 Standard Operating Procedures
Managing Purchases
PURPOSE:
In order to be able to associate all costs to the work performed, a process exists for linking AiM (the Work Management System) toHuskyBuy (the Procurement System) and to KFS (the Financial System). After setting a few defaults in the systems and following the procedures below, Facilities Operations staff should be able to initiate purchases and have the systems associate the finances back to the work, while using the correct accounts, and ensuring responsible financial accountability. It is important to follow the procedures so that purchases of materials and services are not delayed and so the business office and managers can have accurate data to make decisions.
- If not already done, please see the initial setup instructions before initiating any purchases.
- If you are ready to make a purchase, follow the purchasing procedures.
- If you need to see a purchase request you previously made, follow the procedures for finding Purchase Requests.
This guide is intended for users who are already familiar with the navigation of the work management system. If you need to learn how to use the system please review the training materials before attempting to make any Purchase Requests
| Step | Description |
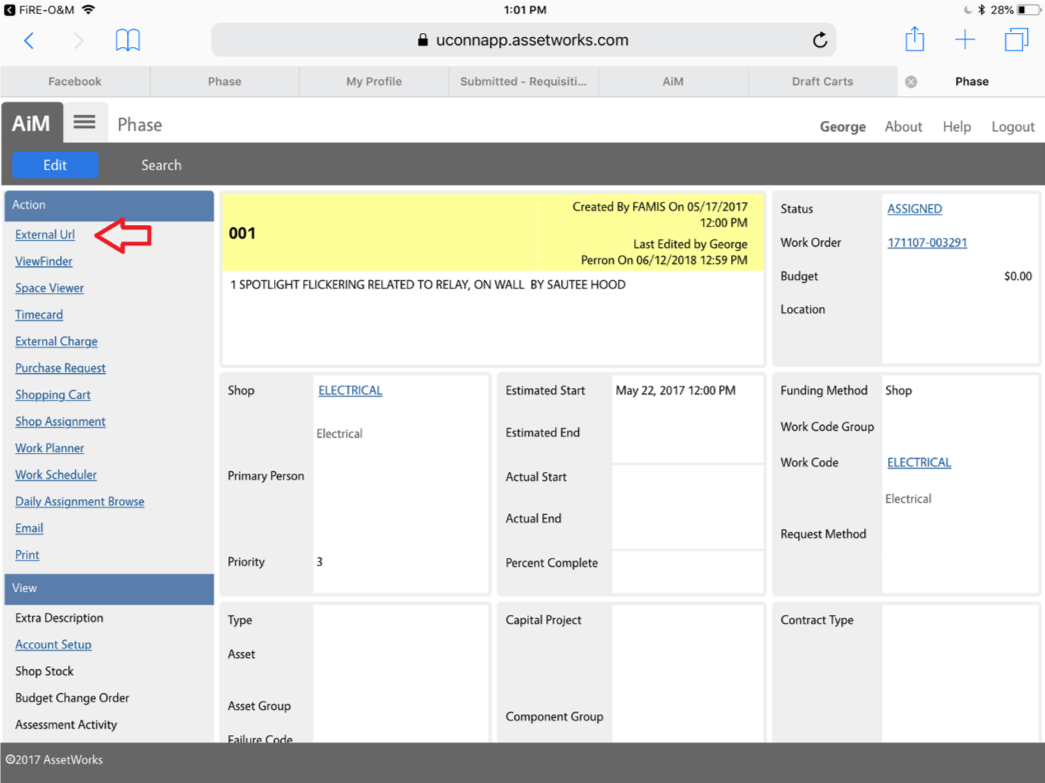
| Navigate to the Phase that reflects the work the purchase is being made for.
Notice that the first Action in the list is the External Url Action. Click this link when you are ready to make a purchase.
{Note: It is important that you have enough time to entirely complete the purchase. Do not initiate the purchase if you do not think you will have time to complete it} |
 |
| Clicking the link starts the process of creating a cart for your purchase. The cart is being set up to contain the important details of the work (e.g., the work order identifier, the phase id, the building, the description of the work, the accounts that should be used, etc.). | 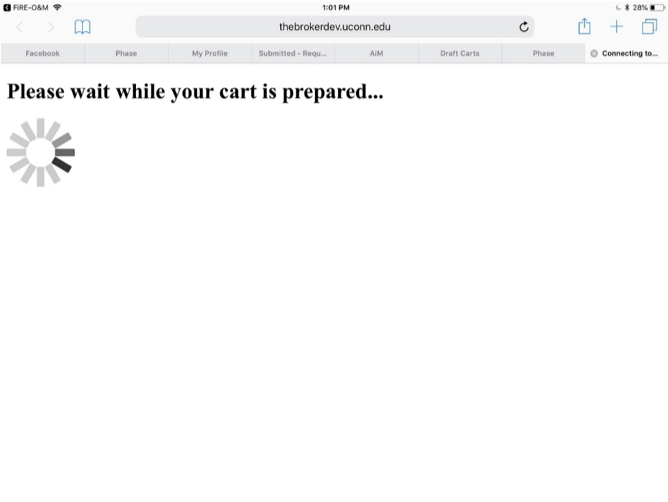 |
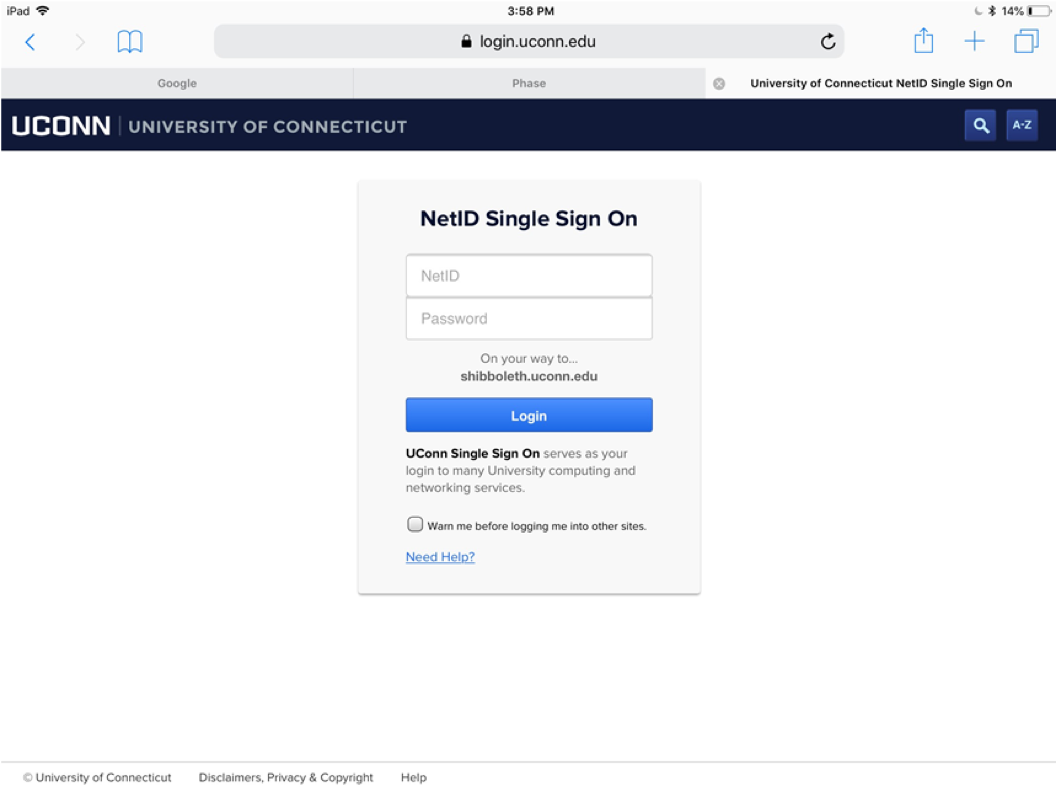
| Once your cart if ready, the procurement system will double-check that you are authorized to make a purchase for this work.
Please enter your NetID and Password if you see Single Sign on Page |
 |
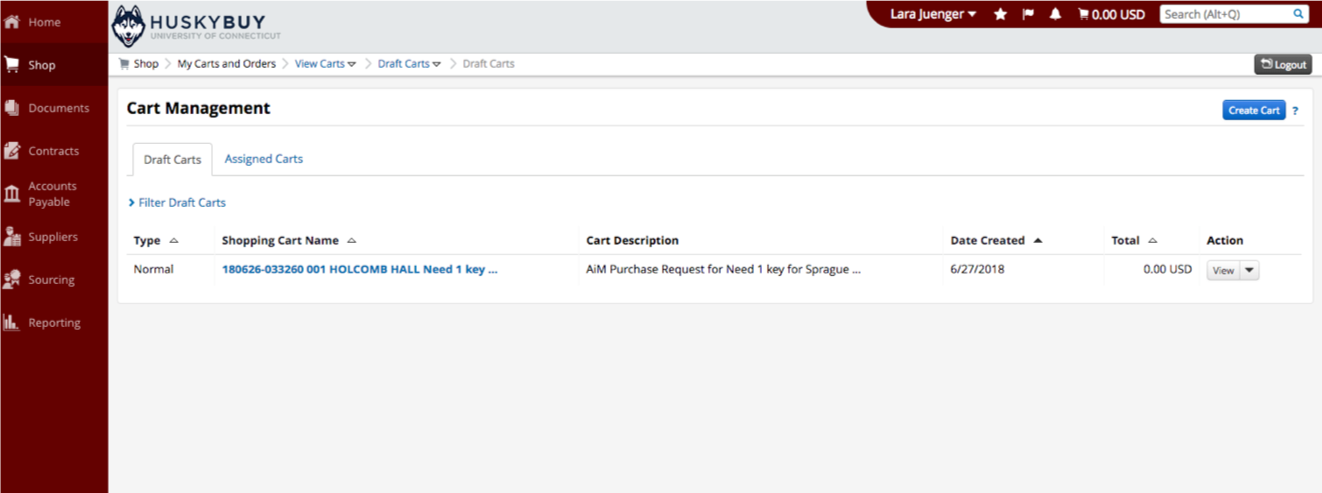
| Your cart is now ready and waiting for you to shop!
You will see the cart has a name that includes the work order and phase, the building and some of the work description |
 |
| To start shopping, either click the cart name or the View Action Menu item | 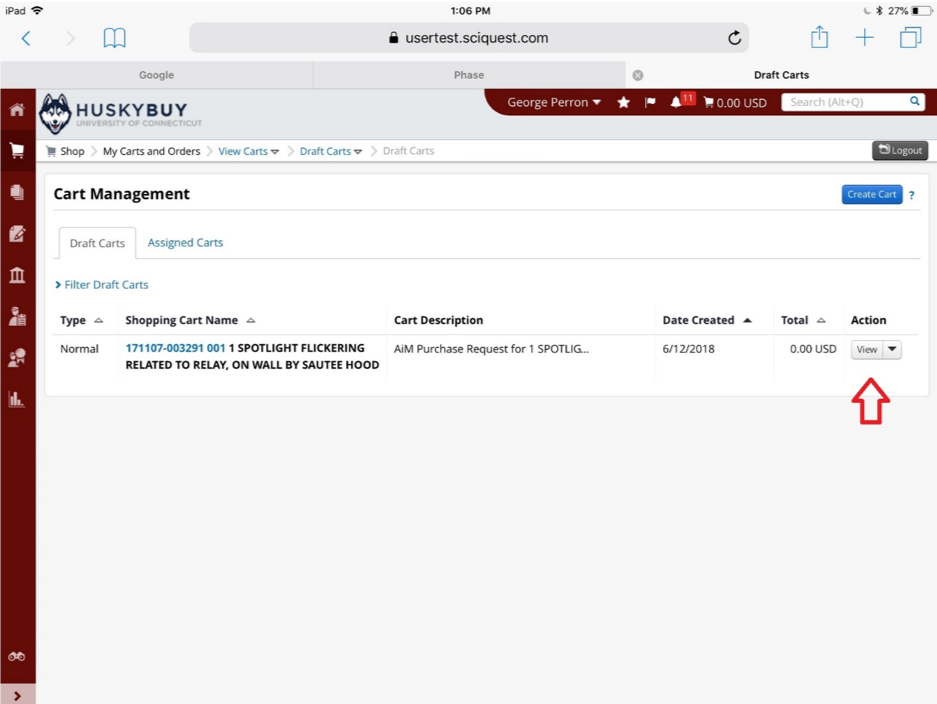 |
| Once inside your cart, click the Click here to start shopping link | 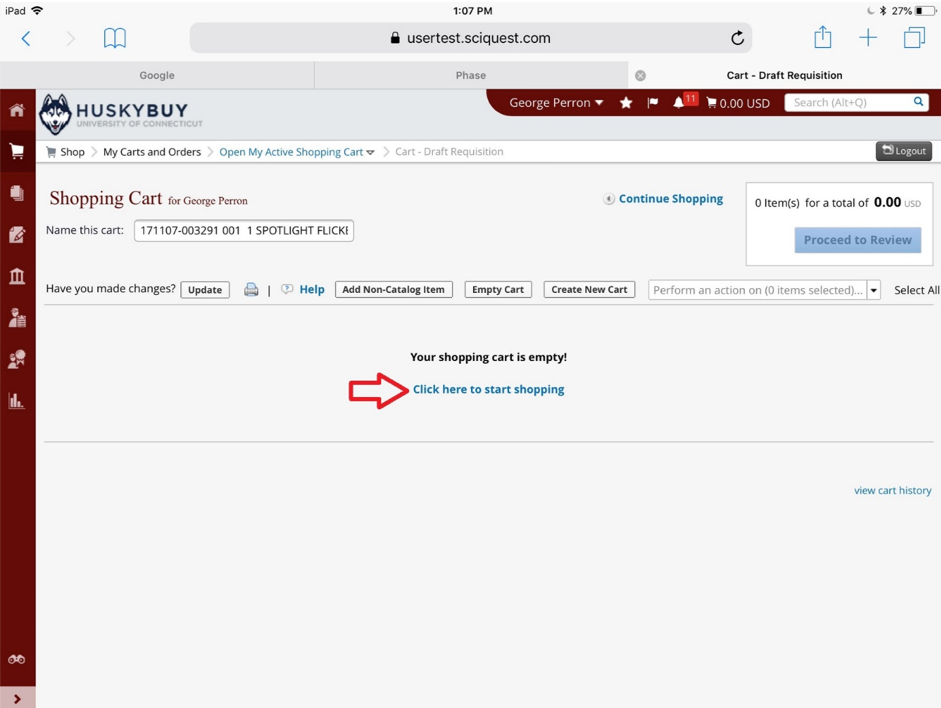 |
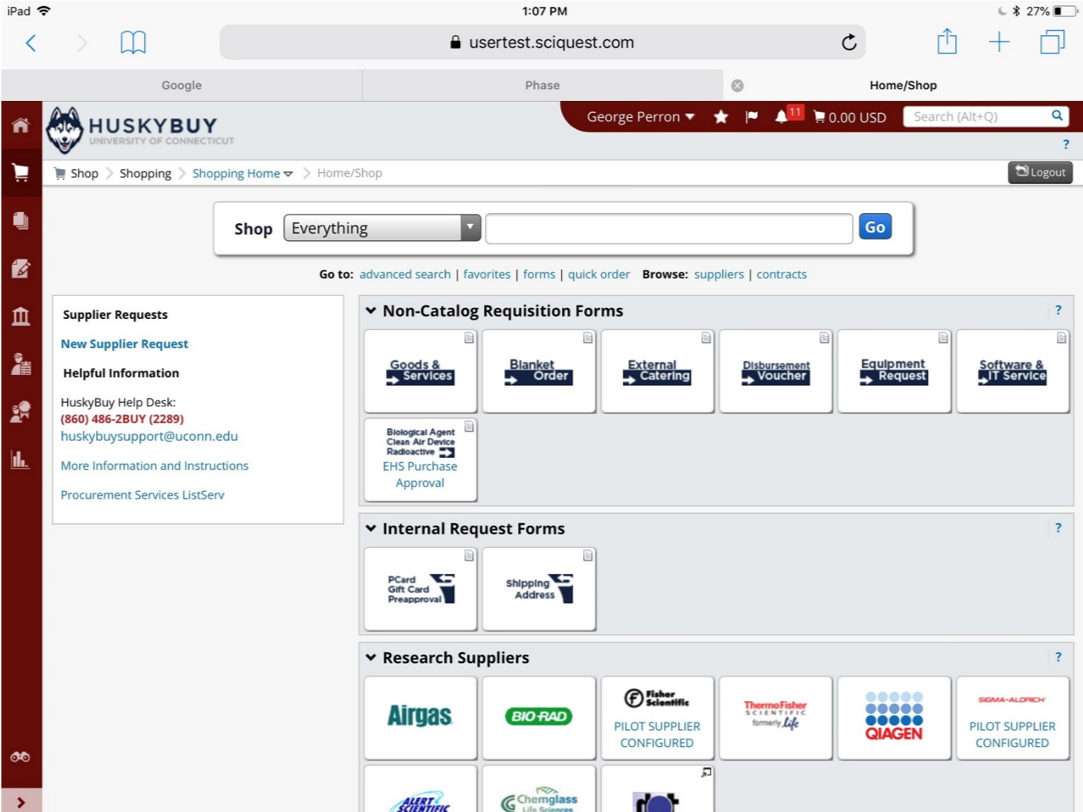
| You are now on the Shopping Home page and should proceed following the training you received on HuskyBuy.
If you need to refer to the Husky Buy training materials or Job Aides, please go to the HuskyBuy Home Page
|
 |
| Follow the Standard Procedures for making purchases in Husky Buy | |
| Once you are done shopping you will be back on the empty Cart Management Screen | 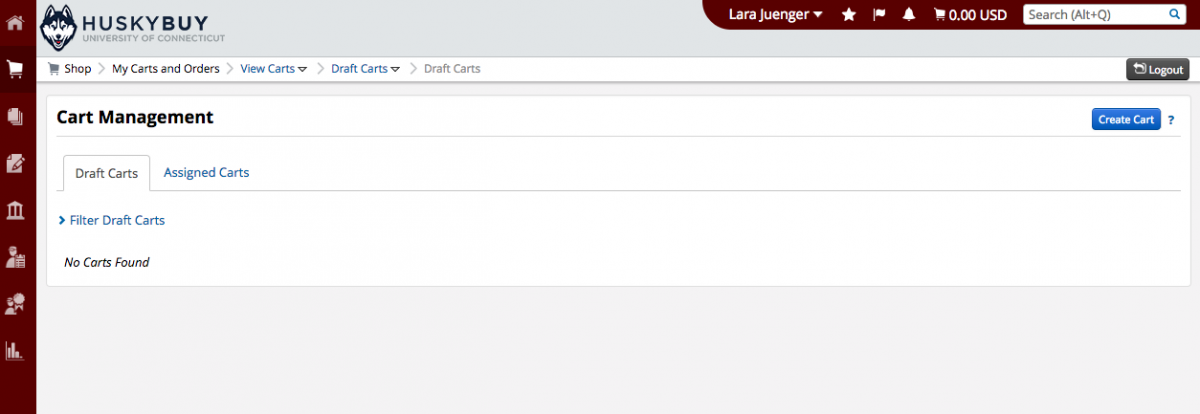 |
| The final step is to close the browser tab. Click the “X” in the tab to complete the process. | 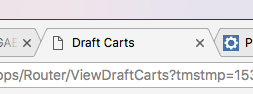 |
| Back on the Phase where you started, you can (1) refresh the page by clicking the refresh option in your browser, then (2) See the Purchase Request details in the View options | 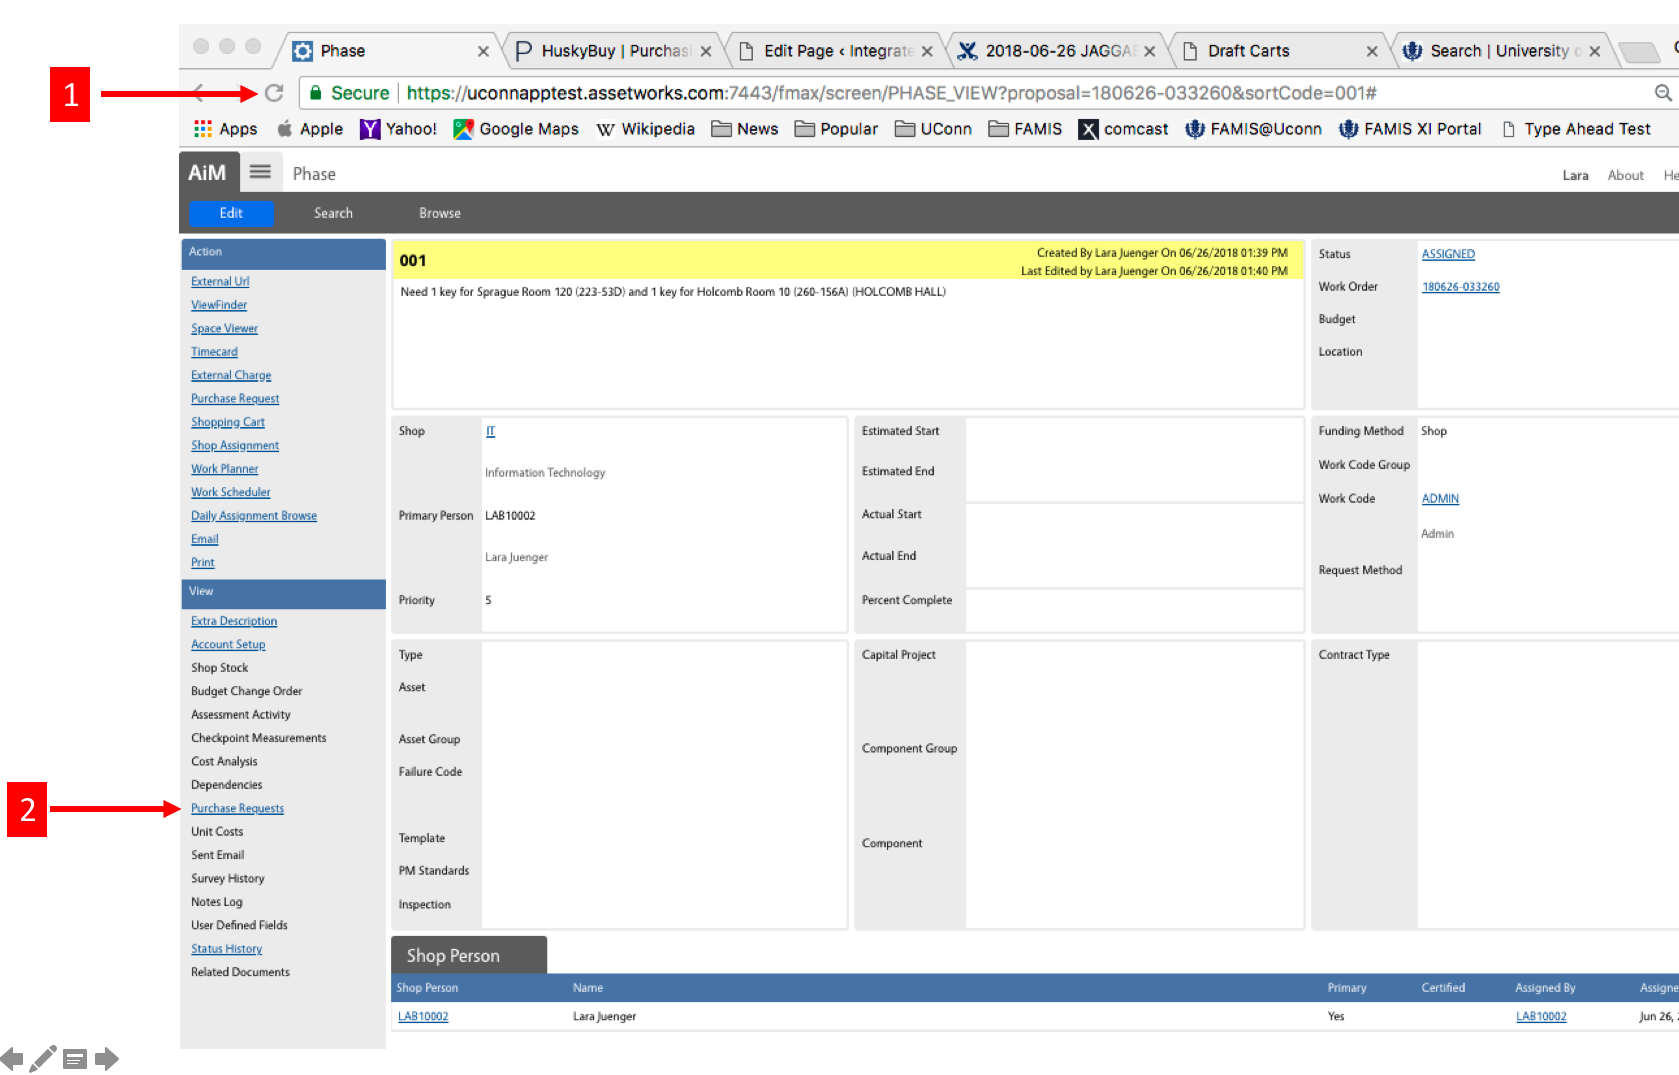 |
| There are two main methods to find a purchase request, by going directly to a phase or by searching on other criteria (e.g., enter date, purchase request id, etc) | |
| Find Purchase Requests Associated to a specific phase | |
| Find Purchase Requests based on other criteria | |
| SYSTEM | STEPS |
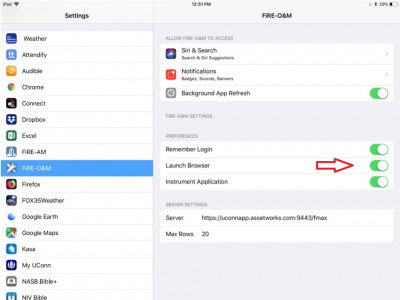
| AiM | The only time AiM users who need to make changes to AiM tools are when the purchases are being made on a iPad.
Launch the Settings app on the iPad:
Scroll down the list on the left until you find the Fire – O&M app. Make sure the Launch Browser option is toggled on (indicated by showing green).
|
| HuskyBuy – Log in | Log in to HuskyBuy (https://solutions.sciquest.com/apps/Router/SAMLAuth/UConnFullSuite) |
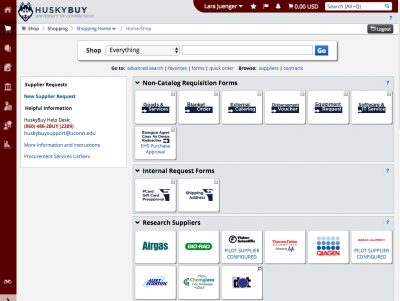
| HuskyBuy – Setting home page | If it is your first time logging in to HuskyBuy, the first screen is the Shopping Home page shown below. This needs to be changed when shopping for Facilities in order to make it easier to associate the purchases back to the work.
First, you need to navigate to the page that you want
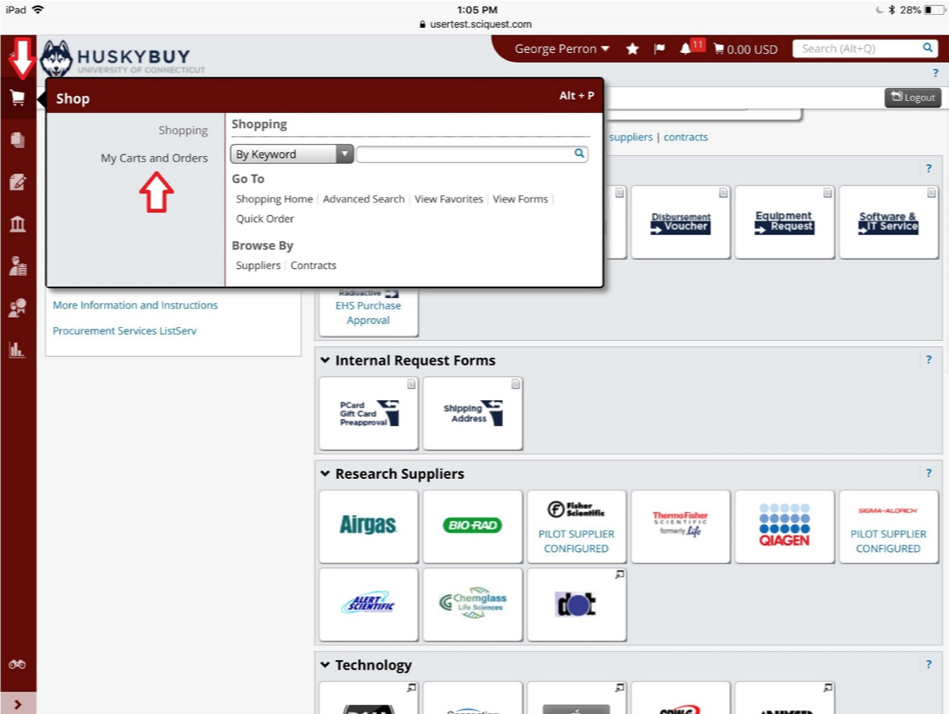
HuskyBuy to start on to make it easier to associate the purchases back to the work. This will be the shopping carts page, since AiM will generate shopping carts for you based on the job or work or shop replenishment you need.
Click on the Shopping Cart Icon on the left menu bar. Click or hover over the My Carts and Orders item on the left, grey menu.
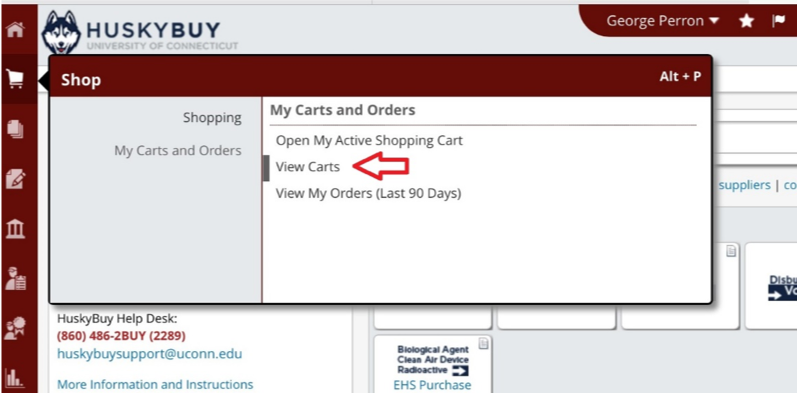
Find the View Carts item and click it.
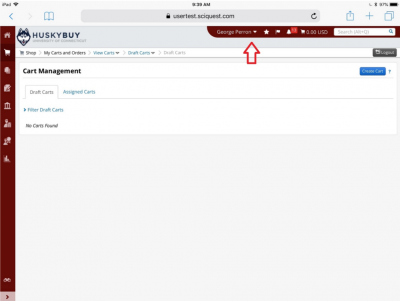
This takes you to the Cart Management page. The No Carts Found message is expected. Notice your name in the menu bar across the top of the screen. Click here to display a menu of options:
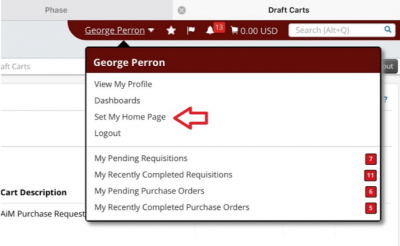
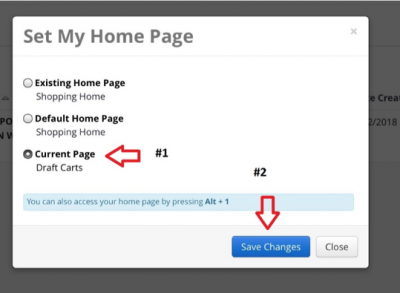
Click the Set My Home Page menu option:
Click the radio button next to the Current Page option and then click the Save Changes button
You have now successfully completed this configuration step. |
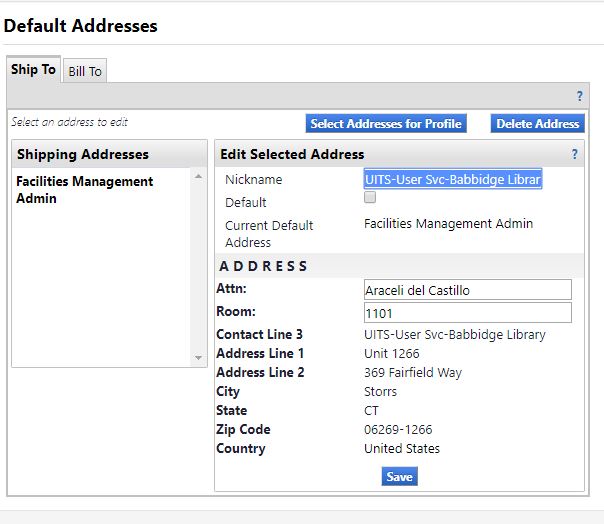
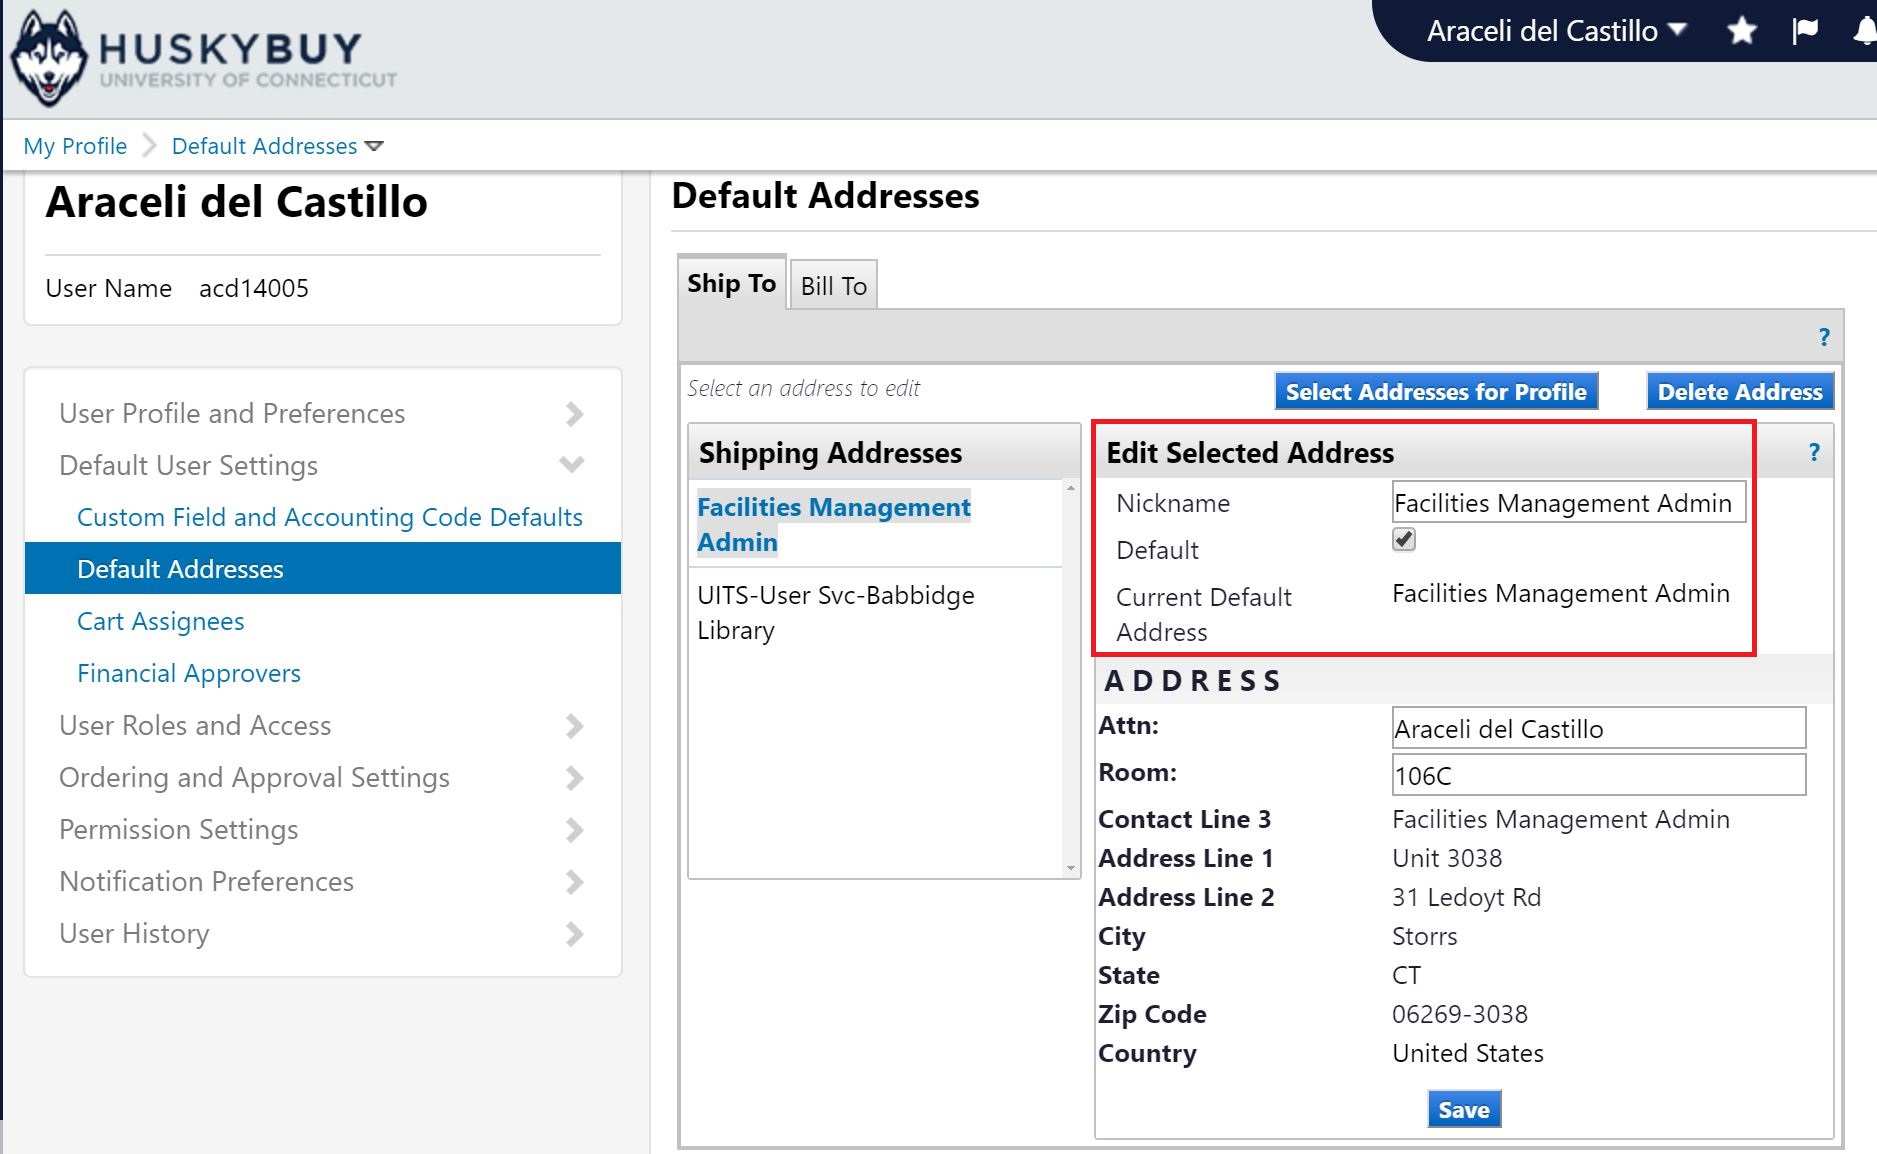
| HuskyBuy – Setting default ship to address | All purchases require a shipping address, so it is good to set your default address. This can always be updated if an individual purchase needs to be shipped to a different location.
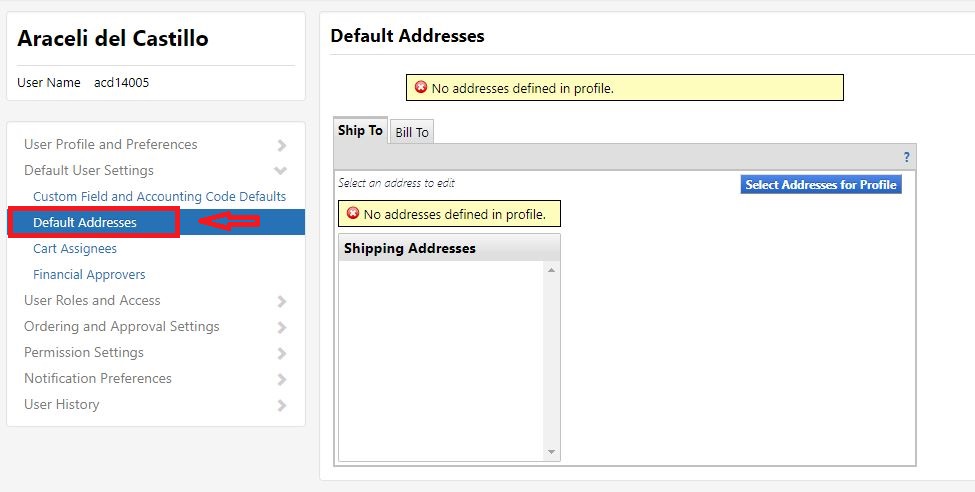
Navigate to View My Profile which is found on the menu attached to your name in the upper right corner of Jaggaer:
Click on Default Addresses option from the Default User settings drop-down list
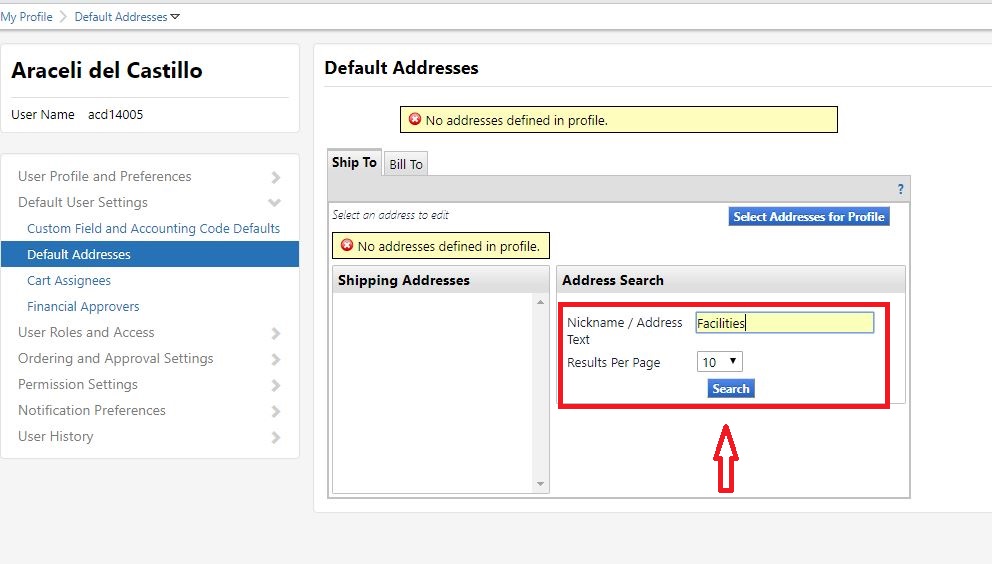
Click Select Addresses for Profile blue button, then enter Nickname/Address (department) to pick default shipping addresses.
Select the desired shipping address
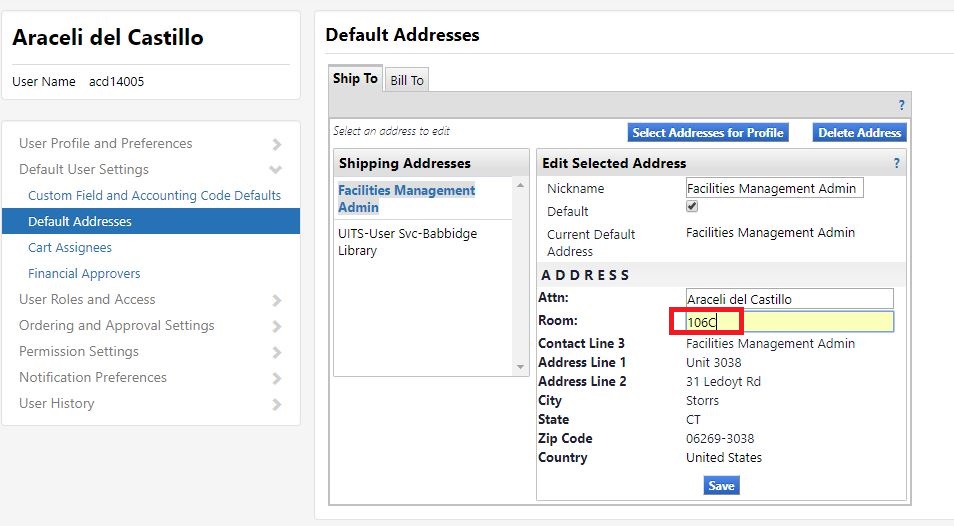
Add room number and click Save
To add more shipping addresses, repeat the steps but make sure you set one as default.
|
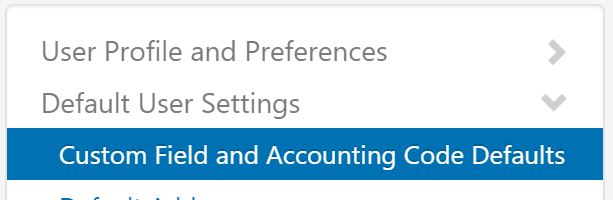
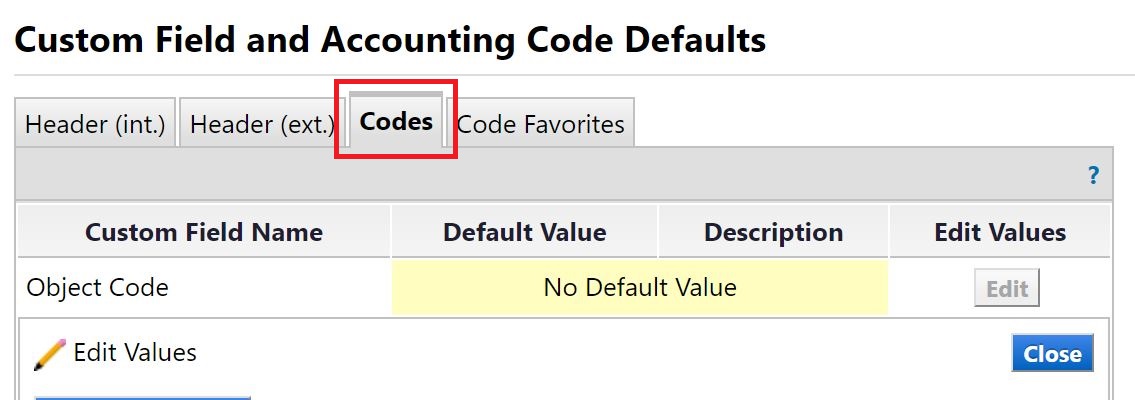
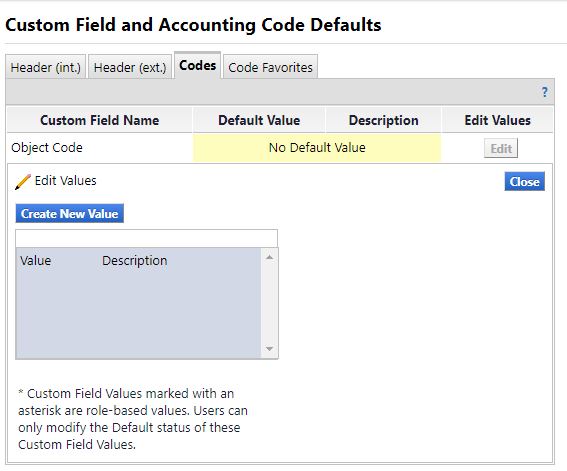
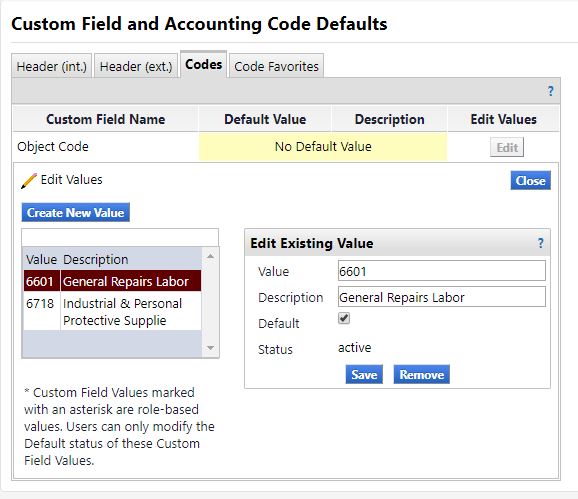
| HuskyBuy – Setting the list of frequently used Object Codes | Click on Custom Field and Accounting Code defaults option from the Default User settings drop-down list
Click on Codes tab
Click Edit on Object Code Custome File Name
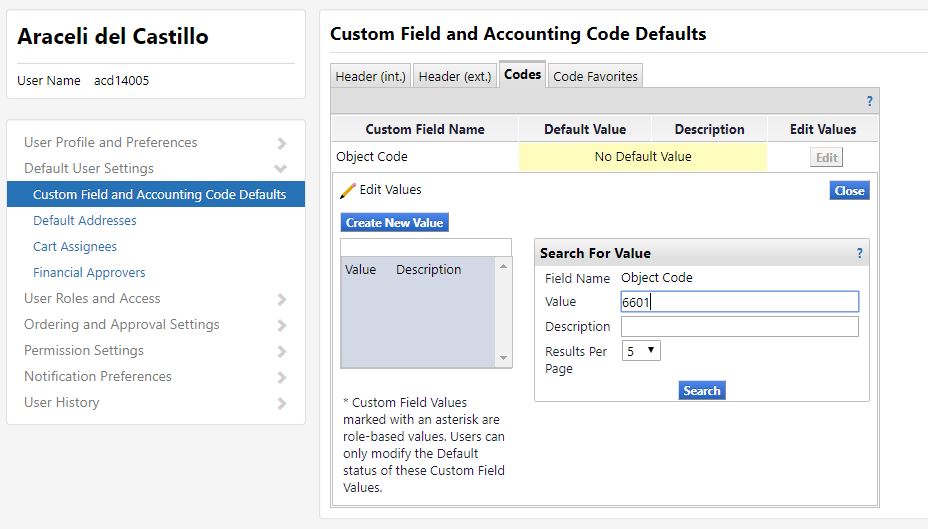
Click Create New Value blue button
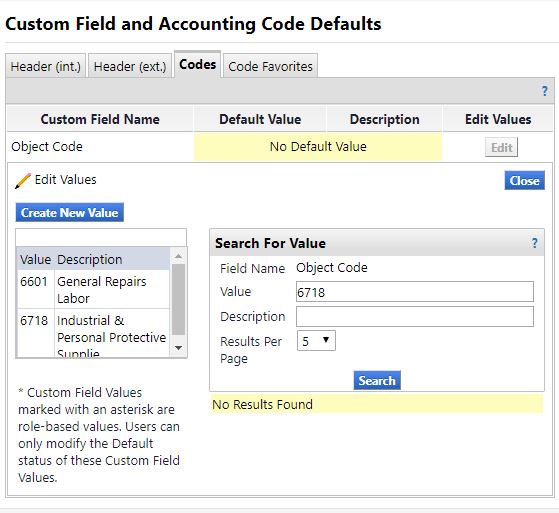
Enter Object Code value or Description, then click Search
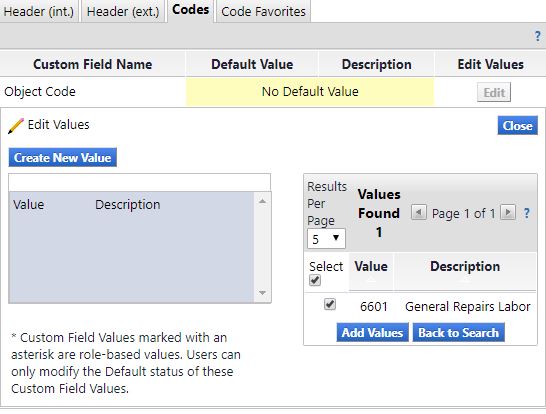
Select the value and click Add Values blue button to add the code to the list.
To add more codes, just repeat the steps above.
If a Default Object Code is desired, click on the value and select default option, otherwise, just click Save to save the list.
Note: If you don’t select the object code as a default and have a list in the profile to select from, you can choose select profile values and then from the drop down list.
View of a list with no default object codes:
|
| HuskyBuy – anything else? | |
| KFS | No special setup needed |


ADDITIONAL RESOURCES:
- HuskyBuy Job Aids and Videos: https://procurement.uconn.edu/huskybuy-evolution/
- HuskyBuy – User guide – Setting Notification Preferences:
- HuskyBuy – User Guide – Setting Up Your Profile:
ROLES USED:
Supervisors: When a supervisor needs to purchase goods or services for work that needs to be done or stock that needs replenishment. Also to track the purchases that have been requested for the shop on any work the supervisor oversees.
Technician: When a technician needs to purchase goods or services for work that needs to be done or stock that needs replenishment. Also to track the purchases that have been requested for work that is the responsibility of the technician.
Finance Office: Business Office Please provide the official roles of anyone else who need and use this process in the organization.
Return to Finance Module SOP