<-Previous || RM Table of Content || Next->
(https://illustrated-git.readthedocs.io/en/latest/)
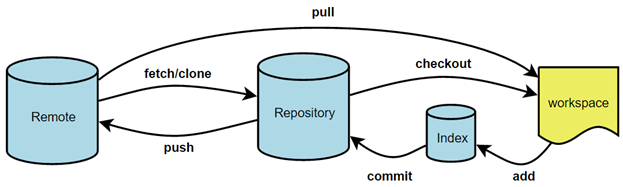
Developers always work on the Test branch. This branch is to keep complete changes from developers and release changes to the Test environment via the deployer. Developers write code, commit to the local Test branch of the local repository, and push to the remote repository as described below:
Pull changes
In a team of multiple developers, at the beginning of the working day pull changes from the Test branch of the central repository made by other developers to minimize the cases of conflicts later.

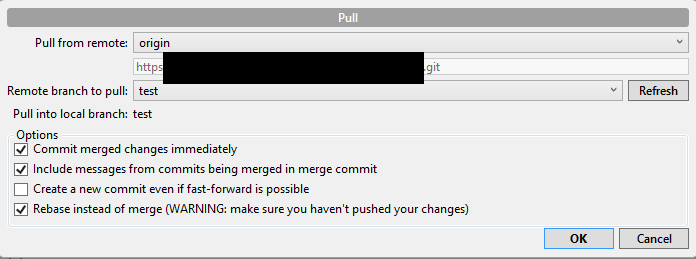
Click the Pull button in SourceTree. In the Pull window make sure the “Include messages from commit…” checkbox and the “Rebase…” check box are checked while leave the rest default. Click the OK button The Rebase option tells Git to move the commit(s) to the tip of the branch:
Notes for Pulls: Pull should be executed at the beginning of the working day to get the newest pushed changes from the remote test branch.
Get a Jira ticket number
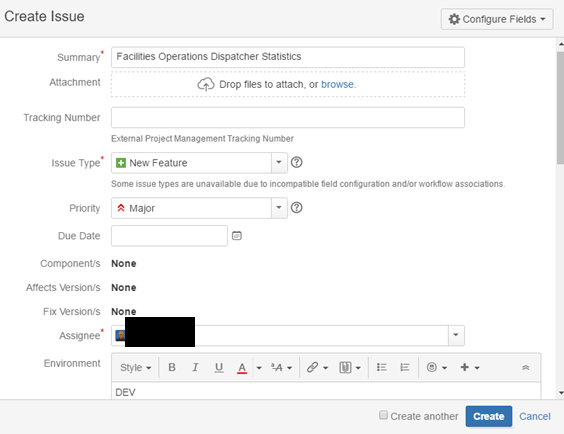
If the bug/feature doesn’t have a ticket in Jira, the developer creates a new ticket as follows:
- Log in in Jira at jira.uconn.edu
- Click the Create button in the top menu
- Provide the following information
- Summary
- Issue Type
- Assignee (the developer)
- Environment (DEV for development)
- Description
- Click Create button on the Create Issue dialog
- Note down the Jira ticket number, in the form of AIM-xxx, where xxx is a number assigned by the system
If there has been a ticket number for the bug/feature in the system, the developer notes down the Jira ticket number.
Commit changes
Click the Commit button in SourceTree to commit changes to the local repository. The developer may need to click the Stage All button, or select files and click Stage Selected button to move the files from Unstaged files area to Staged files area. Fill the Jira ticket number in the text box (for example AIM-100 as an example. You use the your ticket number). Click the Commit button on the right of the dialog as shown below to commit the changes.

Notes for commits: Commit changes regularly to the local repository as needed.
Push changes
Click the Push button to push the changes to the central repository. Pull can be executed several times a day. Alternatively check the “Push changes immediately…” checkbox in the commit dialog above.
Notes for pushes: Only push complete changes that you want to see in Test or Production environments. Do not push incomplete changes. Pushes to master should be followed by a Jira ticket to release to Test or Production environment.
Release to the Test environment
Once the developer is ready to see the changes in the Test environment, the developer opens the existing Jira ticket and set Assignee to self to start releasing changes to the Test environment (See the RM steps in the RM SOP). Change the Environment to TEST if it has not been changed. Provide comments in the Comment text area (e.g. “Ready to move to Test”). Click Update button. The developer works with the requestor to see if the changes meet the requirement.
The developer works with the primary release manager when help is needed. If the primary release manager is out, the developer works with the back-up release manager (Ruben).
Release to the Production environment
Once changes are ready to move to Production after being tested in the Test environment, the developer opens the same Jira ticket and changes Assignee to the primary release manager. If the primary RM isn’t available, assign it to the back-up RM (Ruben). Change Environment to PROD if it has not been changed. Provide comments in the Comment text area (e.g. “Ready to move to Production”). Click Update button to assign the associated Jira ticket to the RM.