<-Previous || RM Table of Content || Next->
Developers may select one of the two options: NetBeans or Aptana.
NetBeans
The developer would then create a project in NetBeans by clicking File -> New Project. Select PHP in Categories and PHP Application with Existing Sources in Projects. Click Next button.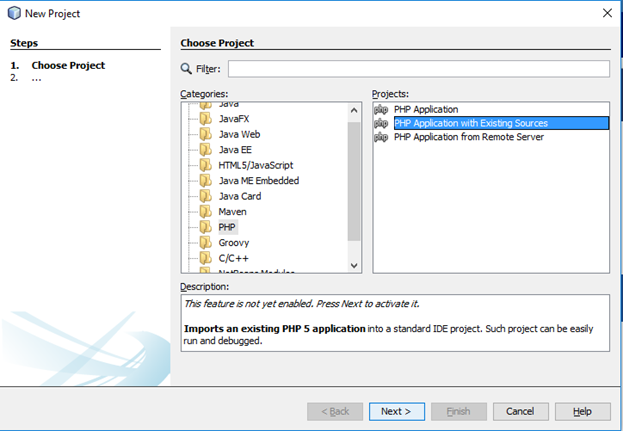
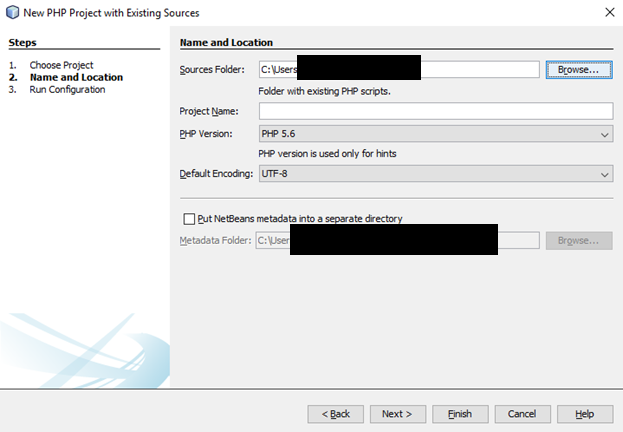
Select the directory containing the PHP source files. Specify Project Name (e.g. “AiM”). Click Next button.
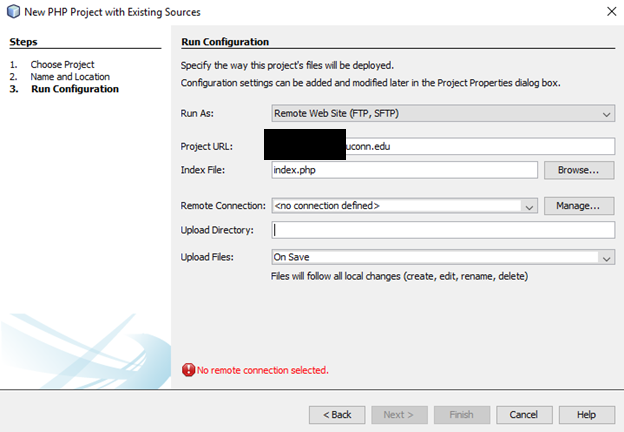
The Project URL is the Dev environment http://aimdev.uconn.edu. Notice that there is a red alert “No remote connection selected”. Click the Manage button to create an FTP connection to the development server.
Enter a name for the connection in Connection Name, for example “AiMDev”.

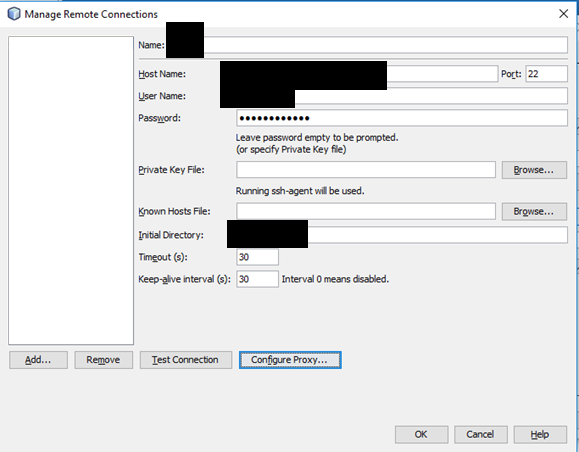
In the Manage Remote Connection window, enter the host name aimdev.uconn.edu, port 22, NetID, Password, and Initial Directory. Click Test Connection. Click OK to close the window if the connection is successful; otherwise check the parameters. Click the Finish button on the NetBeans Step 3 (Run Configuration) to close the window.
Uploading files is automatically done using the On Save setting in the previous step. To upload (a) file(s) if anything else was set, right click the file(s), select Upload.

Aptana
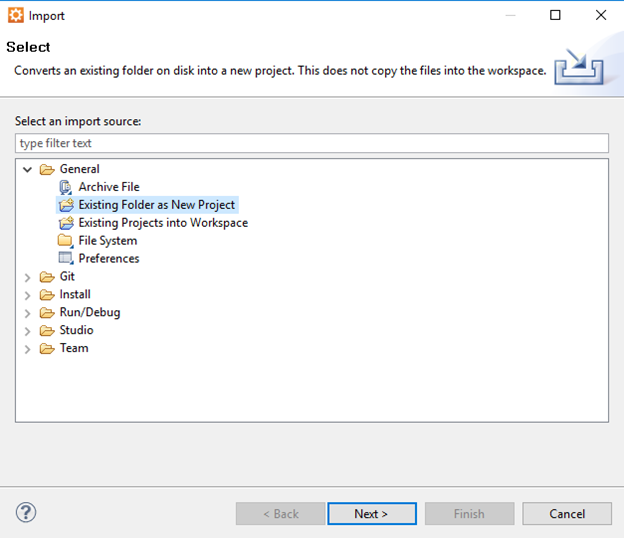
Open Aptana. Select File->Import. Select Existing Folder as New Project. Click Next.
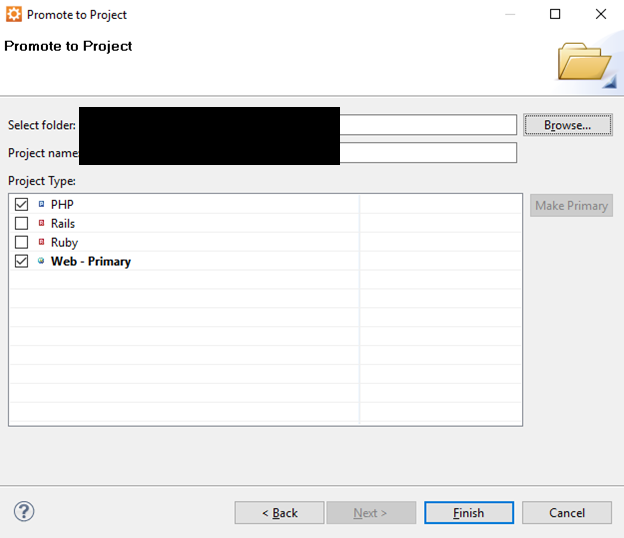
In the Promote to Project window, select the folder containing the working copy, check the Project Type as shown in the figure. Leave the project name the default value, which is the name of the directory. Click Finish to close the window.
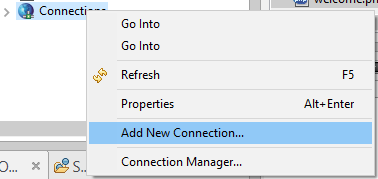
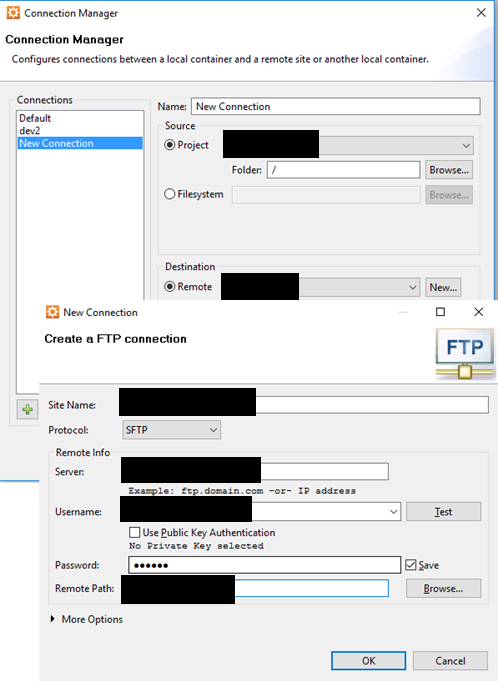
In Project Explorer, right click Connections, select Add New Connection
In Configuration Manager window, give a name to the connection. Click the New button to create an SFTP connection. Fill in the server name aimdev.uconn.edu, NetID, password, and the remote path
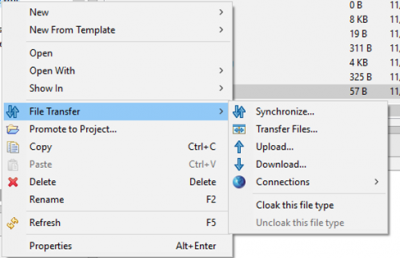
Once a connection is set up, to upload (a) file(s), right click the file(s) in the connection, select File Transfer->Upload