 Standard Operating Procedures
Adding or Removing Inventory of a Part
PURPOSE:
Adding or removing inventory quantities outside of the standard practice of Counter Releases and Counter Returns are a critical part in maintaining inventory accuracy.
Adding or reducing inventory is specific to the Bin Location that houses that inventory. A reduction or increase of inventory must be submitted for each Bin Location that requires an adjustment.
This process is most likely to occur when a receiving is completed, adding supplemental inventory to the existing quantity, or an inventory audit is done showing a disparity between the physical count and the system's documented quantity, requiring a reduction or increase in inventory quantity.
Inventory Adjustments - Role Permissions
| Inventory Read Only | No visibility to Inventory Adjustment |
| Inventory Level 1 | Will be able to search, view, and create new Inventory Adjustment records. |
| Inventory Level 2 | Will be able to search, view, and create new Inventory Adjustment records. |
| Inventory Manager | Will be able to search, view, and create new Inventory Adjustment records. |
| 1. Navigate to the Inventory module on the main menu. | 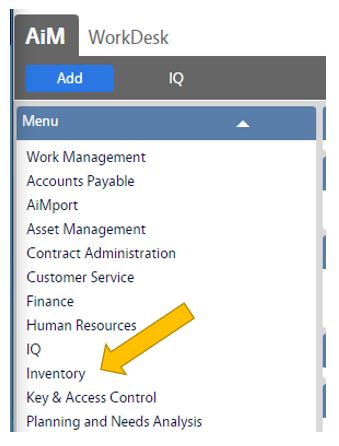 |
| 2. Navigate to the Inventory screen and click the link for Inventory Adjustment. | 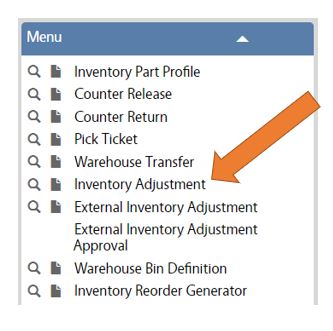 |
| 3. Click New to start a new Inventory Adjustment Record. | 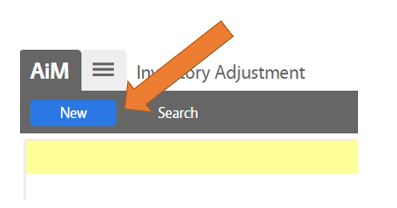 |
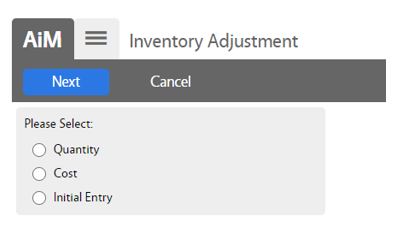
| 4. Select the appropriate type of adjustment to complete, and click the blue Next button.
Types of Adjustments:
|
 |
| QUANTITY ADJUSTMENTS | |
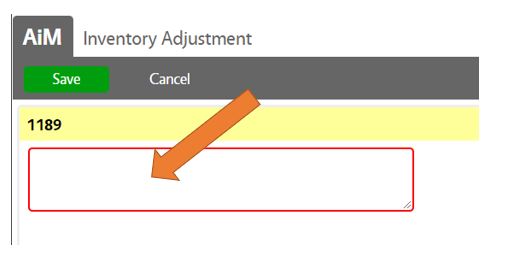
| 1. Enter a description in the description box at the top of the screen.
**There is no standard defined for a description, but the field is required, so something will need to be entered** |
 |
| 2. Enter the Part number in the Part field (if known) and click the magnifying glass next to the field. If the Part number is not known, click on the magnifying glass and perform a search to find the Part number. | 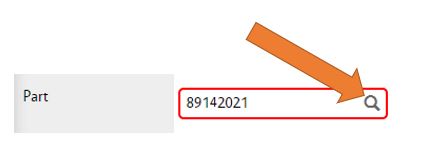 |
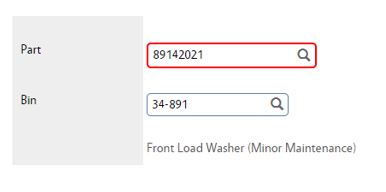
| 3. If the item has only one relative Bin Location, it will automatically populate in the Bin field.
If the Part has multiple Bin Location, a Bin Location will need to be selected. |
 |
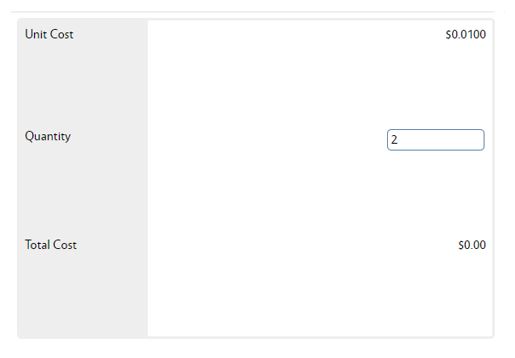
| 4. Enter the amount of quantity you wish to change in the Quantity field. This is not the total quantity owned, but rather the amount you want to add to or reduce the existing quantity.
Ex. Current quantity for item X is 4 but needs to be adjusted to 6. Enter 2 in the Quantity box.
Ex. Current quantity for item X is 100 but needs to be adjusted to 80. Enter -20 in the Quantity box. |
 |
| 5. Click the green Save button in the upper left hand corner. | |
| 6. If the adjustment was made due to a receiving of product, go to the SOP for Completing A Receiving of Inventory. | |
| COST ADJUSTMENTS | |
| 1. Enter a description in the description box at the top of the screen.
**There is no standard defined for a description, but the field is required, so something will need to be entered** |
|
| 2. Enter the Part number in the Part field (if known) and click the magnifying glass next to the field. If the Part number is not known, click on the magnifying glass and perform a search to find the Part number. | |
| 3. Enter the new cost of the Part in the Unit Cost field. | 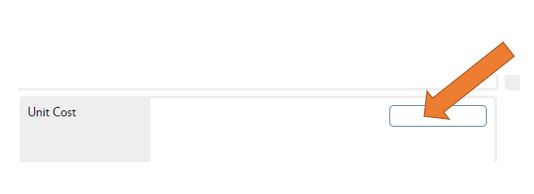 |
| 4. Click the green Save button in the upper left hand corner. | 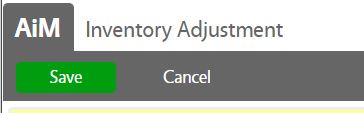 |
| INITIAL ENTRY ADJUSTMENTS | |
| 1. Enter a description in the description box at the top of the screen.
**There is no standard defined for a description, but the field is required, so something will need to be entered** |
|
| 2. Enter the Part number in the Part field (if known) and click the magnifying glass next to the field. If the Part number is not known, click on the magnifying glass and perform a search to find the Part number. | |
| 3. If the item has only one relative Bin Location, it will automatically populate in the Bin field.
If the Part has multiple Bin Location, a Bin Location will need to be selected. |
|
| 4. Enter the cost of the Part in the Unit Cost field. | 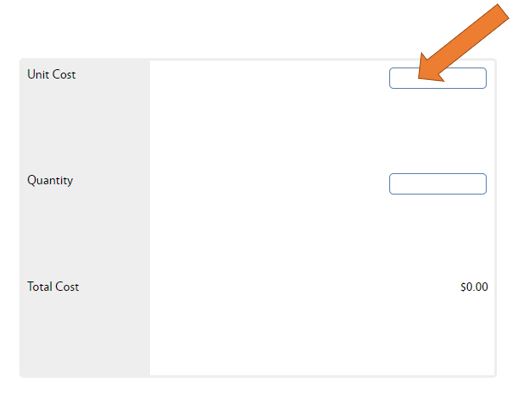 |
| 5. Enter the amount of inventory you with to load into the system in the Quantity field. | 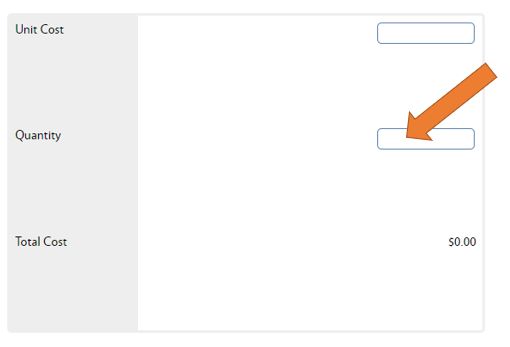 |
| 6. Click the green Save button in the upper left hand corner. | |
Return to Inventory Module SOP