 Standard Operating Procedures
Assigning an Inventory Part to a Bin Location
PURPOSE:
Assigning of an Inventory Part to a Bin Location allows for tracking of inventory quantities of that part in that particular location.
To identify storage locations of inventory, an Inventory Part is assigned to a Bin Location (a Bin Location is not assigned to an Inventory Part). Only one Inventory Part can be assigned per Bin Location, however, an Inventory Item can be assigned to multiple Bin Locations.
Warehouse Bin Definition - Role Permissions
| Inventory Read Only | Will be able to search and view existing Bin Locations |
| Inventory Level 1 | Will be able to search and view existing Bin Locations |
| Inventory Level 2 | Will be able to search, view, and update existing Bin Locations. This role will also be able to create Bin Locations. |
| Inventory Manager | Will be able to search, view, and update existing Bin Locations. This role will also be able to create Bin Locations. |
| 1. Navigate to the Inventory module on the main menu. | 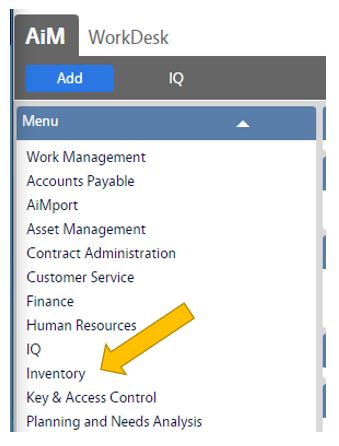 |
| 2. Navigate to the Inventory screen and click the link to Warehouse Bin Definition. | 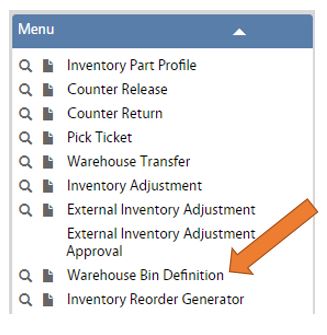 |
| 3. Click Search to find an established Bin Location that has already been defined. | 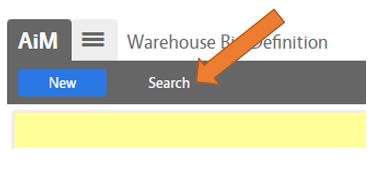 |
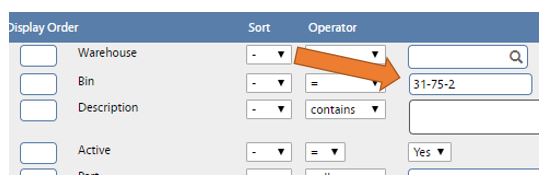
| 4a. If there is predetermined Bin Location where the Inventory Part will be placed, enter that Bin Location in the Bin field.
**If there is no defined location, and any empty Bin Location can be assigned, skip ahead to Step 5** |
 |
| 4b. Click the blue Execute button in the upper left hand corner. | 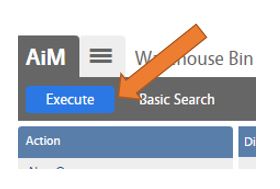 |
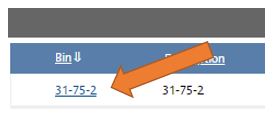
| 4c. Select the Bin Location by clicking on the Bin Location number in the Bin column.
**Skip step 5 and go onto Step 6**
|
 |
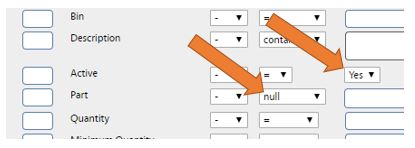
5a. If there is no predetermined Bin Location for an item, and a search to find any vacant Bin Location is needed:
|
 |
| 5b. Click the blue Execute button in the upper left hand corner. | |
| 5c. The results will be any vacant Bin Location. Select the desired Bin Location by clicking on the Bin Location number in the Bin column. | 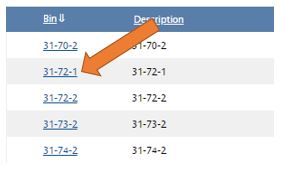 |
| 6. Click the blue Edit button in the upper left hand corner. |  |
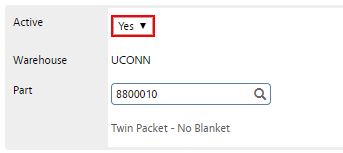
| 7. Enter the Inventory Part number in the Part field and click on the Magnifying glass to validate the number. |  |
| 8. The description of the item should appear below the Part field.
If the Inventory Part Profile screen screen comes up, the number could not be validated. Recheck your part number or complete a search to get the accurate number. |
 |
| 9. If the inventory levels of this Inventory Part will be managed for replenishment, place the Minimum and Maximum Quantities in their respective fields. | 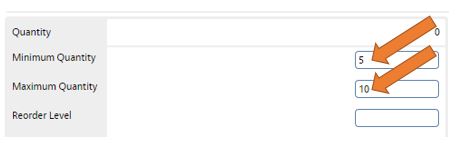 |
| 10. Click on the green Save button in the upper left hand corner of the screen to save the Bin Definition. | 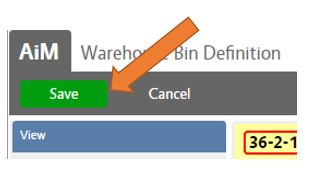 |
Return to Inventory Module SOP