 Standard Operating Procedures
Creating a New Inventory Part Profile
PURPOSE:
The Inventory Part Profile is the unique items that is being managed through the Inventory module in AiM.
The user defines the Part Number as the unique identifier of this Inventory Part as well as the description of the Inventory Part Profile.
The user also defines the Inventory Classification for the item during the set up of the Inventory Part Profile. The Inventory Classification is used to support reporting of items based on Commodity Code. The Item section of the Inventory Classification will default to CUSTOMER INVENTORY, as it is the only configured Item for all Commodity Codes.
If inventory levels of the Inventory Part will be managed to establish and report on reorder points, the SOP for Attaching a Vendor to an Inventory Item Profile should also be followed upon the completion of the steps below.
Inventory Part Profile - Role Permissions
| Inventory Read Only | Will be able to search and view existing Inventory Part Profiles |
| Inventory Level 1 | Will be able to search, view, and update existing Inventory Part Profiles |
| Inventory Level 2 | Will be able to search, view, and update existing Inventory Part Profiles. This role will also be able to create New Inventory Part Profiles. |
| Inventory Manager | Will be able to search, view, and update existing Inventory Part Profiles. This role will also be able to create New Inventory Part Profiles. |
PROCEDURE:
| 1. Navigate to the Inventory module on the main menu. | 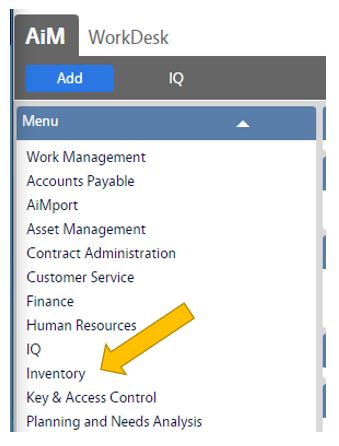 |
| 2. Navigate to the Inventory screen and click the link to Inventory Part Profile. | 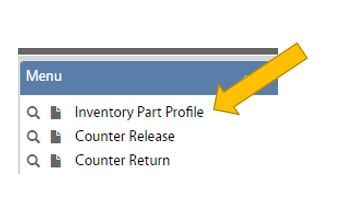 |
| 3. Click New to call up a blank form to create the new inventory part. | 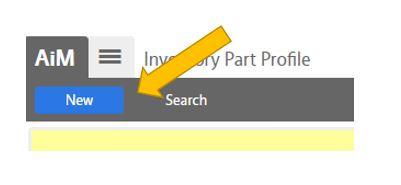 |
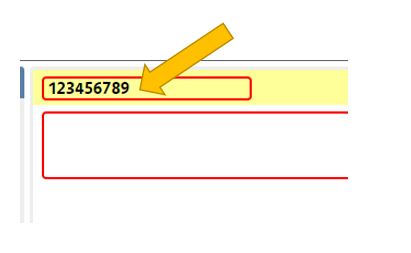
| 4. Input the designated number for the Inventory Part in the box located in the yellow bar at the top of the screen.
**The Inventory Part number is designated by the editor of the record. The system does auto-populate this number.** |
 |
| 5. Type in the description of the item in the red box below the location where the item number was entered | 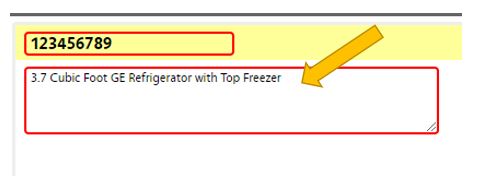 |
| 6. Click on the magnifying glass in the empty Class field.
|
 |
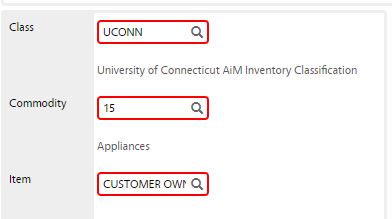
| 7. Only one option is defined under Inventory Class. Click on UCONN to select this class. | 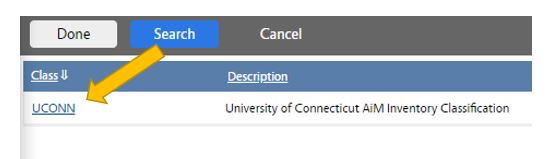 |
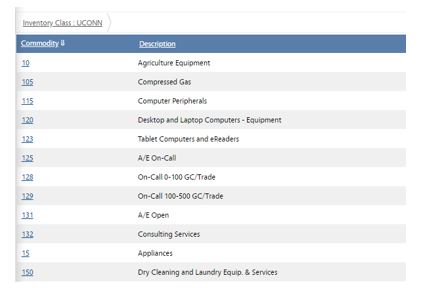
| 8. Determine the commodity that best represents the inventory item being created. Click on the number in the Commodity # to select the commodity.
** Use the Previous and Next options on the bottom of the page to scroll through additional pages if the commodity is not available.** |
 |
| 9. In most cases, only one value will be available for the Item field - Customer Owned. This value will be entered in the Item field by default.
If there are multiple values available for that Commodity, select the appropriate Item clicking on the corresponding value under the Inventory Item column. |
 |
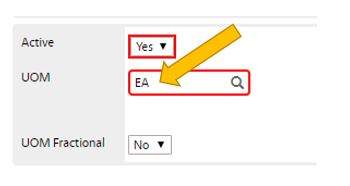
| 10. In the UOM (Unit of Measure) field on the right side of the screen, enter "EA" for Each.
All inventory that will be managed through the Inventory module in AiM is intended to be done so using the measurement of Each |
 |
| 11. Click on the green Save button in the upper left hand corner of the screen to save the Inventory Part Profile. | 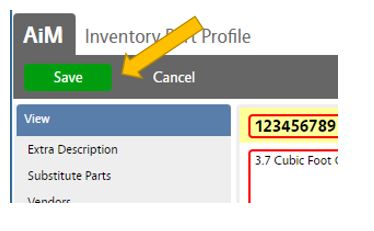 |
Return to Inventory Module SOP