How to Access Fire Asset Manager on a mobile device
How to Search for an Inspection
How to Pass an inspection item
How to Fail and note the problem on an inspection item
How to Submit an Inspection when it is completed
How to mark an Inspection in a room you want to revisit
How to find the work that needs to be done in a room after the initial inspection
How to create an inspection on-the-fly
How to cancel an inspection that is of the wrong type or in the wrong place
Inspection Steps and Remedial Actions to Identify
How to refer a problem to a TRADES SHOP
How to refer a problem to yourself or someone else in the Residential Maintenance area
Who is this Job Aide for?
General Trades Workers – As part of the annual turn over of residential dorm rooms in the Summer, GTW’s will track progress, activity and problems using the inspection capabilities of Fire Asset Manager
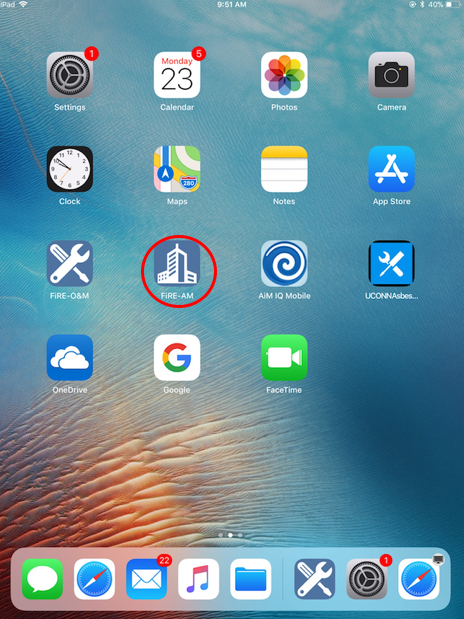
How to Access Fire Asset Manager on a Mobile Device:
|
 |
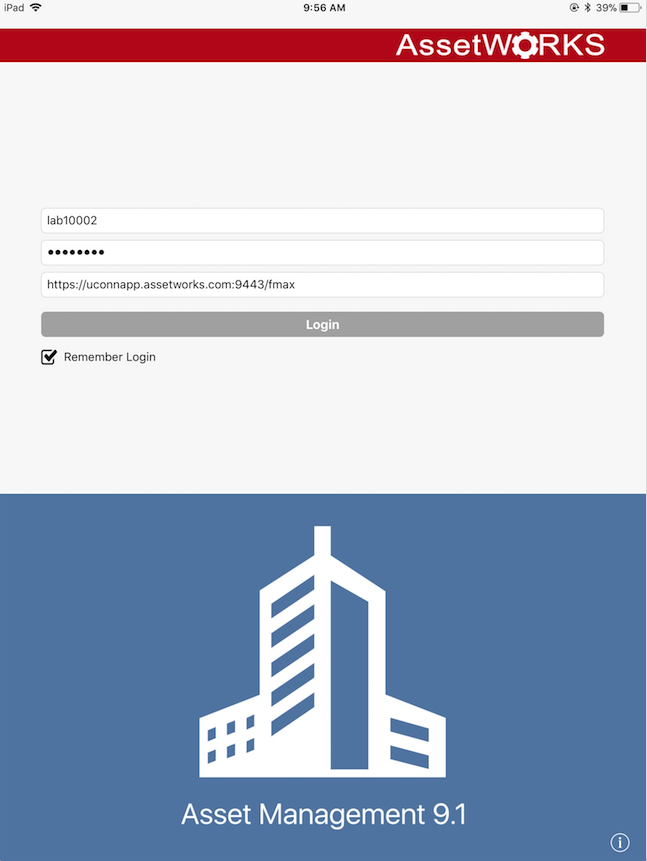
| 2.Enter your UConn Netid and single sign on password.The URL should be https://uconnapp.assetworks.com:6443/fmax
(In Training https://uconnapptest.assetworks.com:5443/fmax) (For Developers https://uconnapp.assetworks.com:9443/fmax) |
 |
| 3. The first view in Fire Asset Manager is the Asset Scan. |  |
How to Search for an Inspection:
There are two options to search for Inspections in Fire AM
| Go to the Inspections Icon and locate the Inspections that are not yet complete | |
| At the bottom of the main Fire Asset Manager screen, touch the Inspection Icon
Every outstanding inspection is kept in this area, many of which are for the Trades shops. The inspections related to Summer Turns are found in the APARTMENT, SUITE and TRADITIONAL groups. |
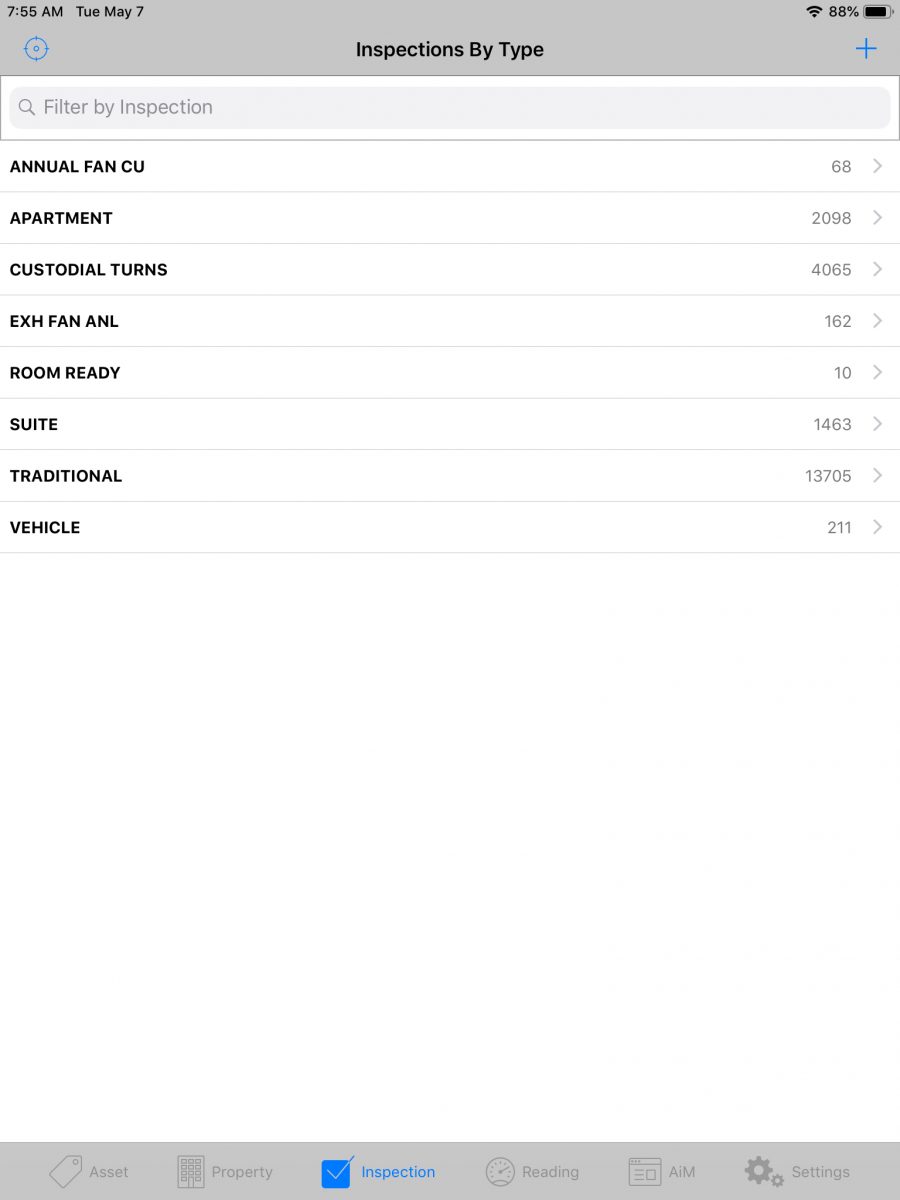 |
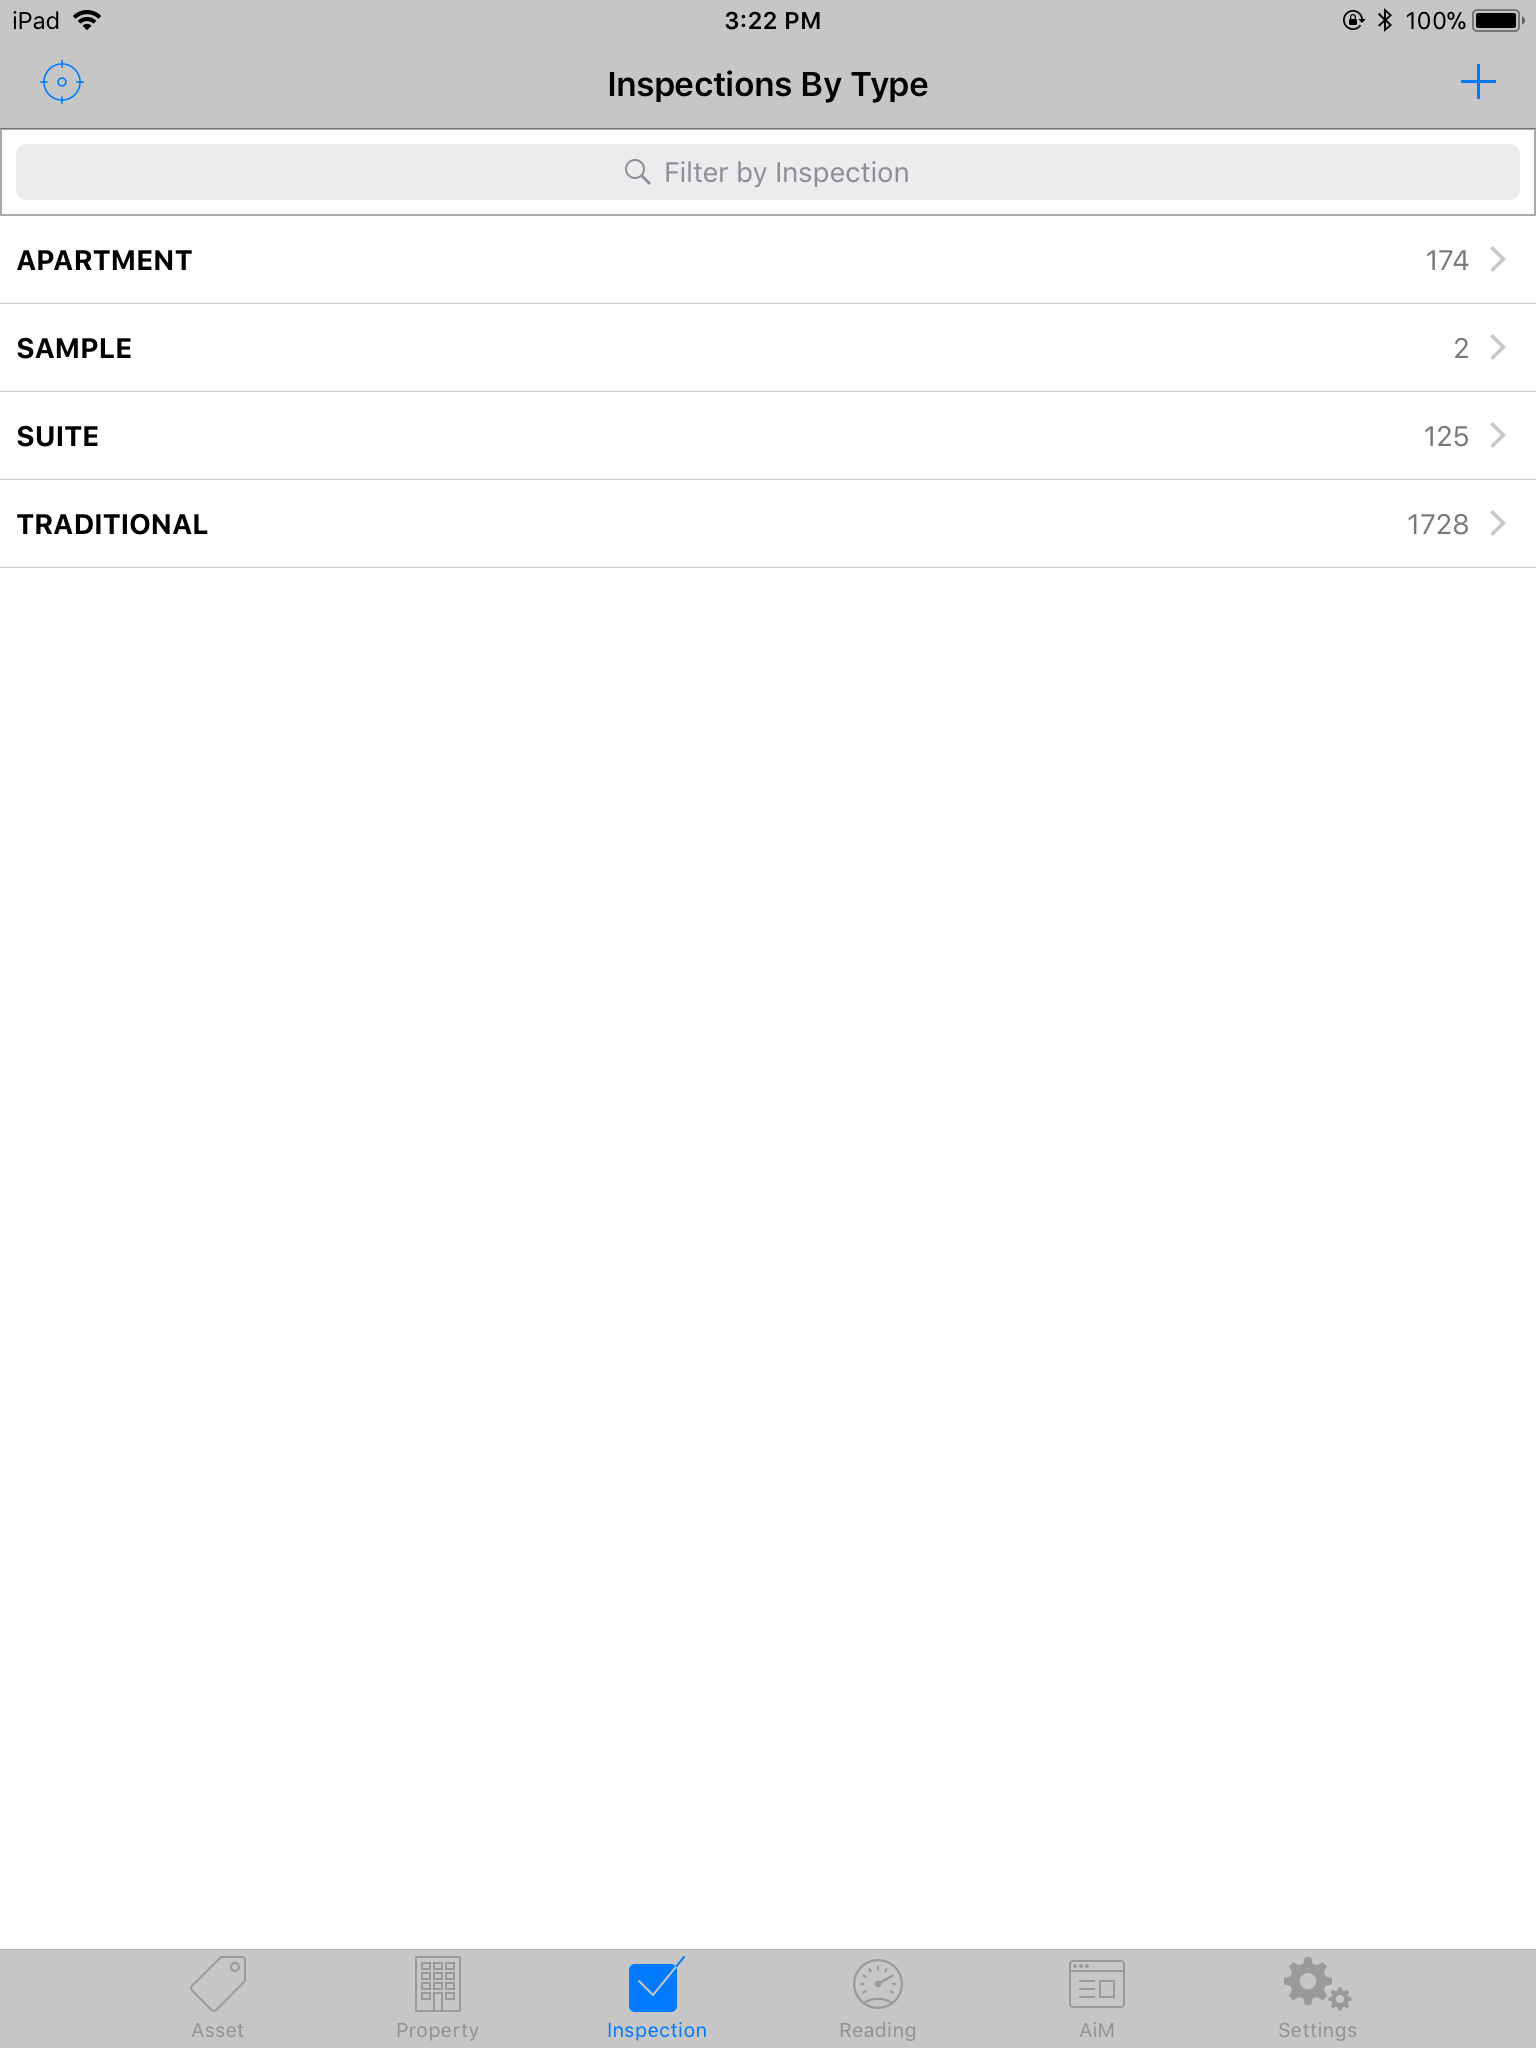
| A list of each inspection type with the number of outstanding inspections displays when this option is selected.
To narrow inspections by Property, type the building name into the search box at the top of the screen and click the Search Button to narrow the list of inspections to those in the Property. |
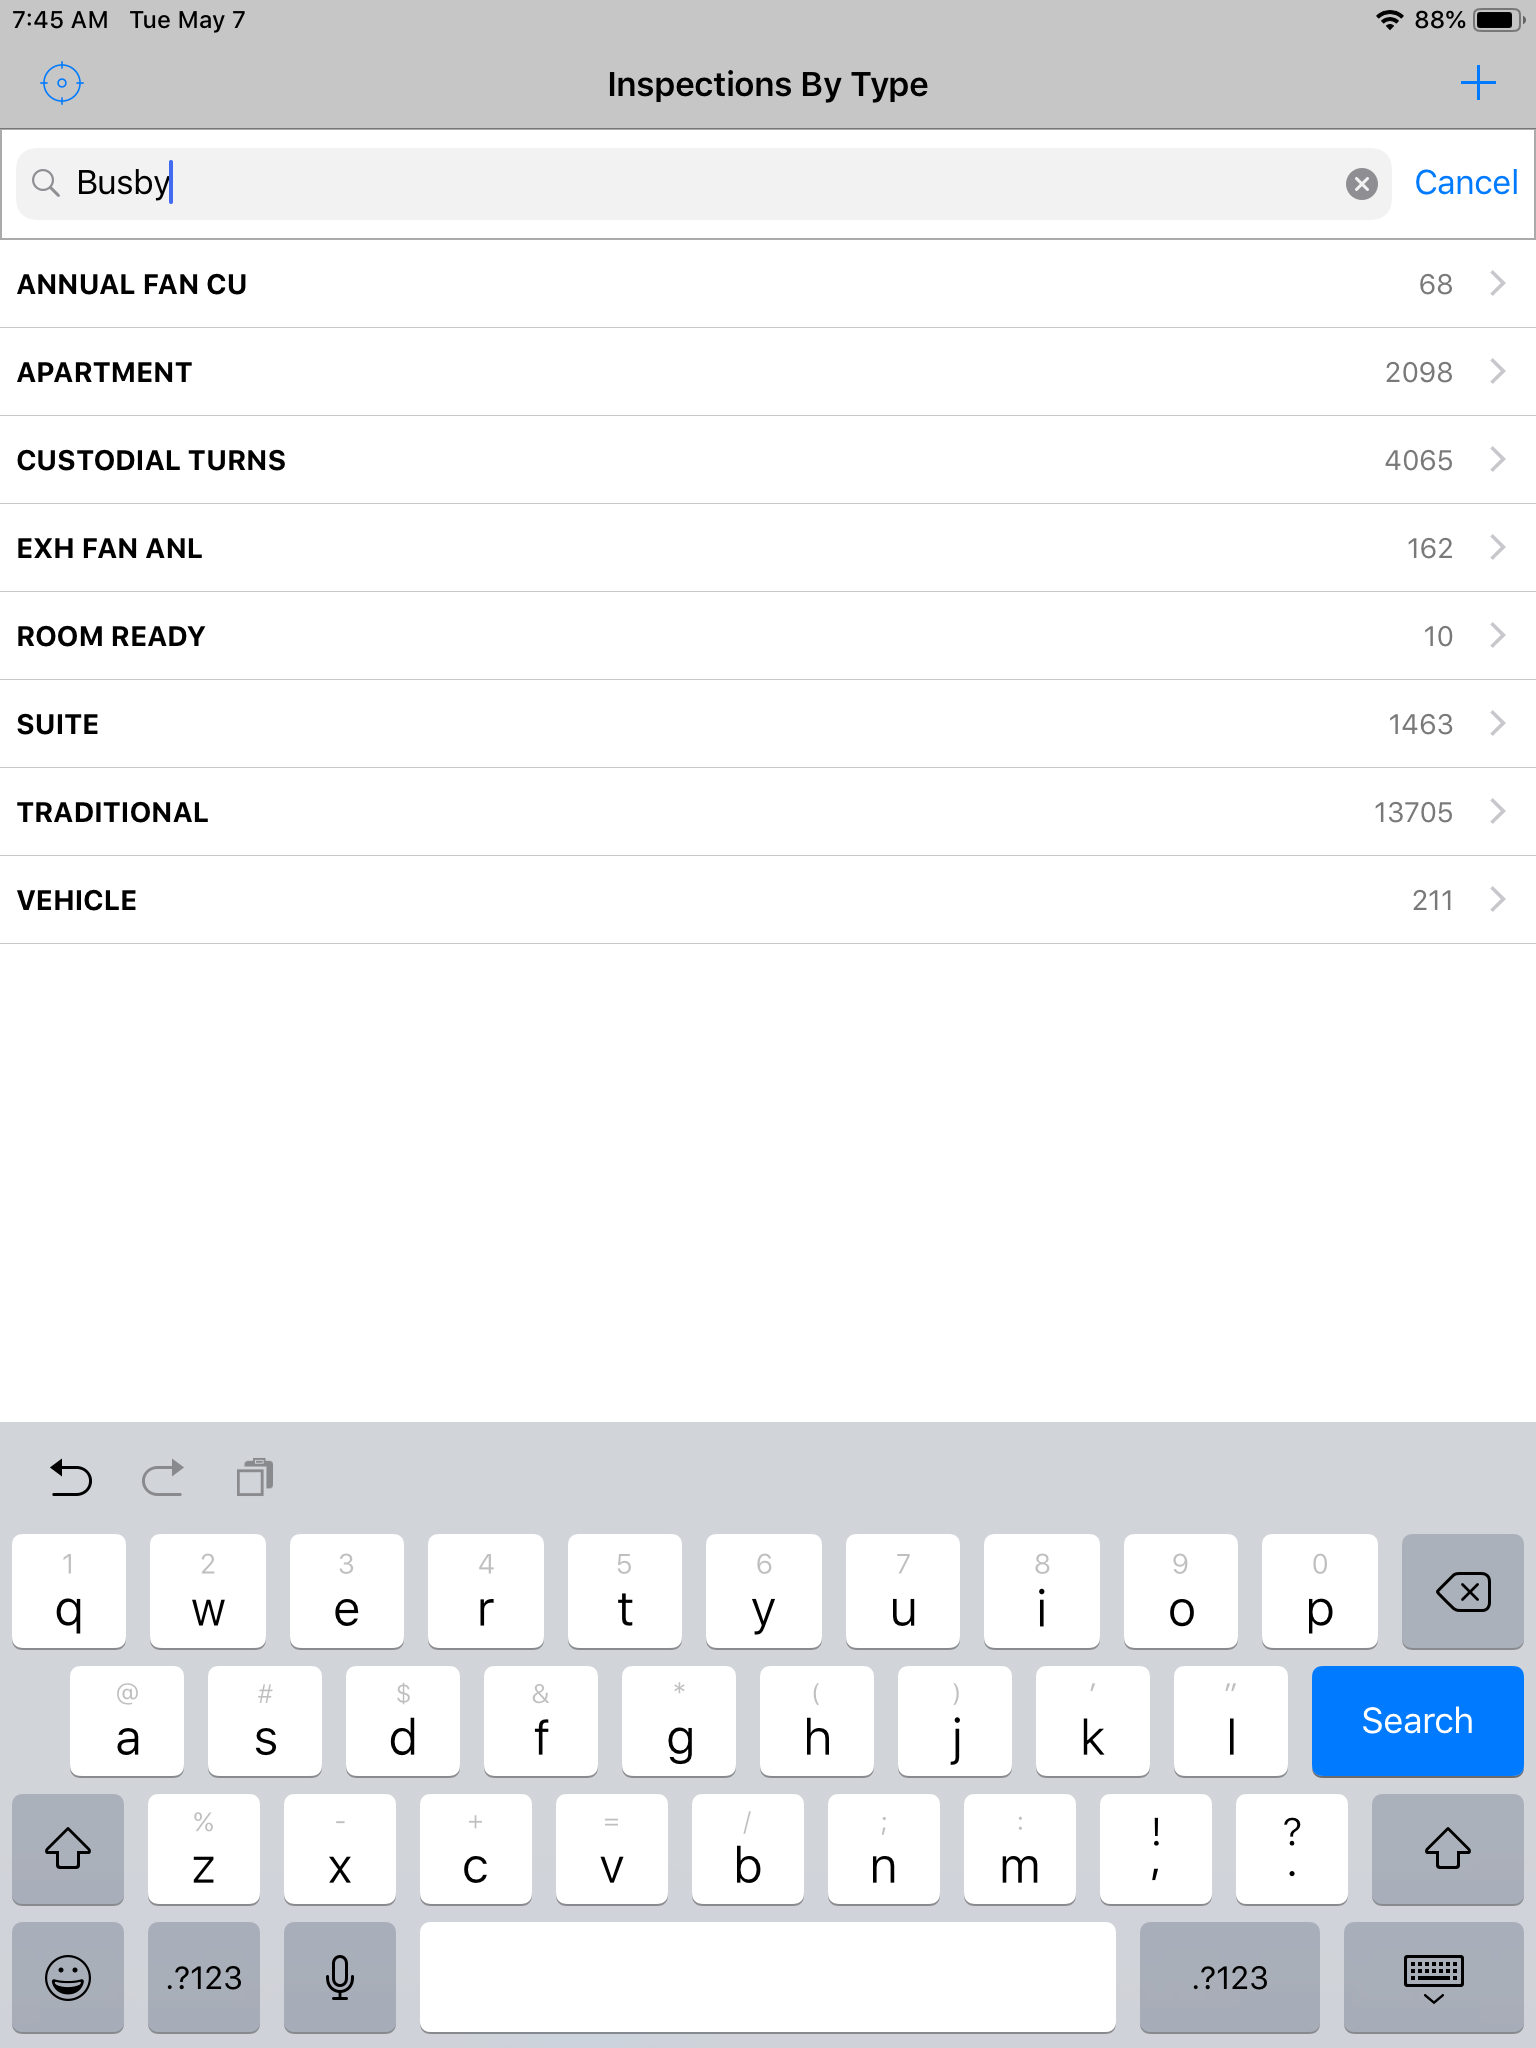 |
| The Inspections By Type list will be limited to only the inspections that match the property search. Click the type of Inspection to be performed. | 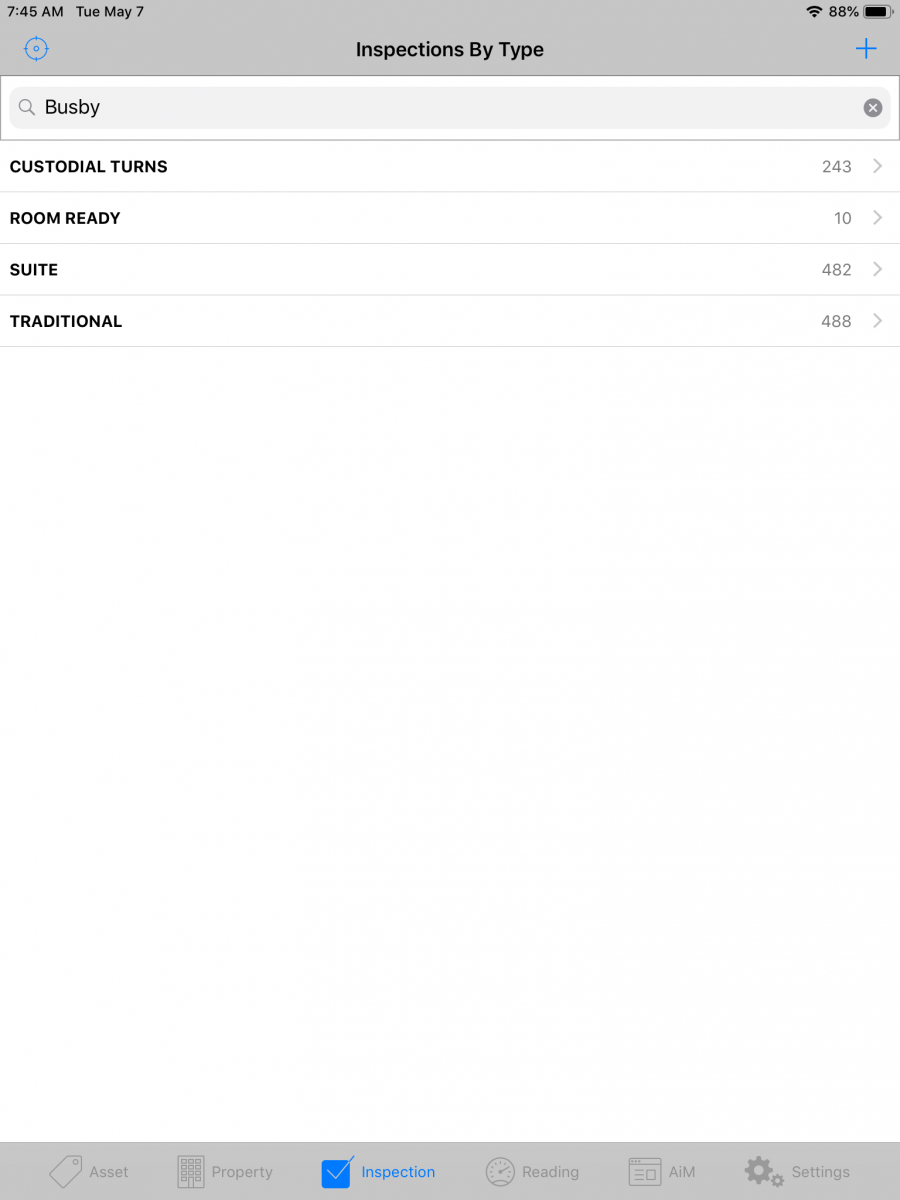 |
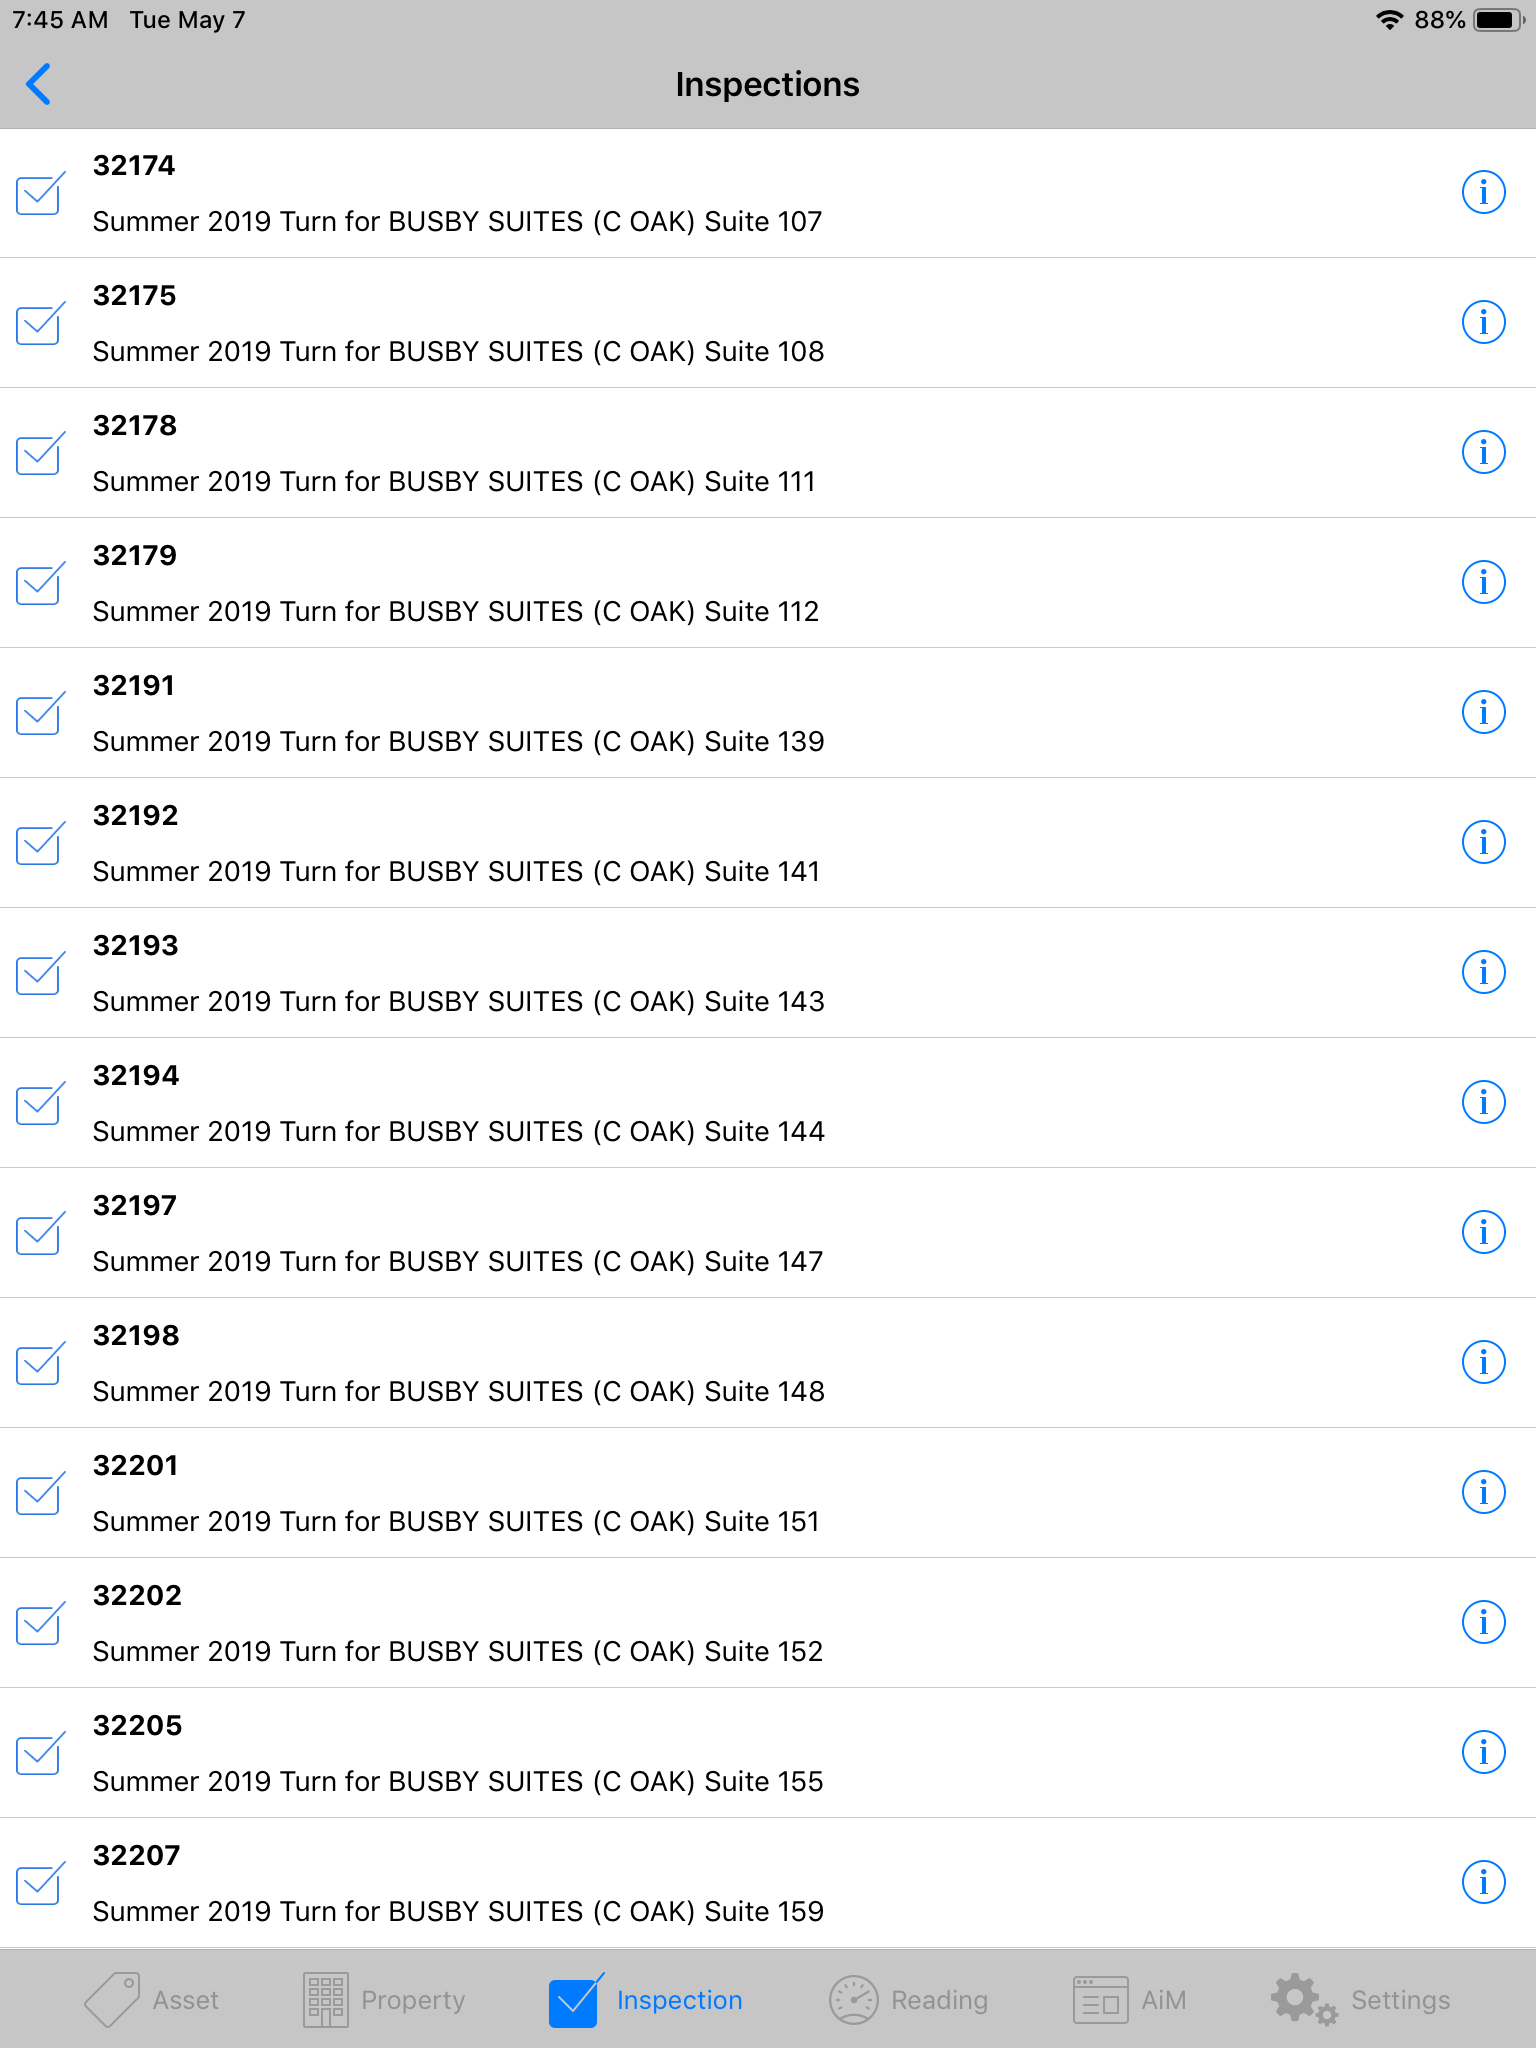
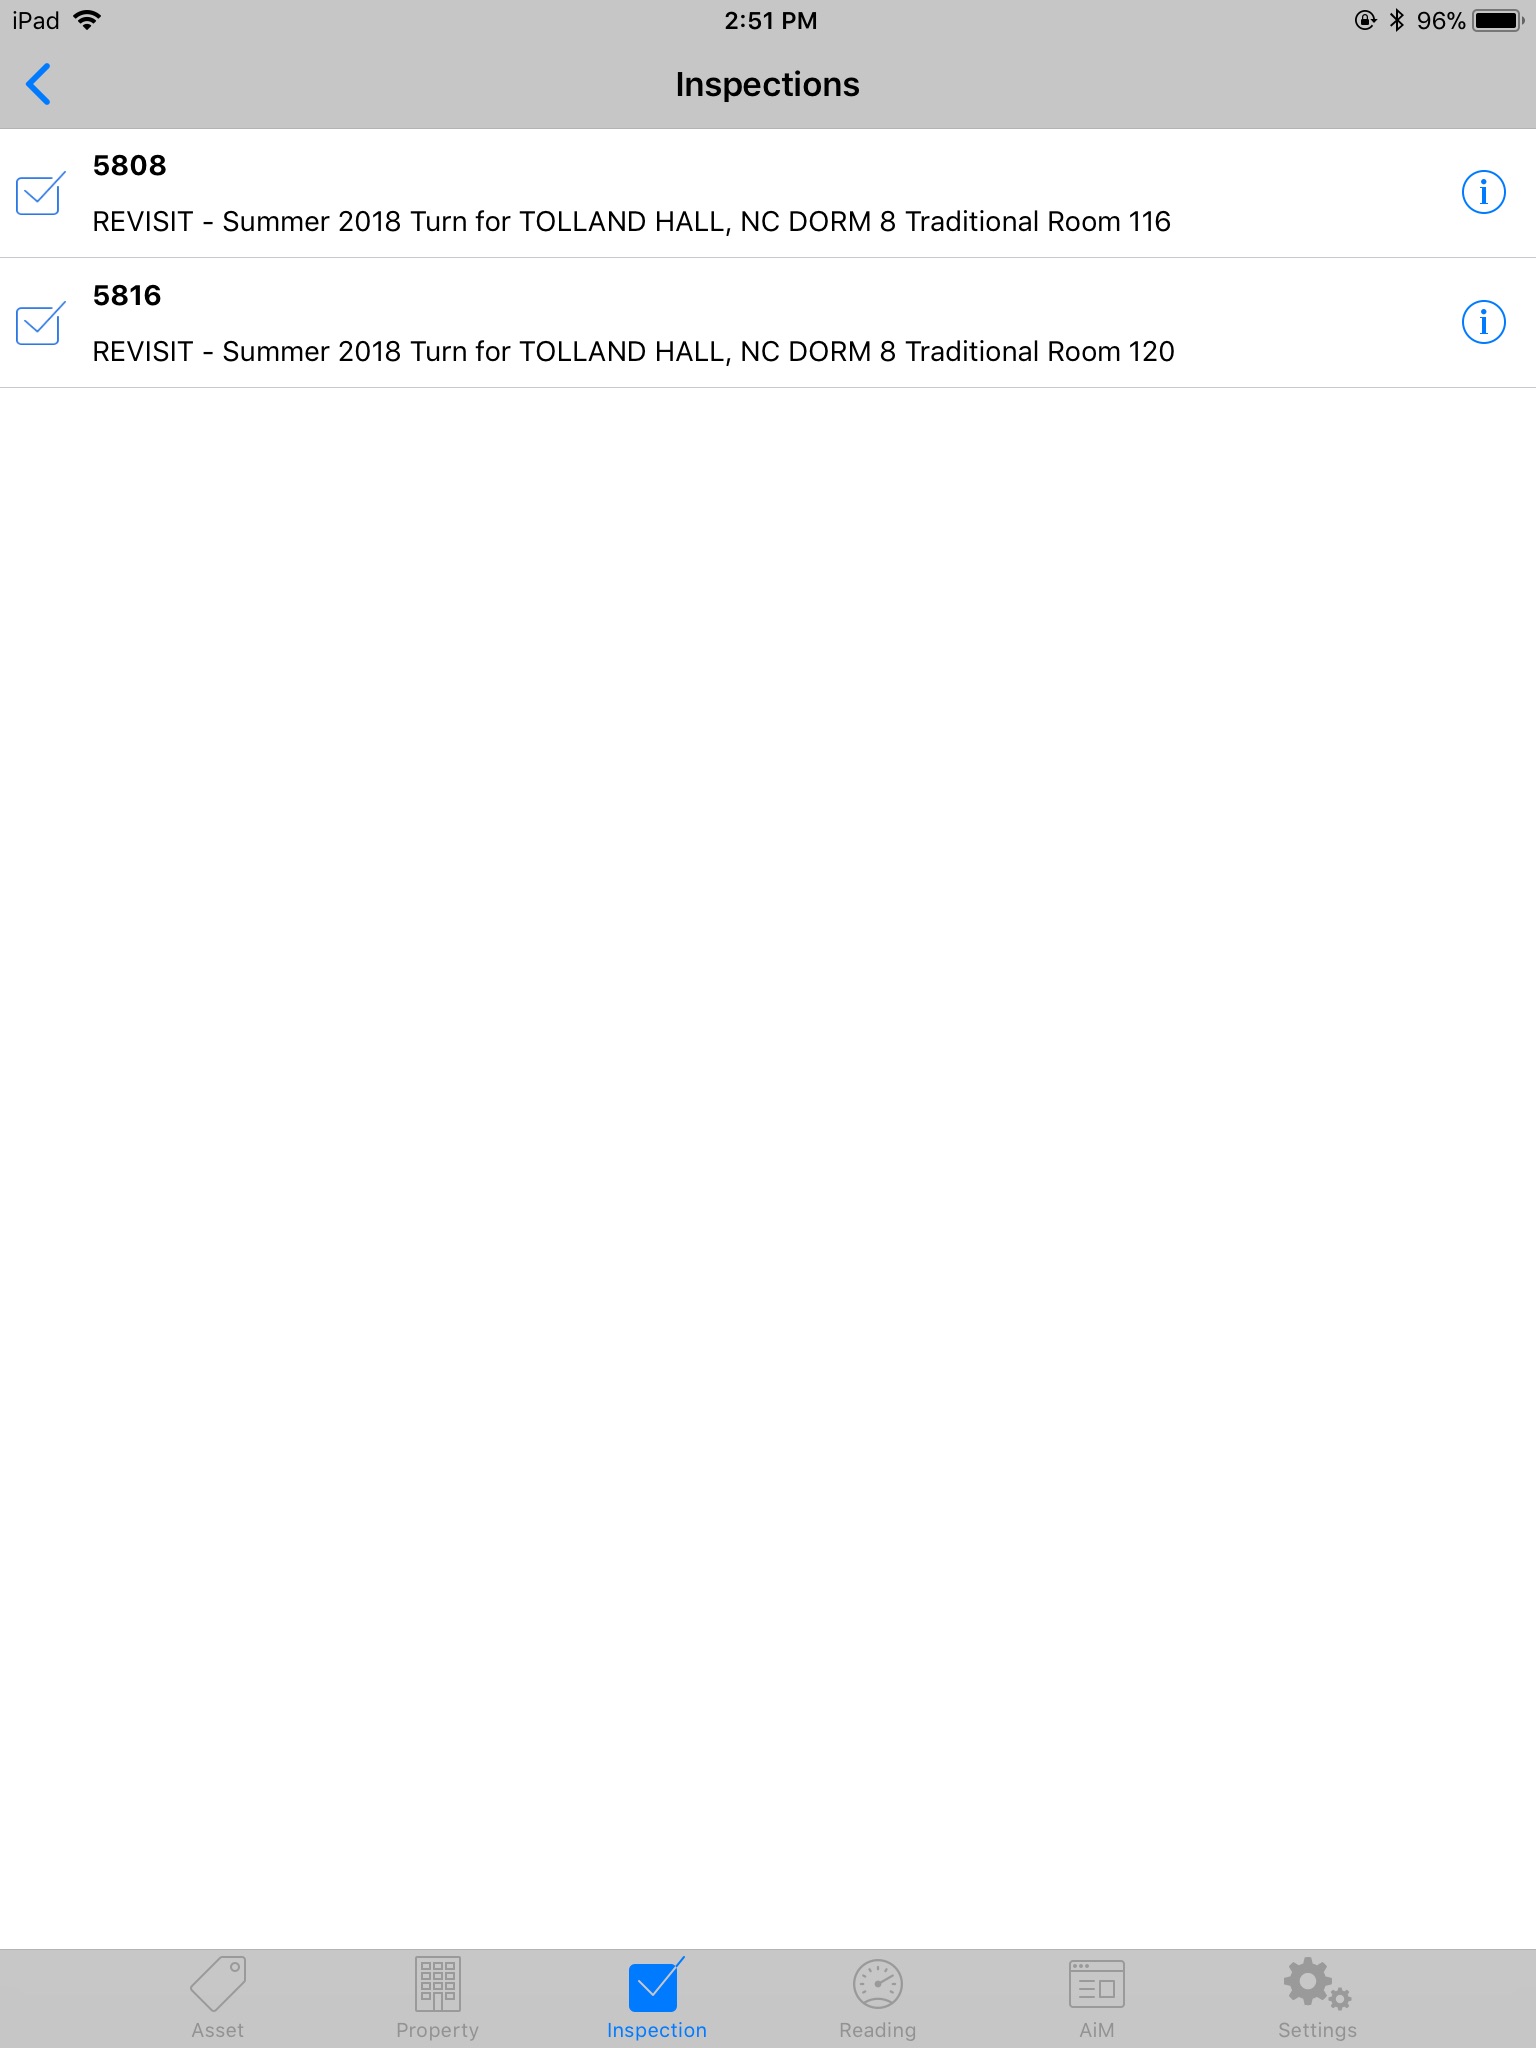
| The rooms that are awaiting their Summer Turn, will show in the Inspections list. Clicking the blue icon to the left fo the Inspection number , |
 |
| Go to the Property Icon and search for the Building and all the Inspections that are not yet complete | |
| At the bottom of the main Fire Asset Manager screen, touch the Property Icon
|
 |
| The Property Scan screen starts in a scan mode. Since no UConn Properties are bar coded, typing the building identifier or name in the search box is the quickest way to find data on an individual property.As a property name or identifier is typed into the search box a blue Search button shows in the keyboard area. When all or part of the property name is in the search box, click the blue Search Button to get a list of properties. | 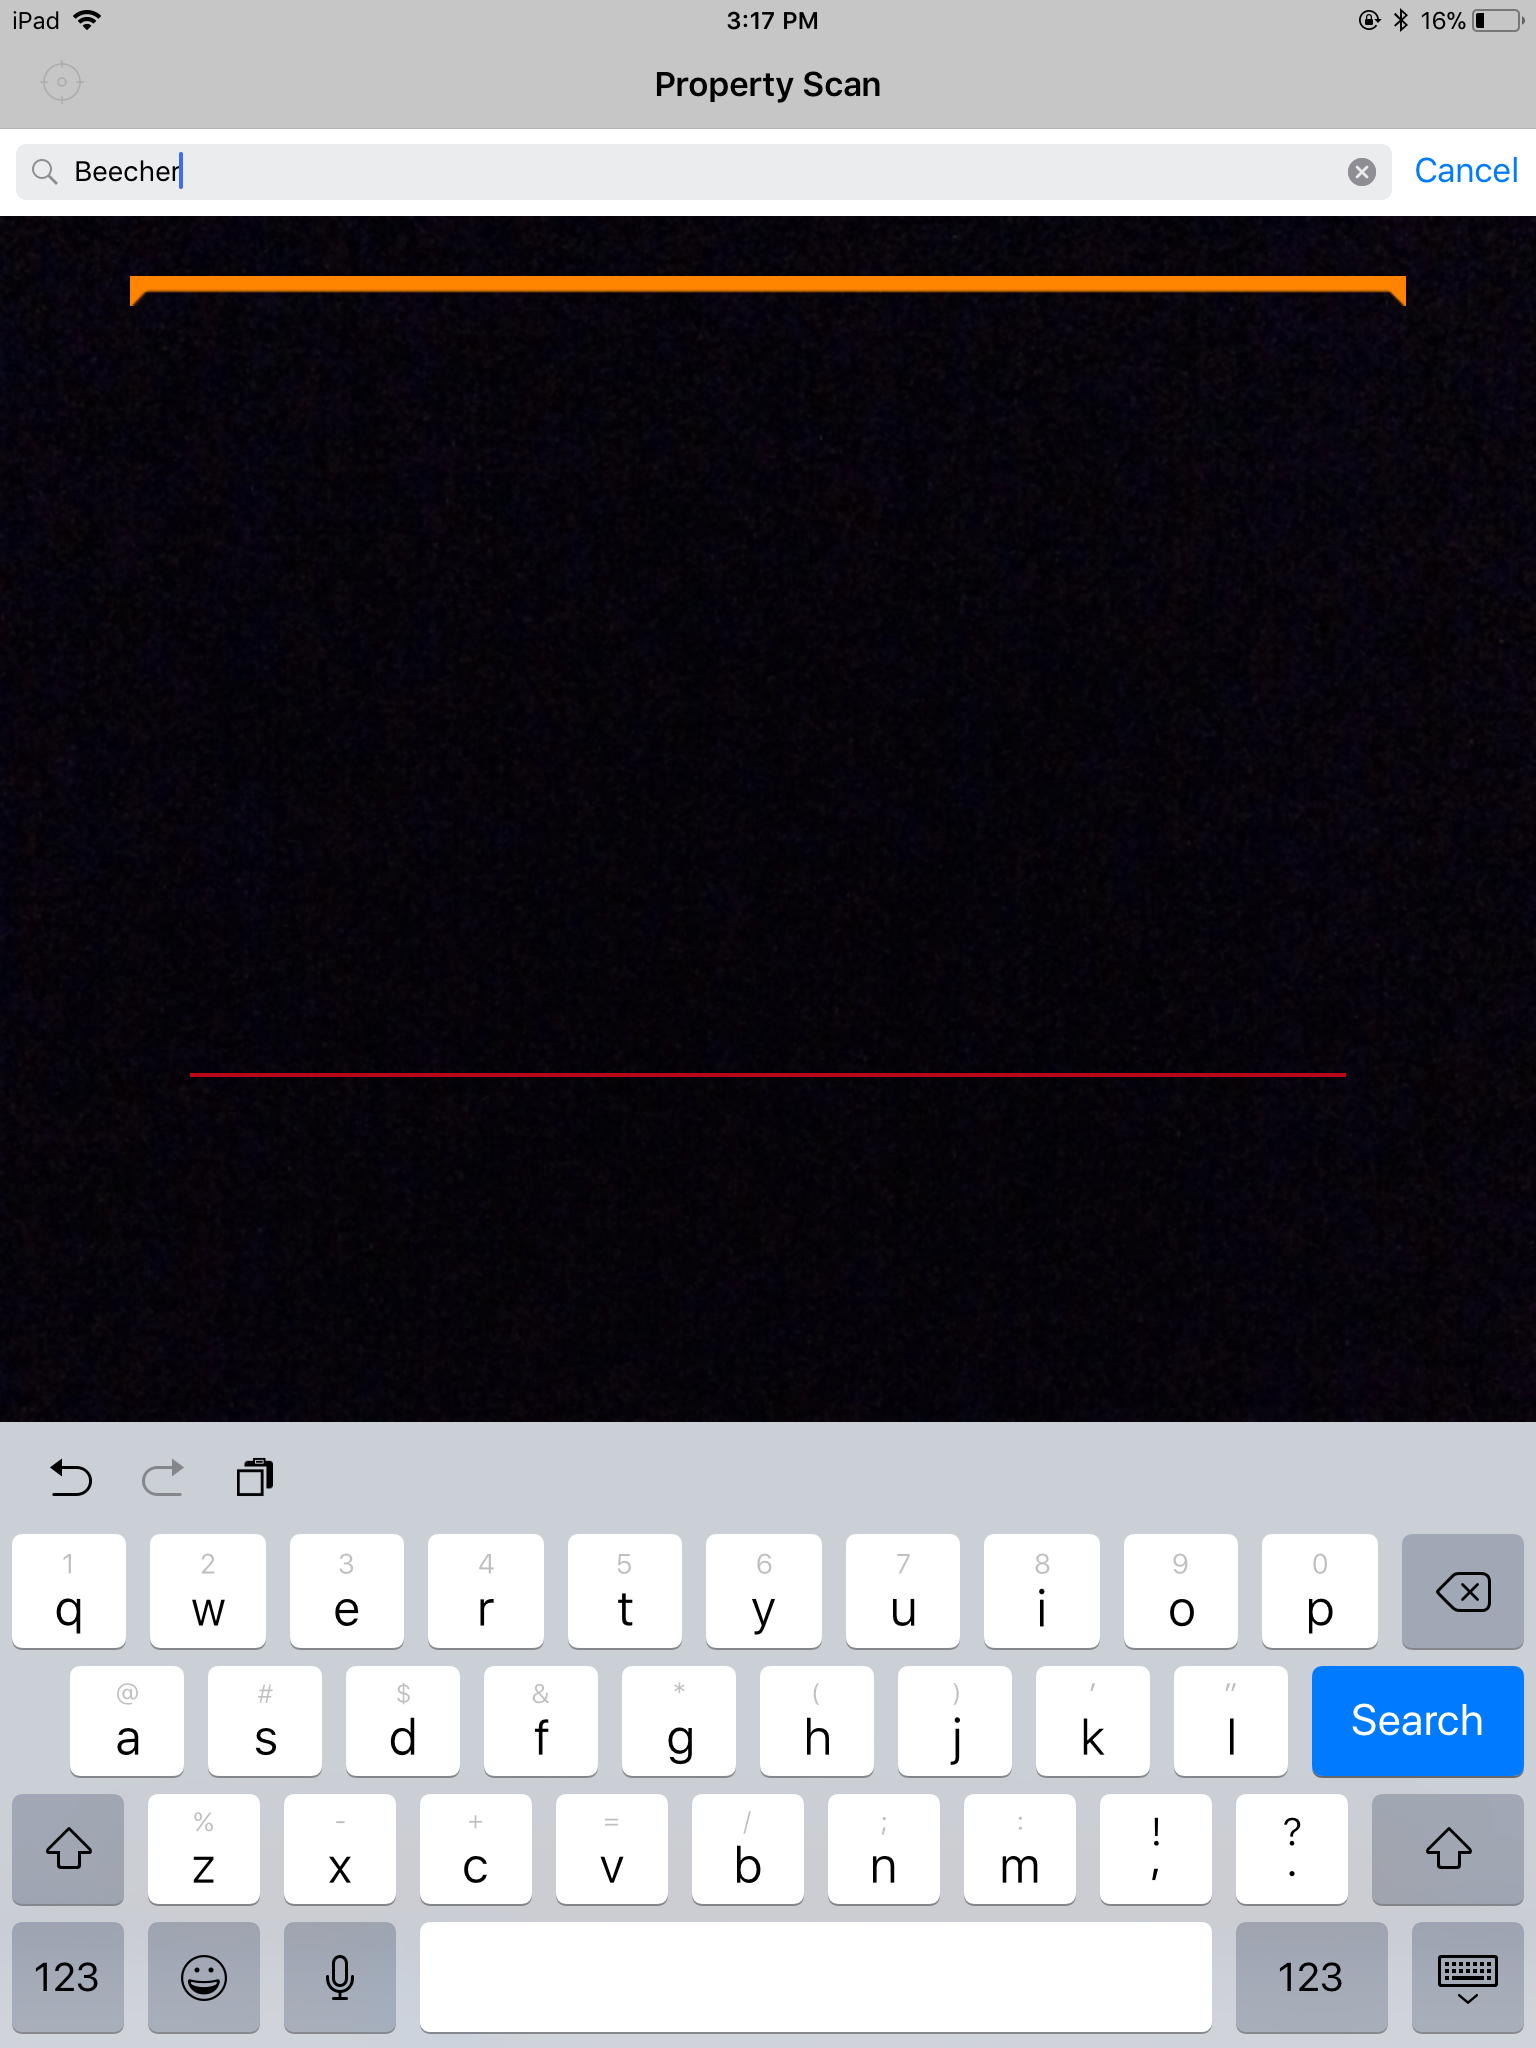 |
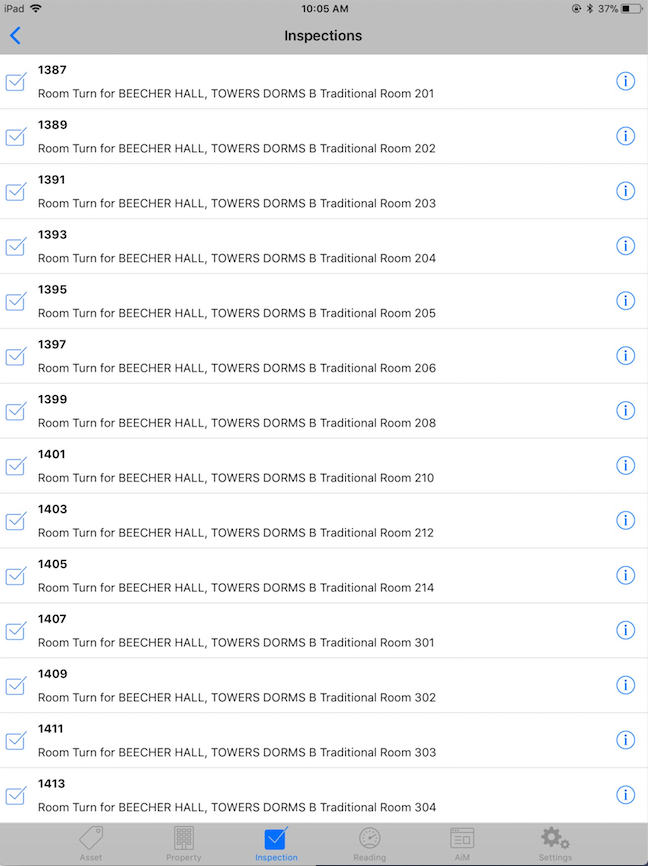
| The inspections that are available to execute will show in the Inspections list. Clicking the blue icon to the left fo the Inspection number , |
 |

How to Pass an Inspection Item:
| UConn Inspections are created with all the Inspection steps set to PASS as a default to overcome the semi-cumbersome design of the interface. | 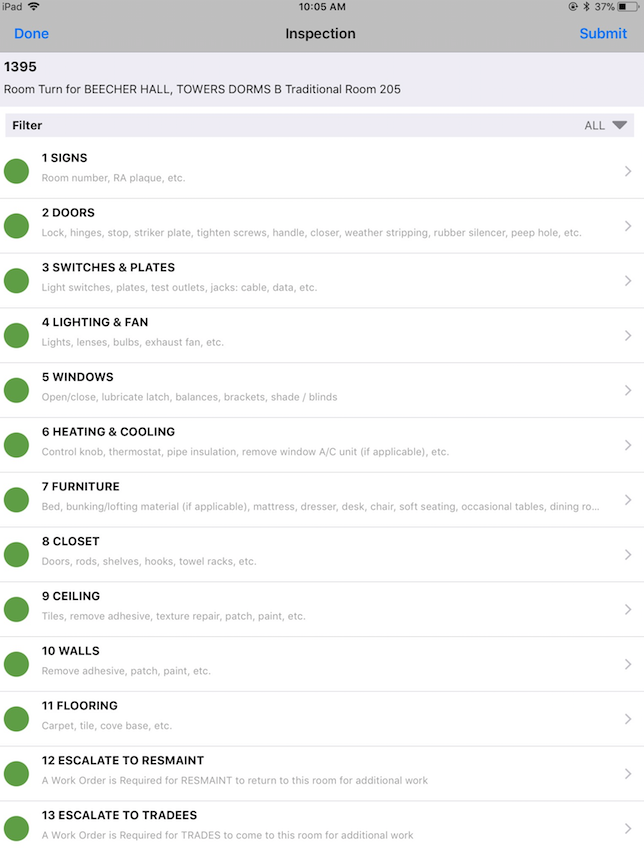 |
| On the Inspection Screen, clicking the right arrow on the right end of any inspection line navigates to the details of that line.Clicking on inspection line 9 below takes the user to the details shown to the right
|
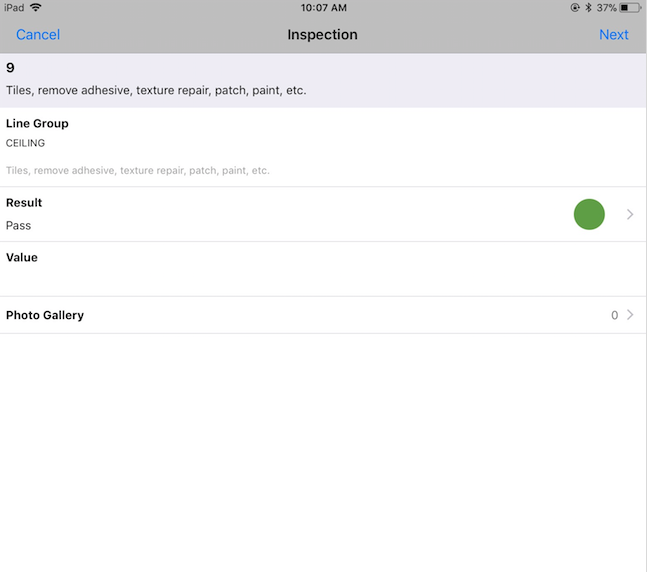 |
| *By default no action is needed on an Inspection step to set it Pass | |
How to Fail an Inspection Item and note the problem:
| UConn Inspections are created with all the Inspection steps set to PASS as a default to overcome the semi-cumbersome design of the interface. To change the response to Fail, click the arrow to the right of the green dot on the Result line that shows PASS. | |
| You will see a blue check on the Pass line. Touch anywhere on the Fail line. | 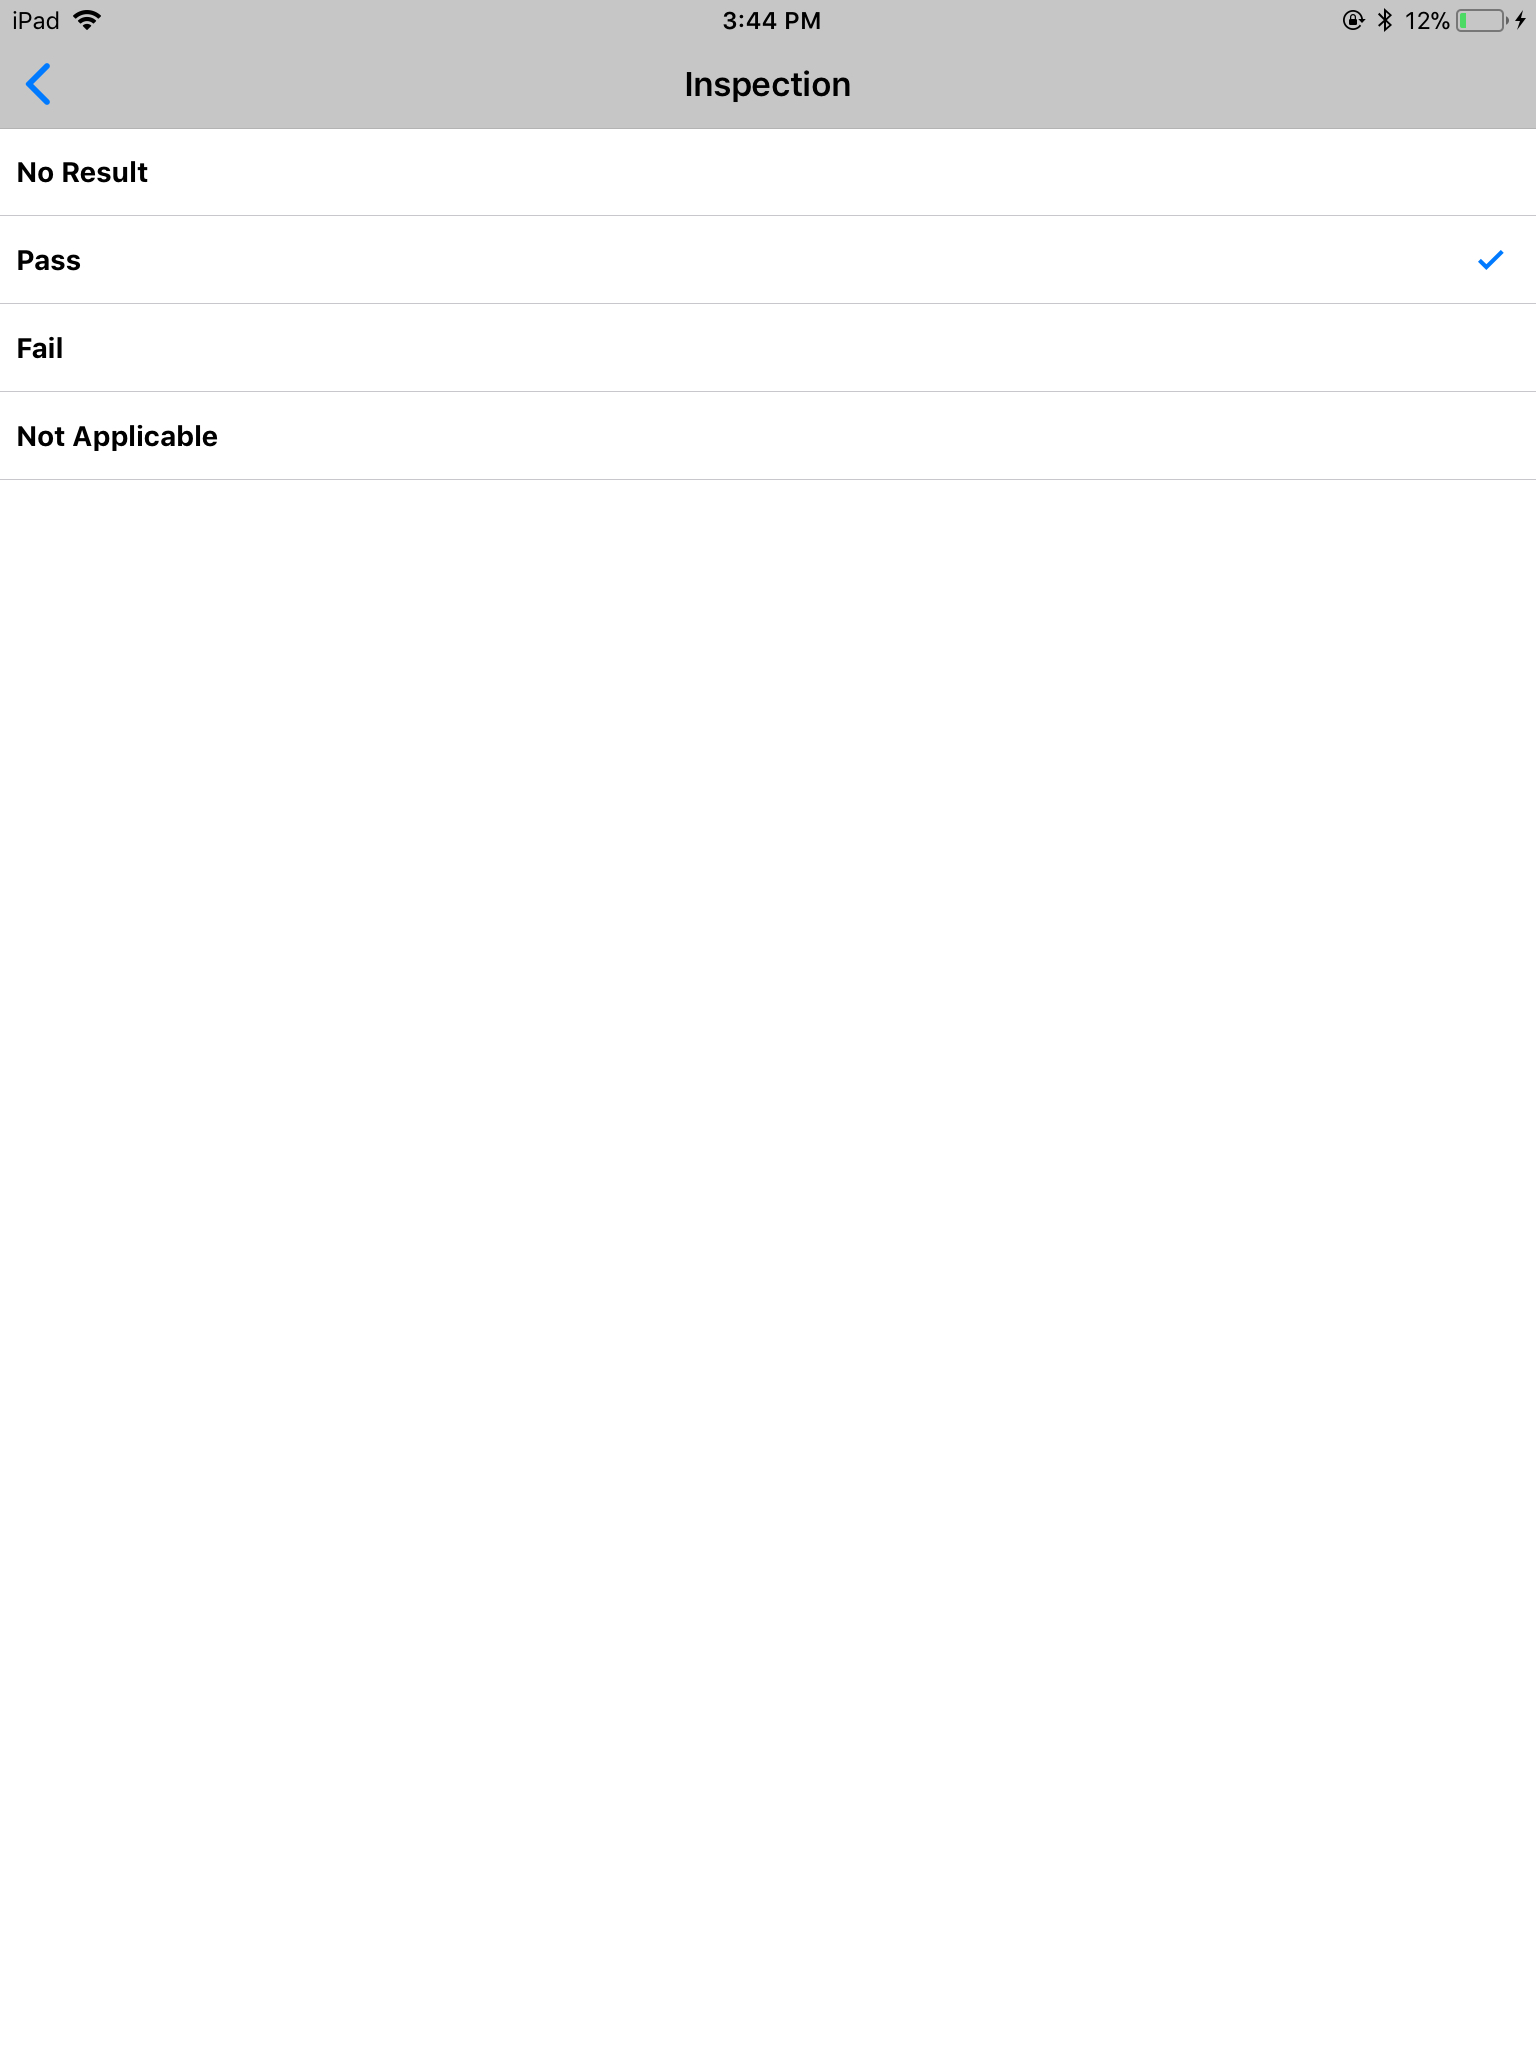 |
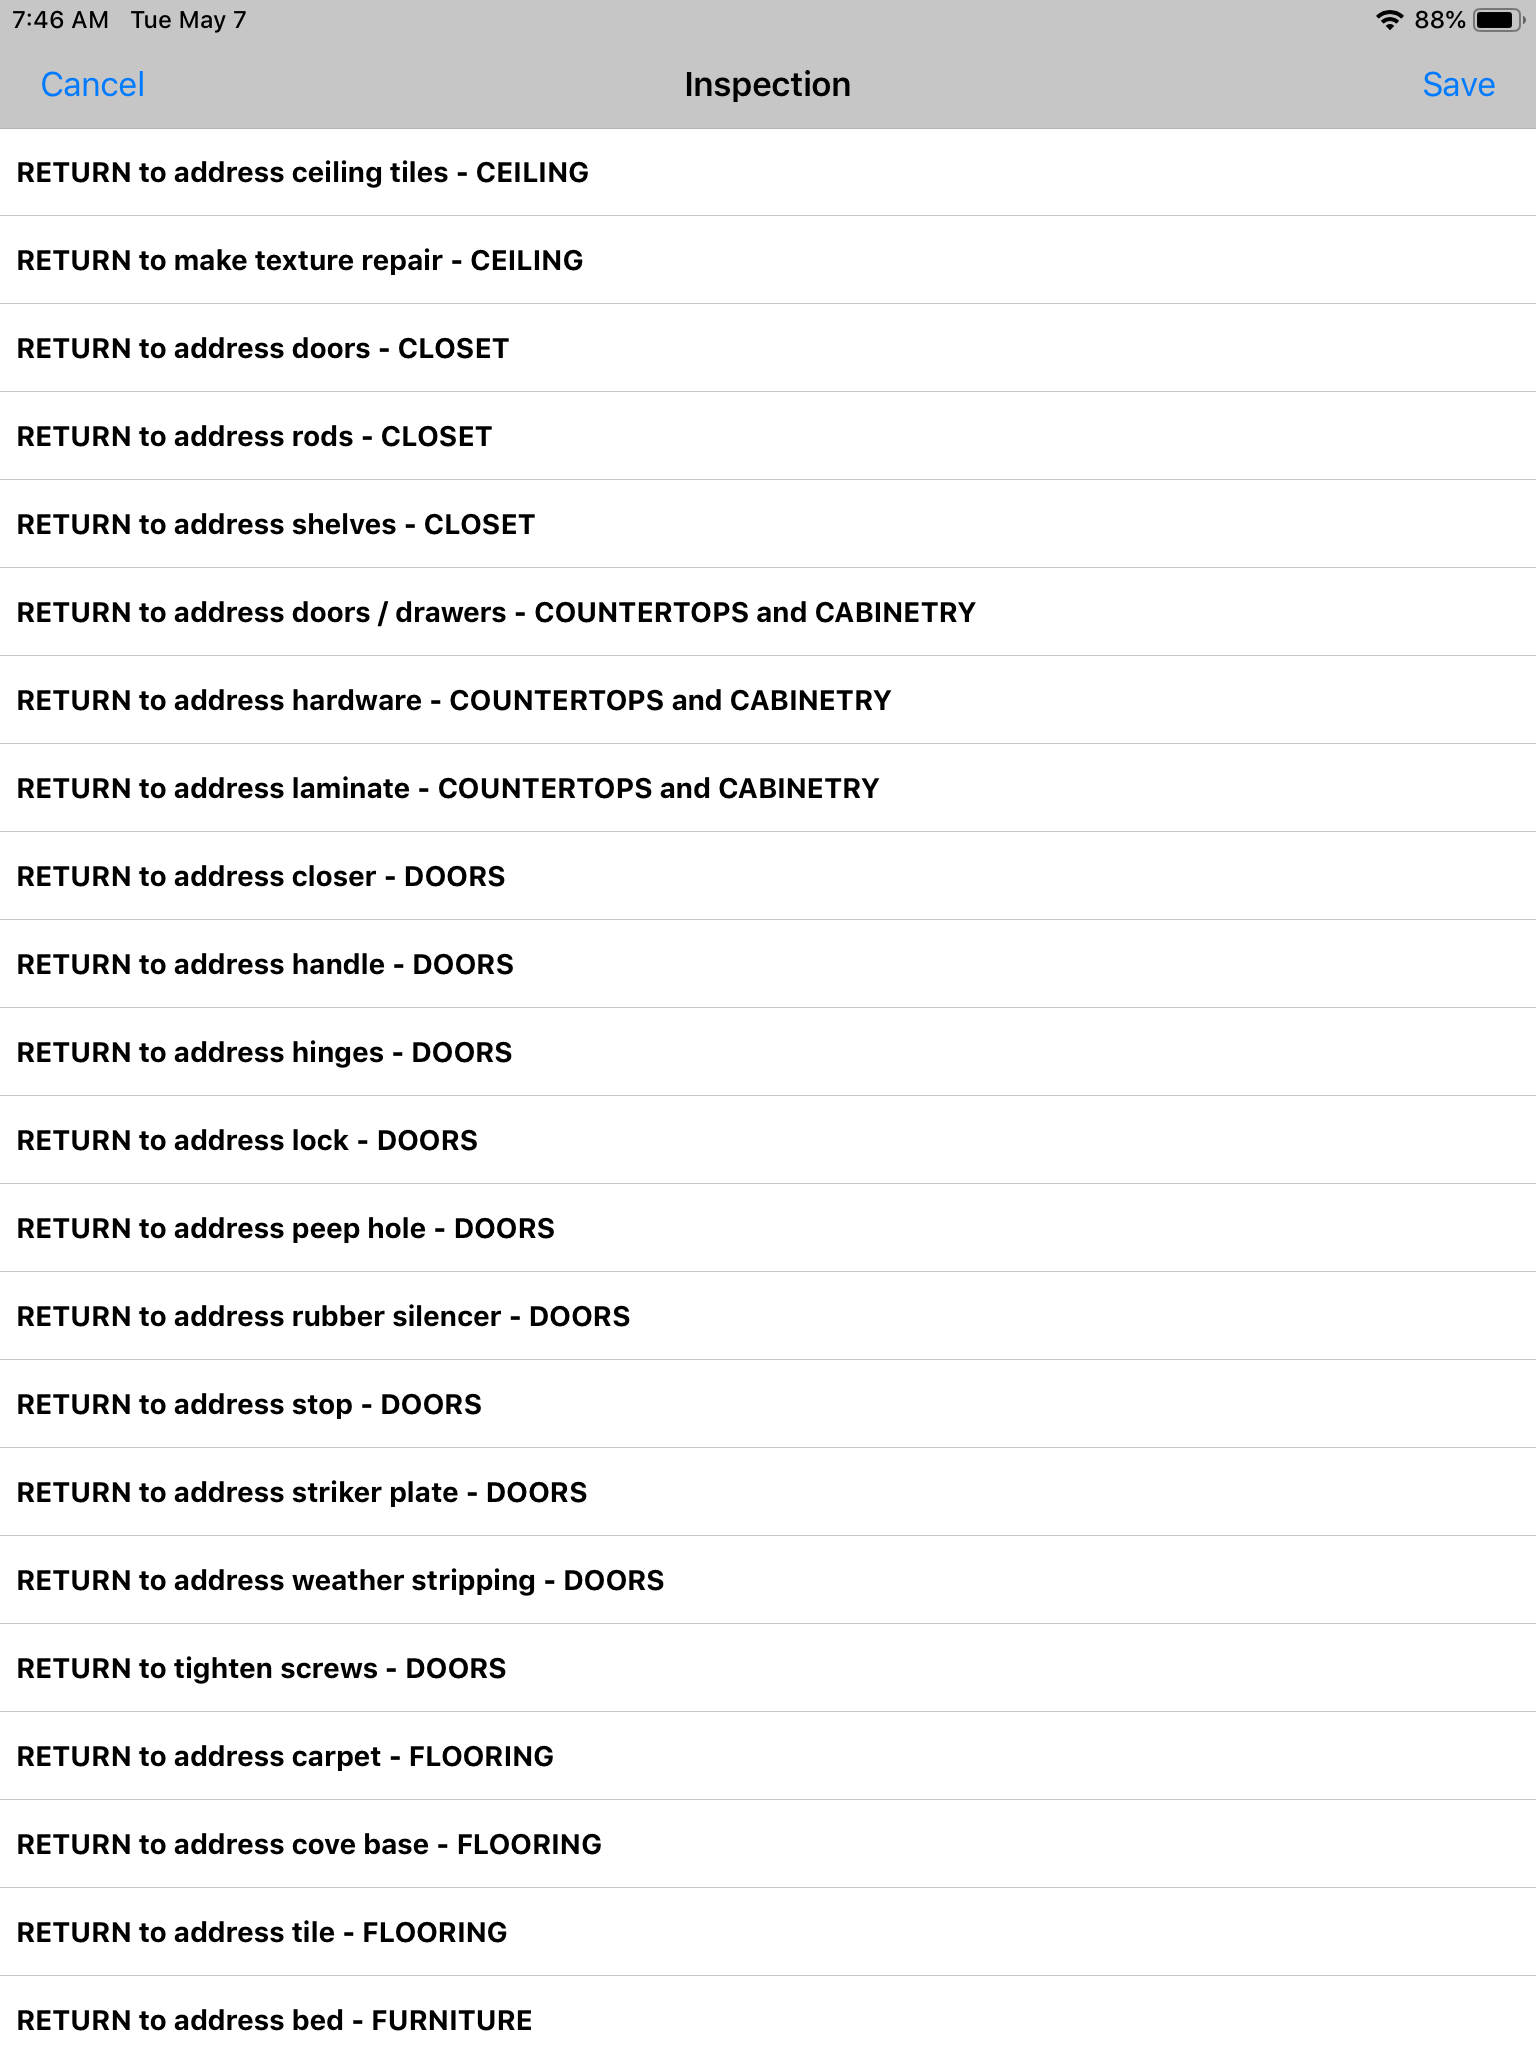
| The system displays an Alert box that asks “Do you wish to add remedial actions?”. Click the Yes Option. | 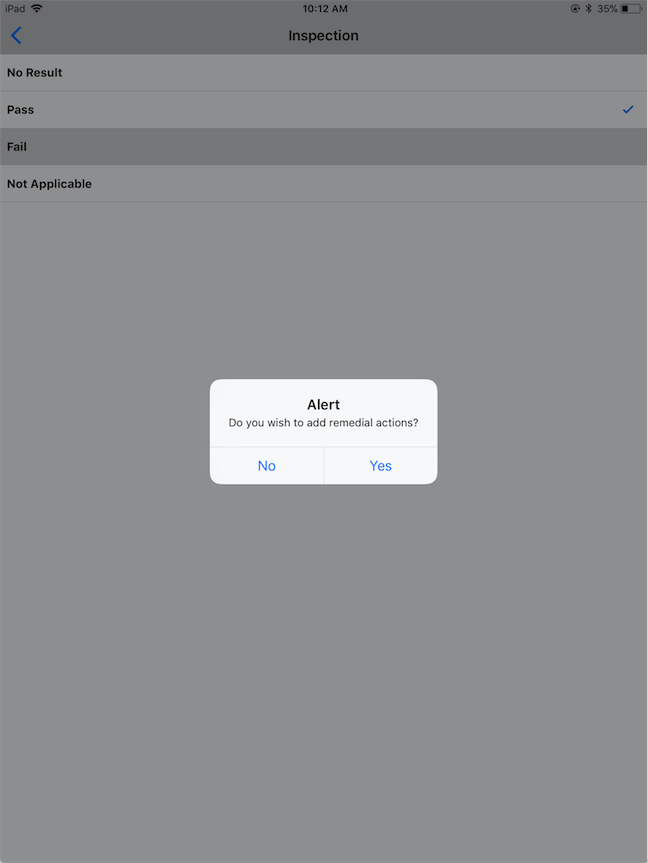 |
| More than one option can be selected when the appropriate. The example to the right gives choices that are independent of each other. If necessary choose more than one option in this case. | 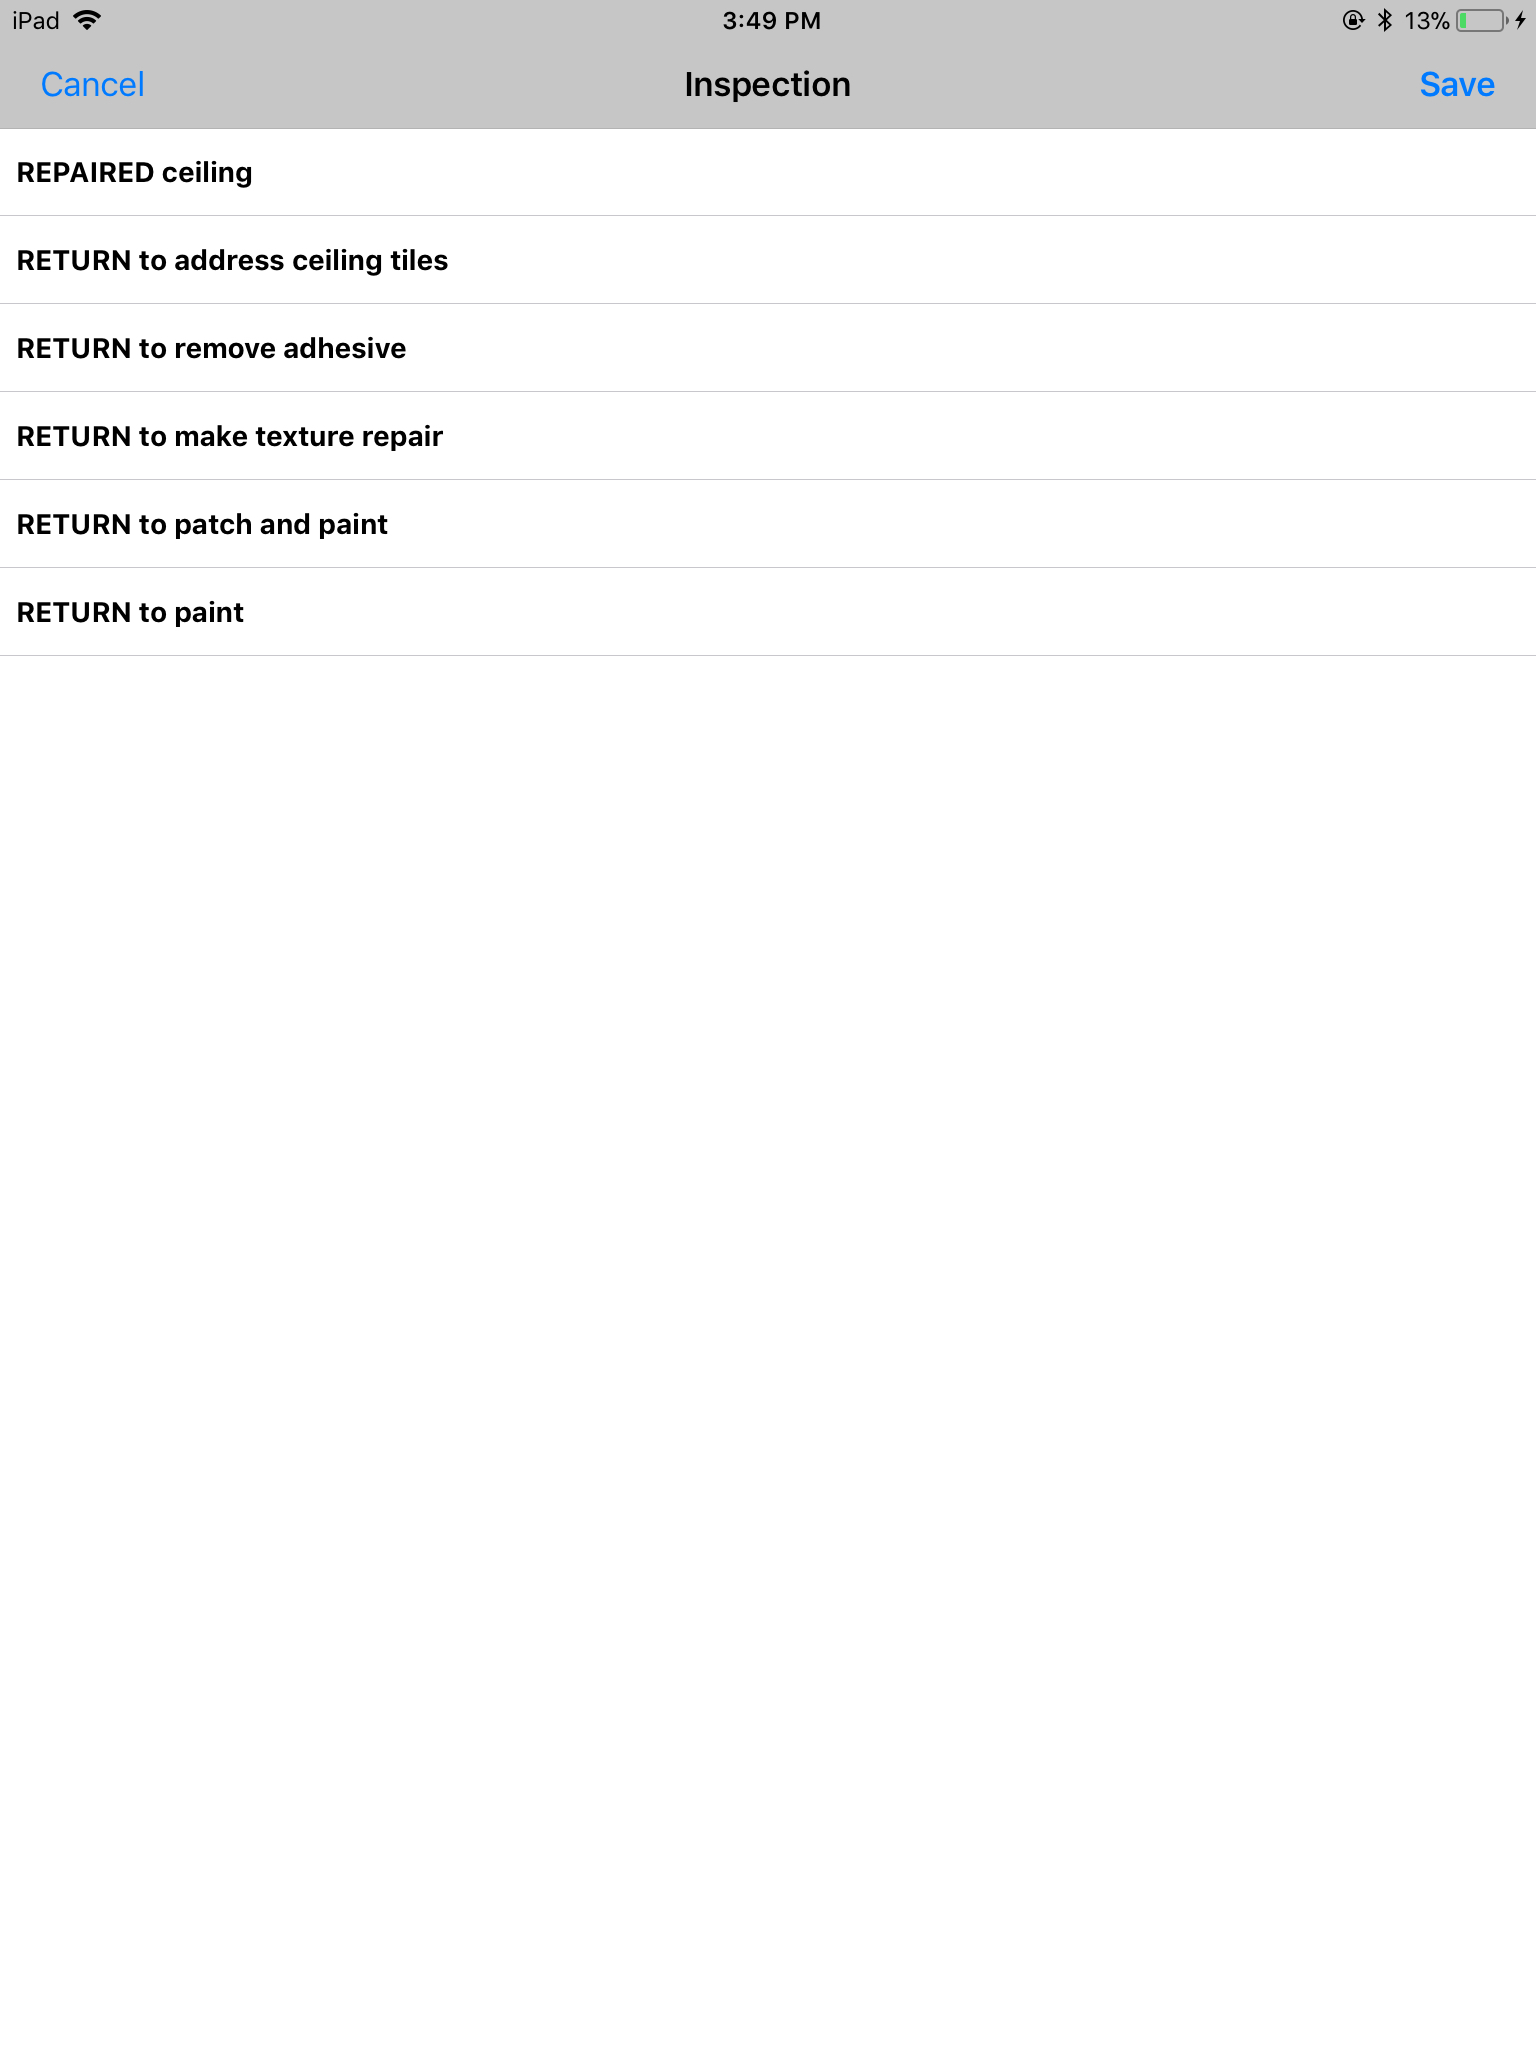 |
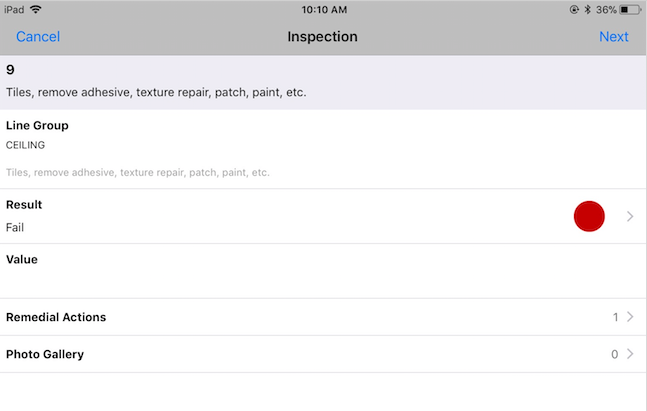
| After selecting a Fail Result the application returns to the Inspection Line. The Result is now a Fail and a red dot appears on that line. The count of Remedial Actions is visible on that line.
If desired, images can be added by clicking the Photo Gallery Line. |
 |
|
IMPORTANT: For the inspection result to be saved the Next option in the top bar must be clicked if any changes to the Line Group have been made!
|
|
| To jump back to the main inspection list at any point click Cancel in the upper left hand corner. Any changes on the current inspection item will not be captured so this should always be done on an Inspection element that starts with the proper status (most often PASS) |  |

How to Submit an Inspection when it is completed
| When an inspection is finished click Submit in the upper right corner. The system displays an Alert box that asks “Would you like to submit this inspection?”. Click the Yes Option. | 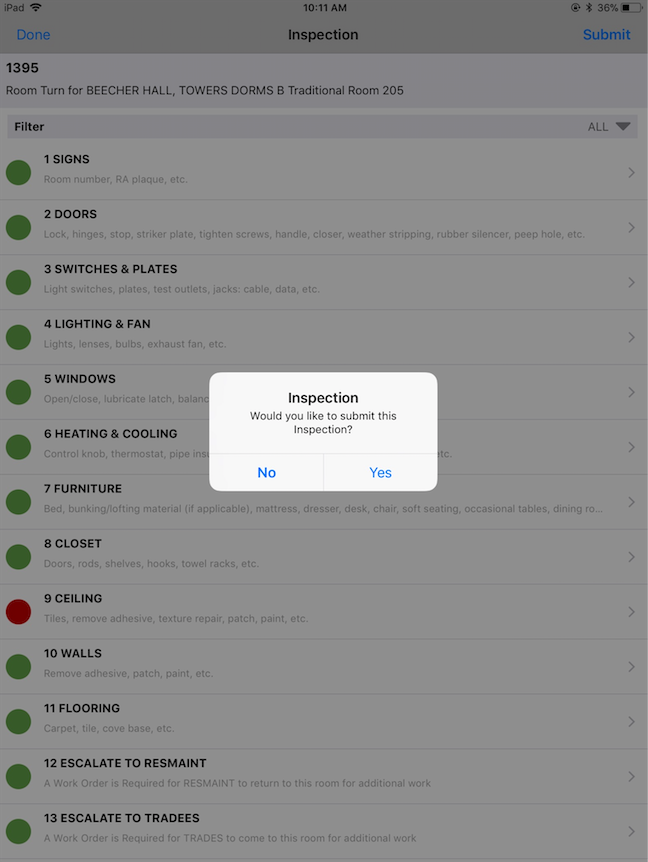 |
| After submitting an inspection, the application returns to the Inspection list. Any completed inspections will no longer be available in the list | 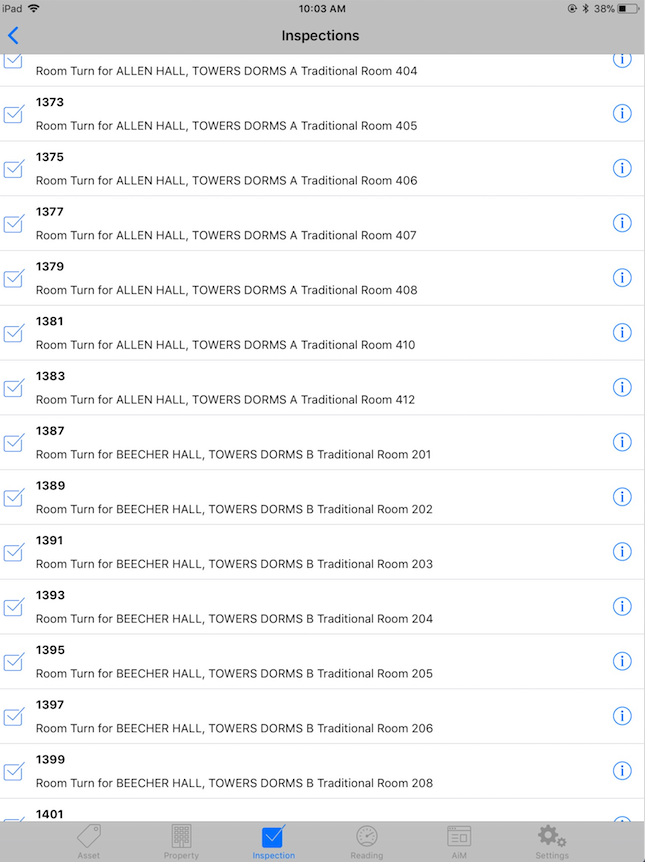 |
How to mark an Inspection in a room you want to revisit
| Inspection Statuses can be changed by locating the Inspection in the Inspection list and clicking the information link on the right end of the inspection line.
|
|
| The inspection information is shown on the right. Click the Edit link in the upper right corner to update. | 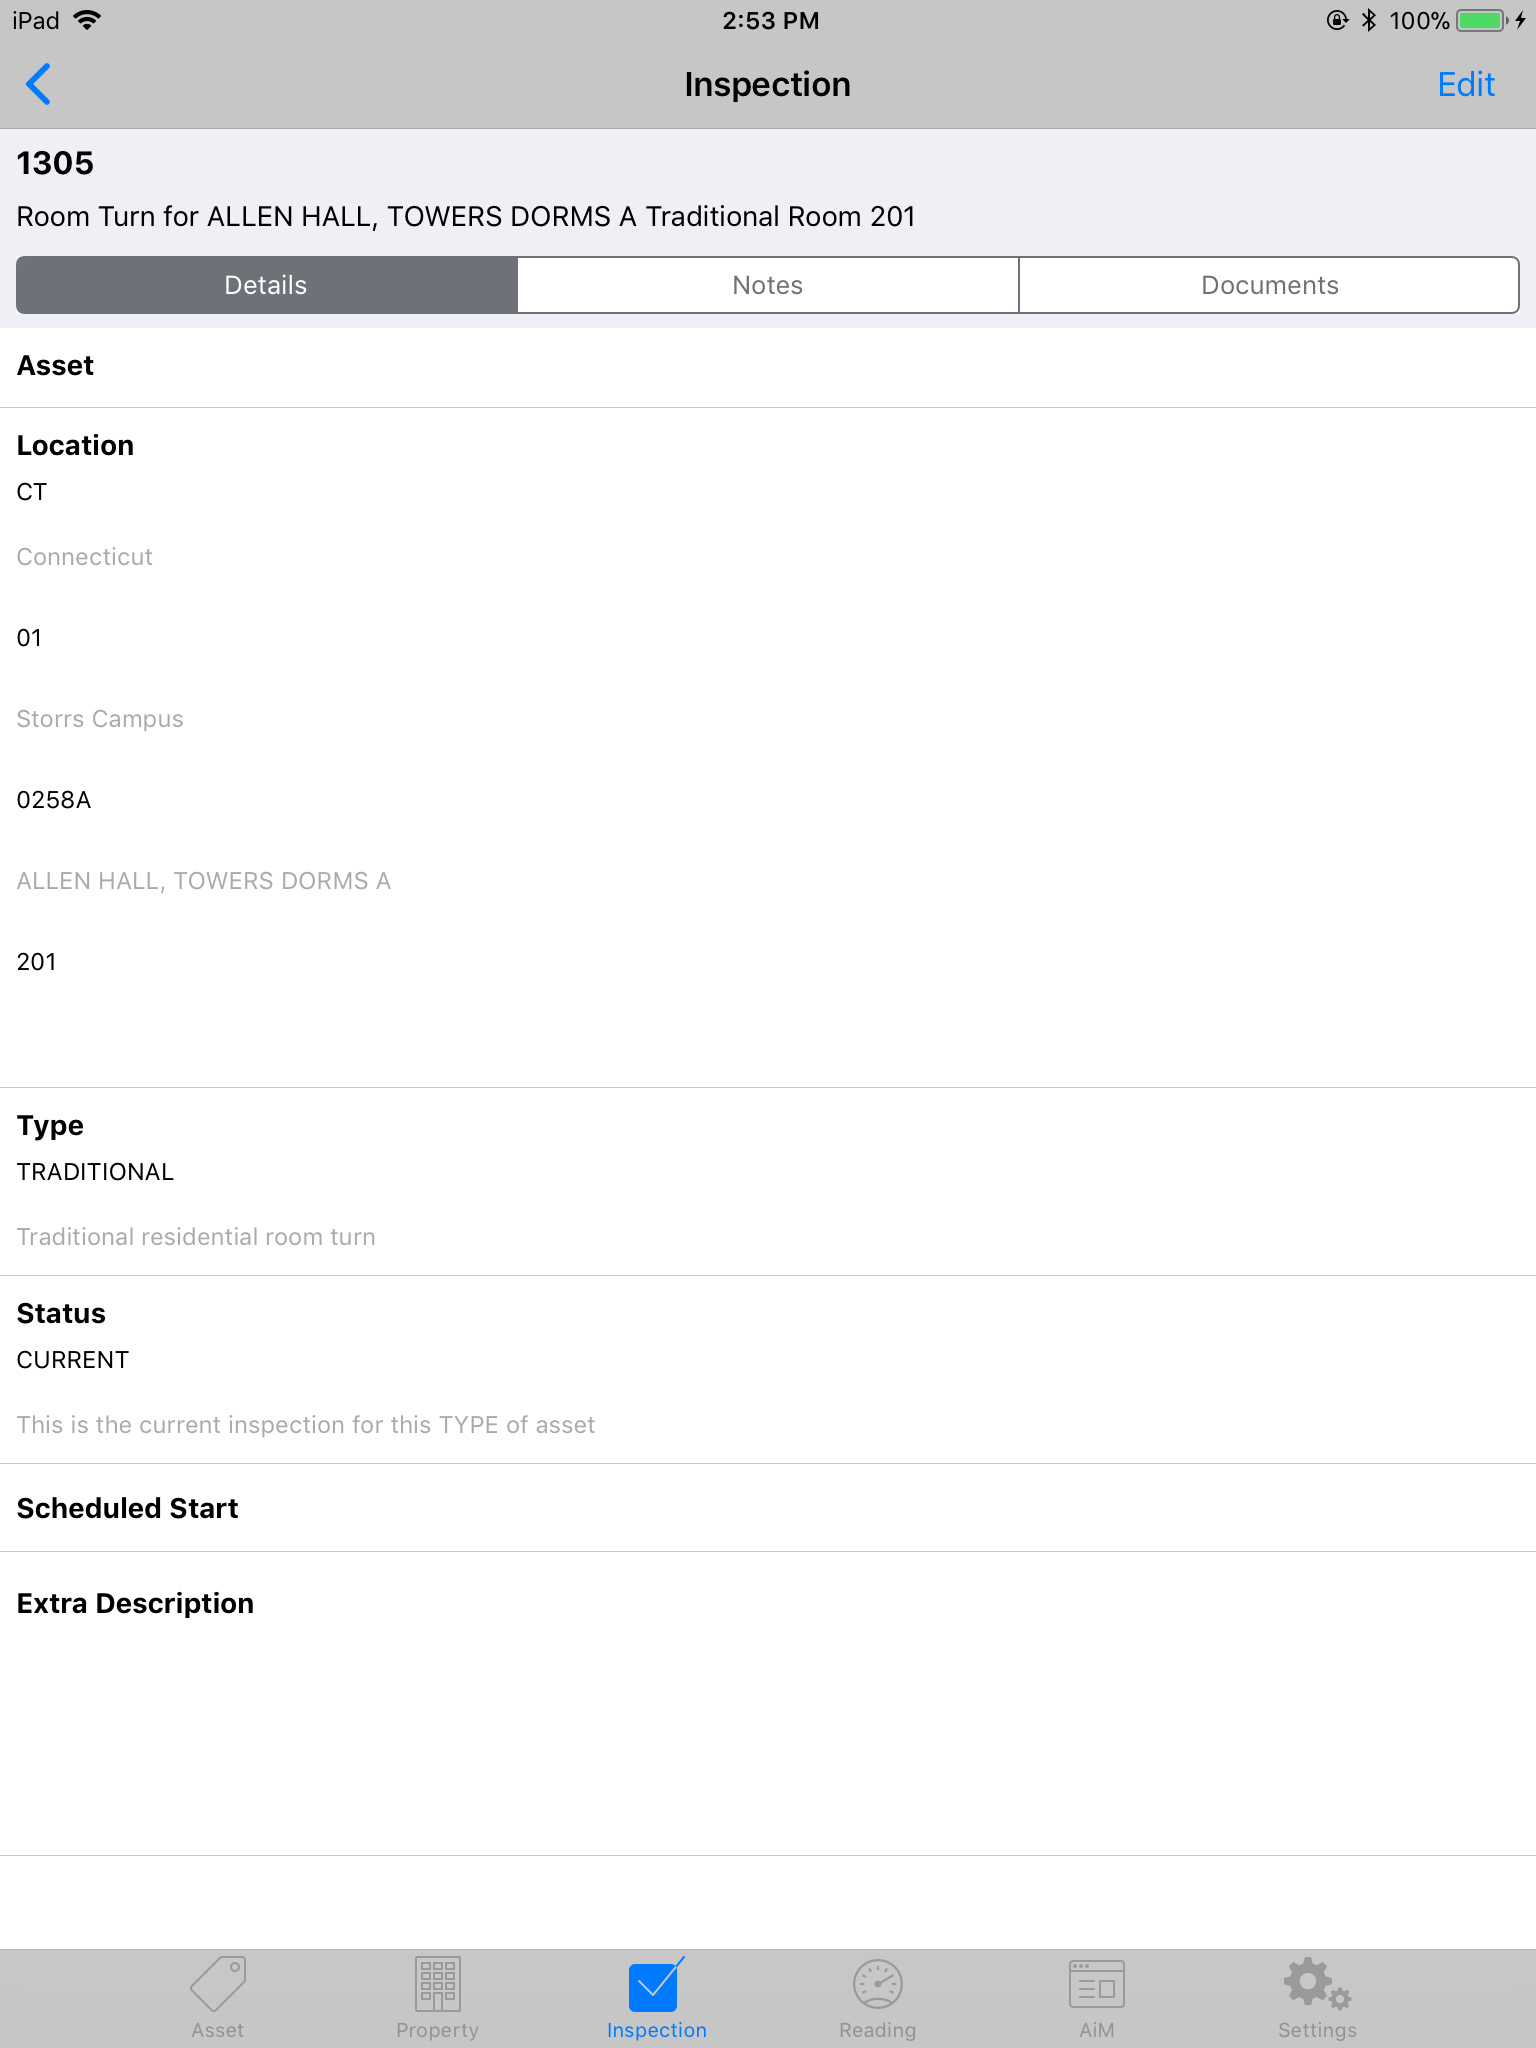 |
| In this mode the description becomes editable and the Status field displays a right arrow a the end of the line. Click the right arrow to access the list of available statuses. | 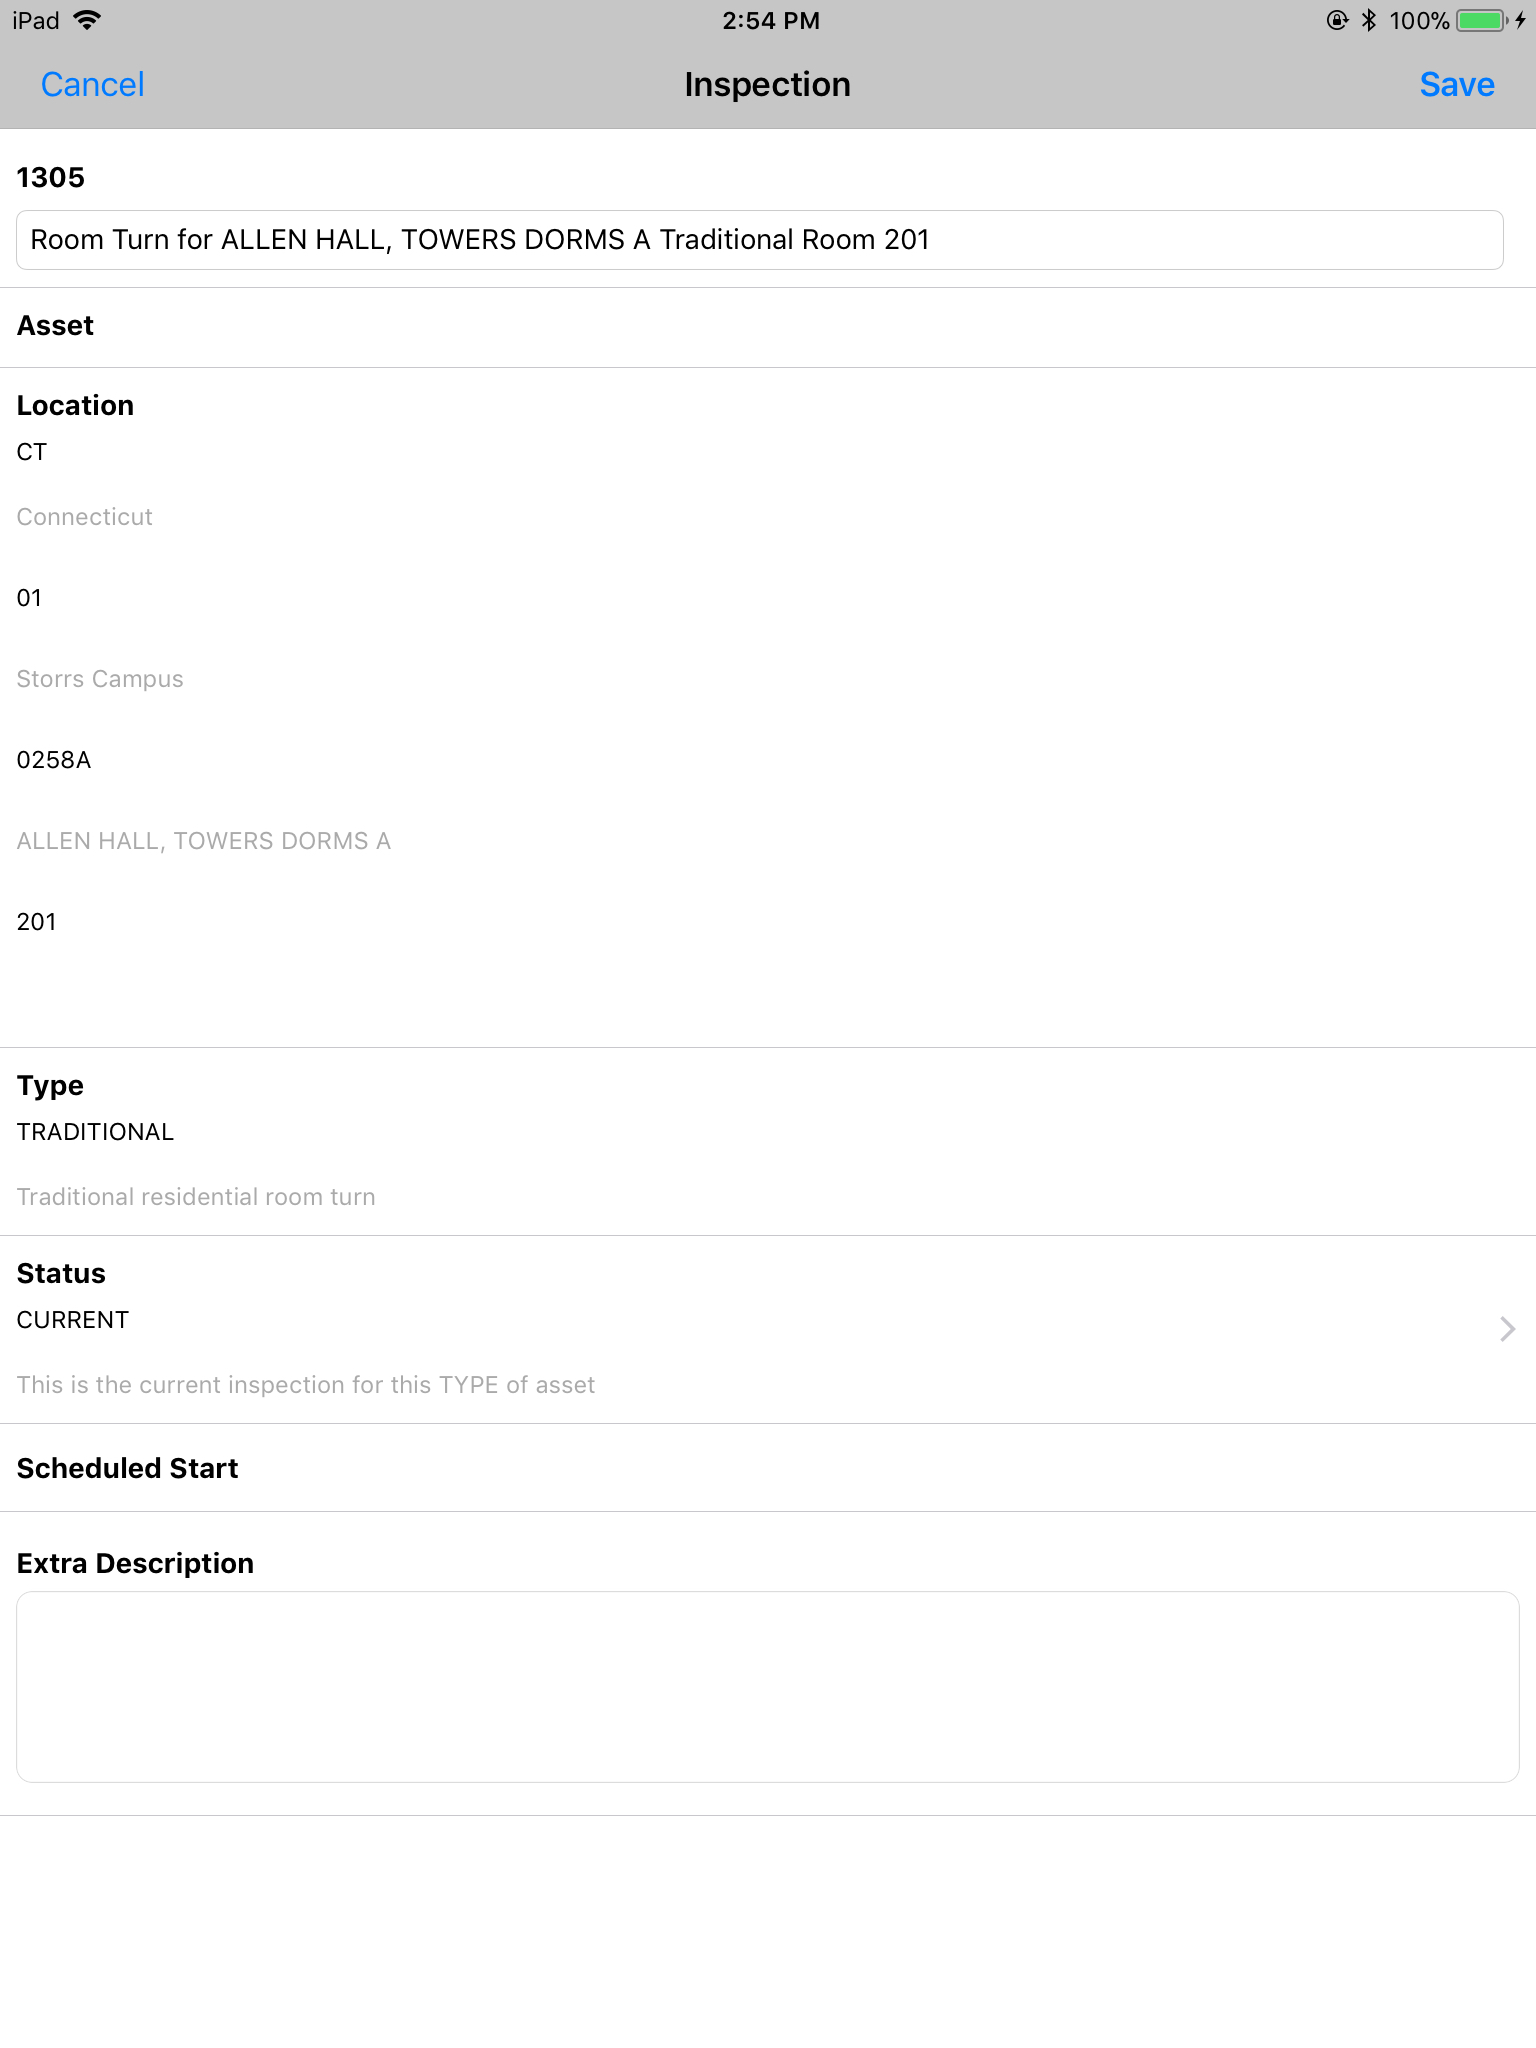 |
| Touch the line with the word REVISIT in bold text. | 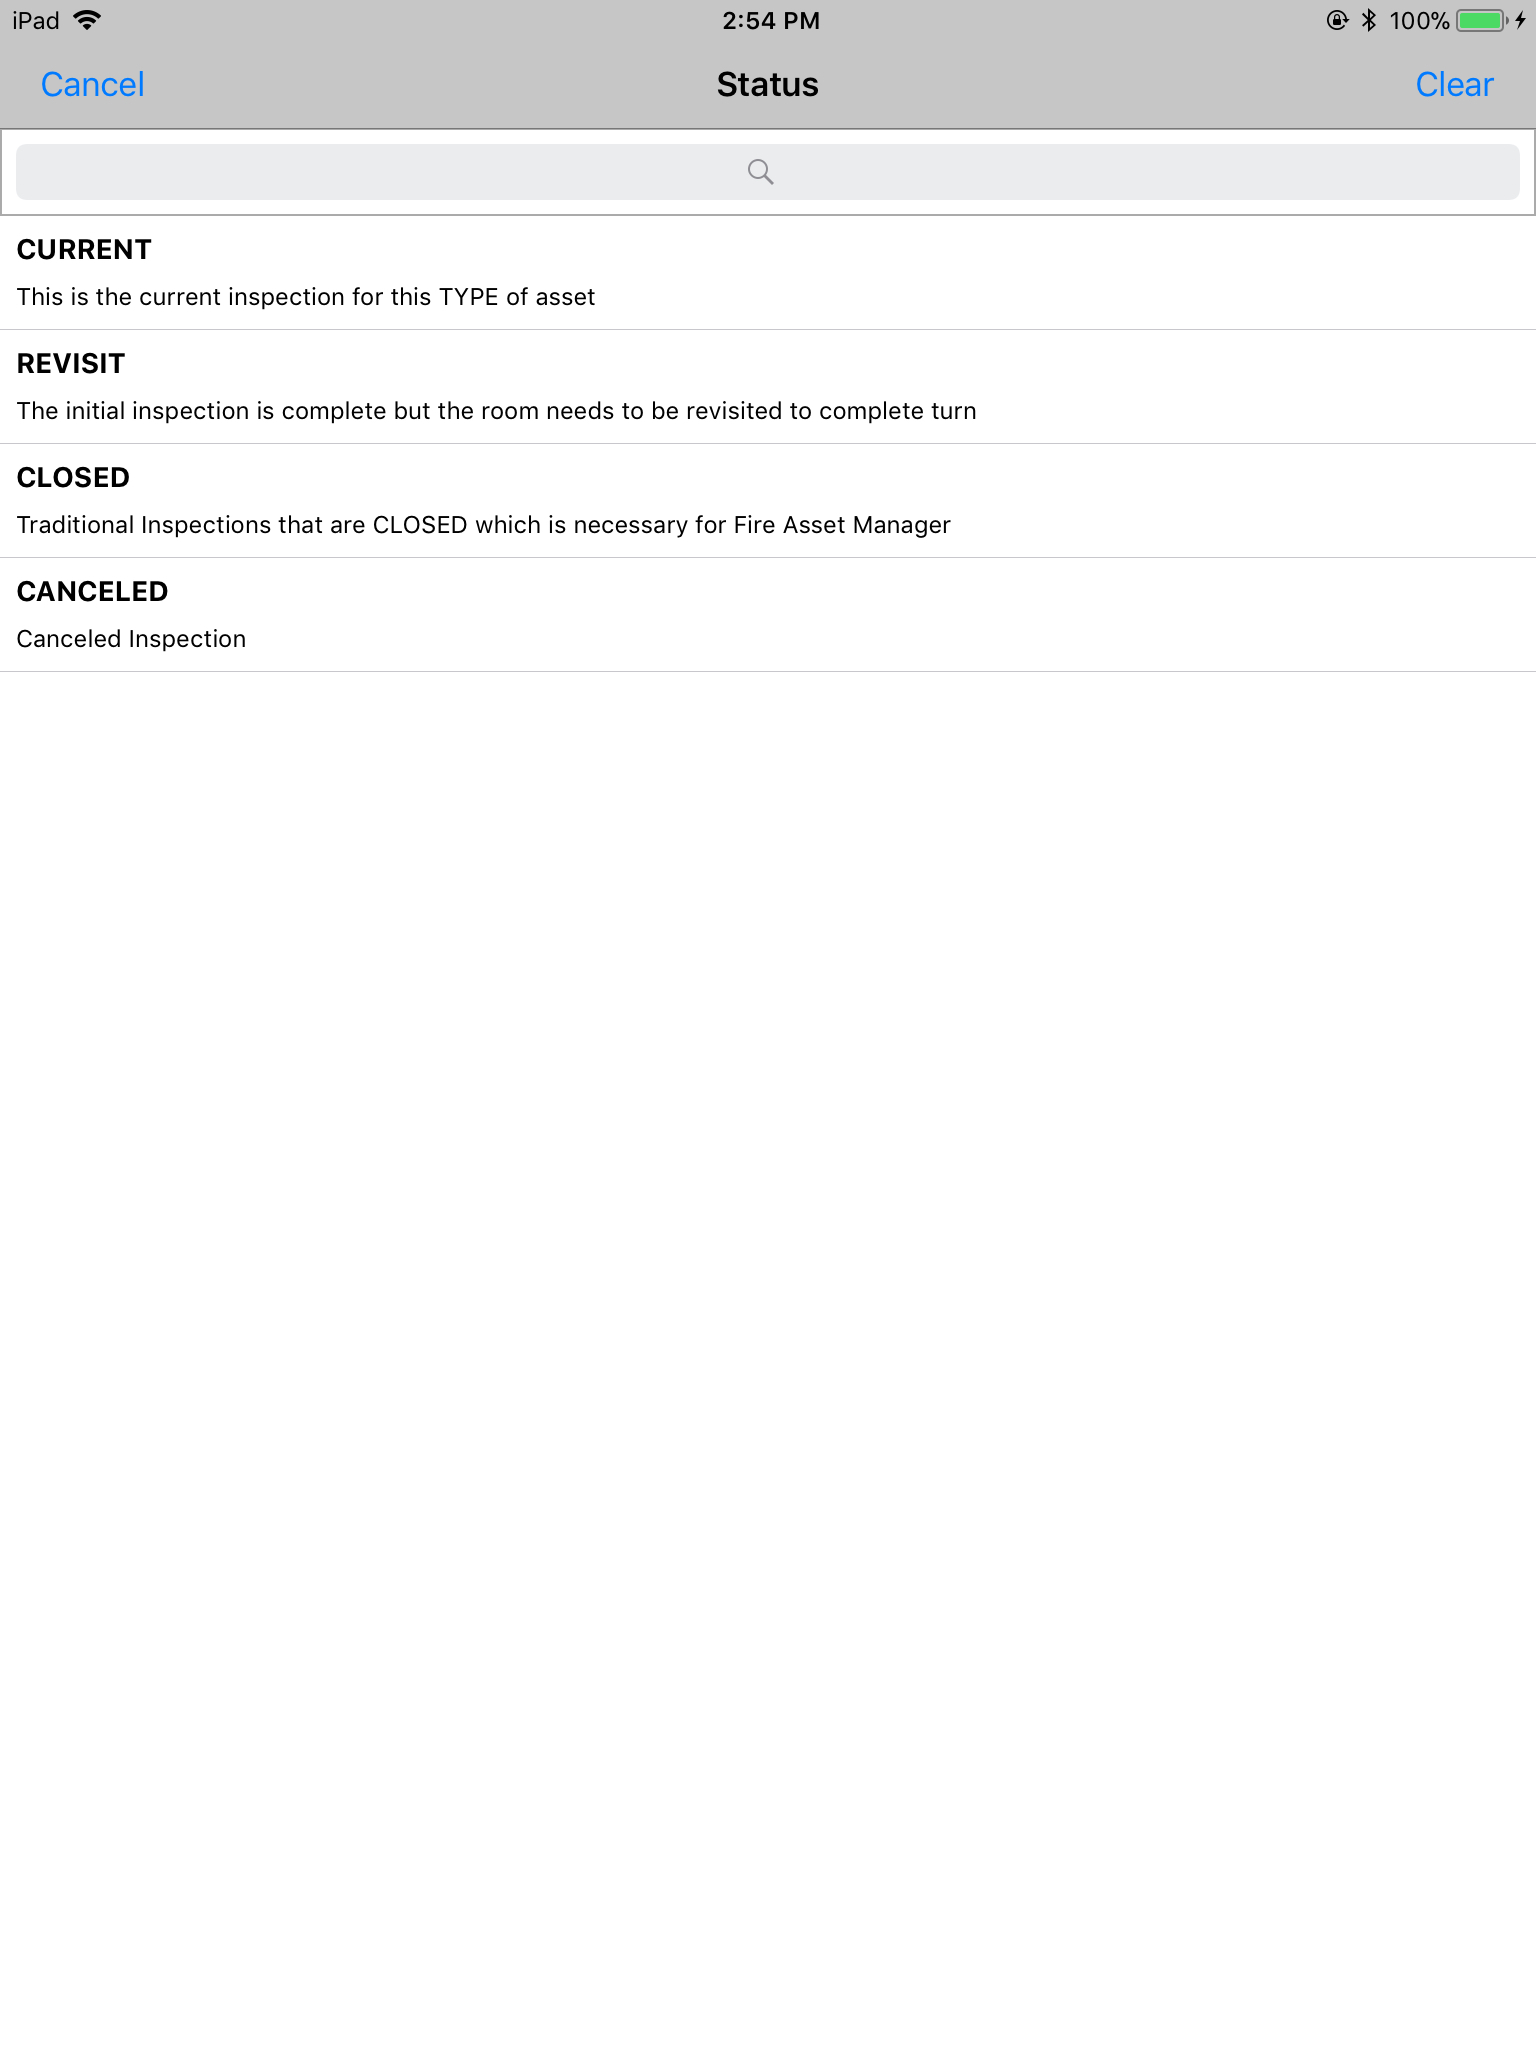 |
| Once the update has been made and confirmed back on the Inspection Information Screen select the Save link in the upper right corner. | 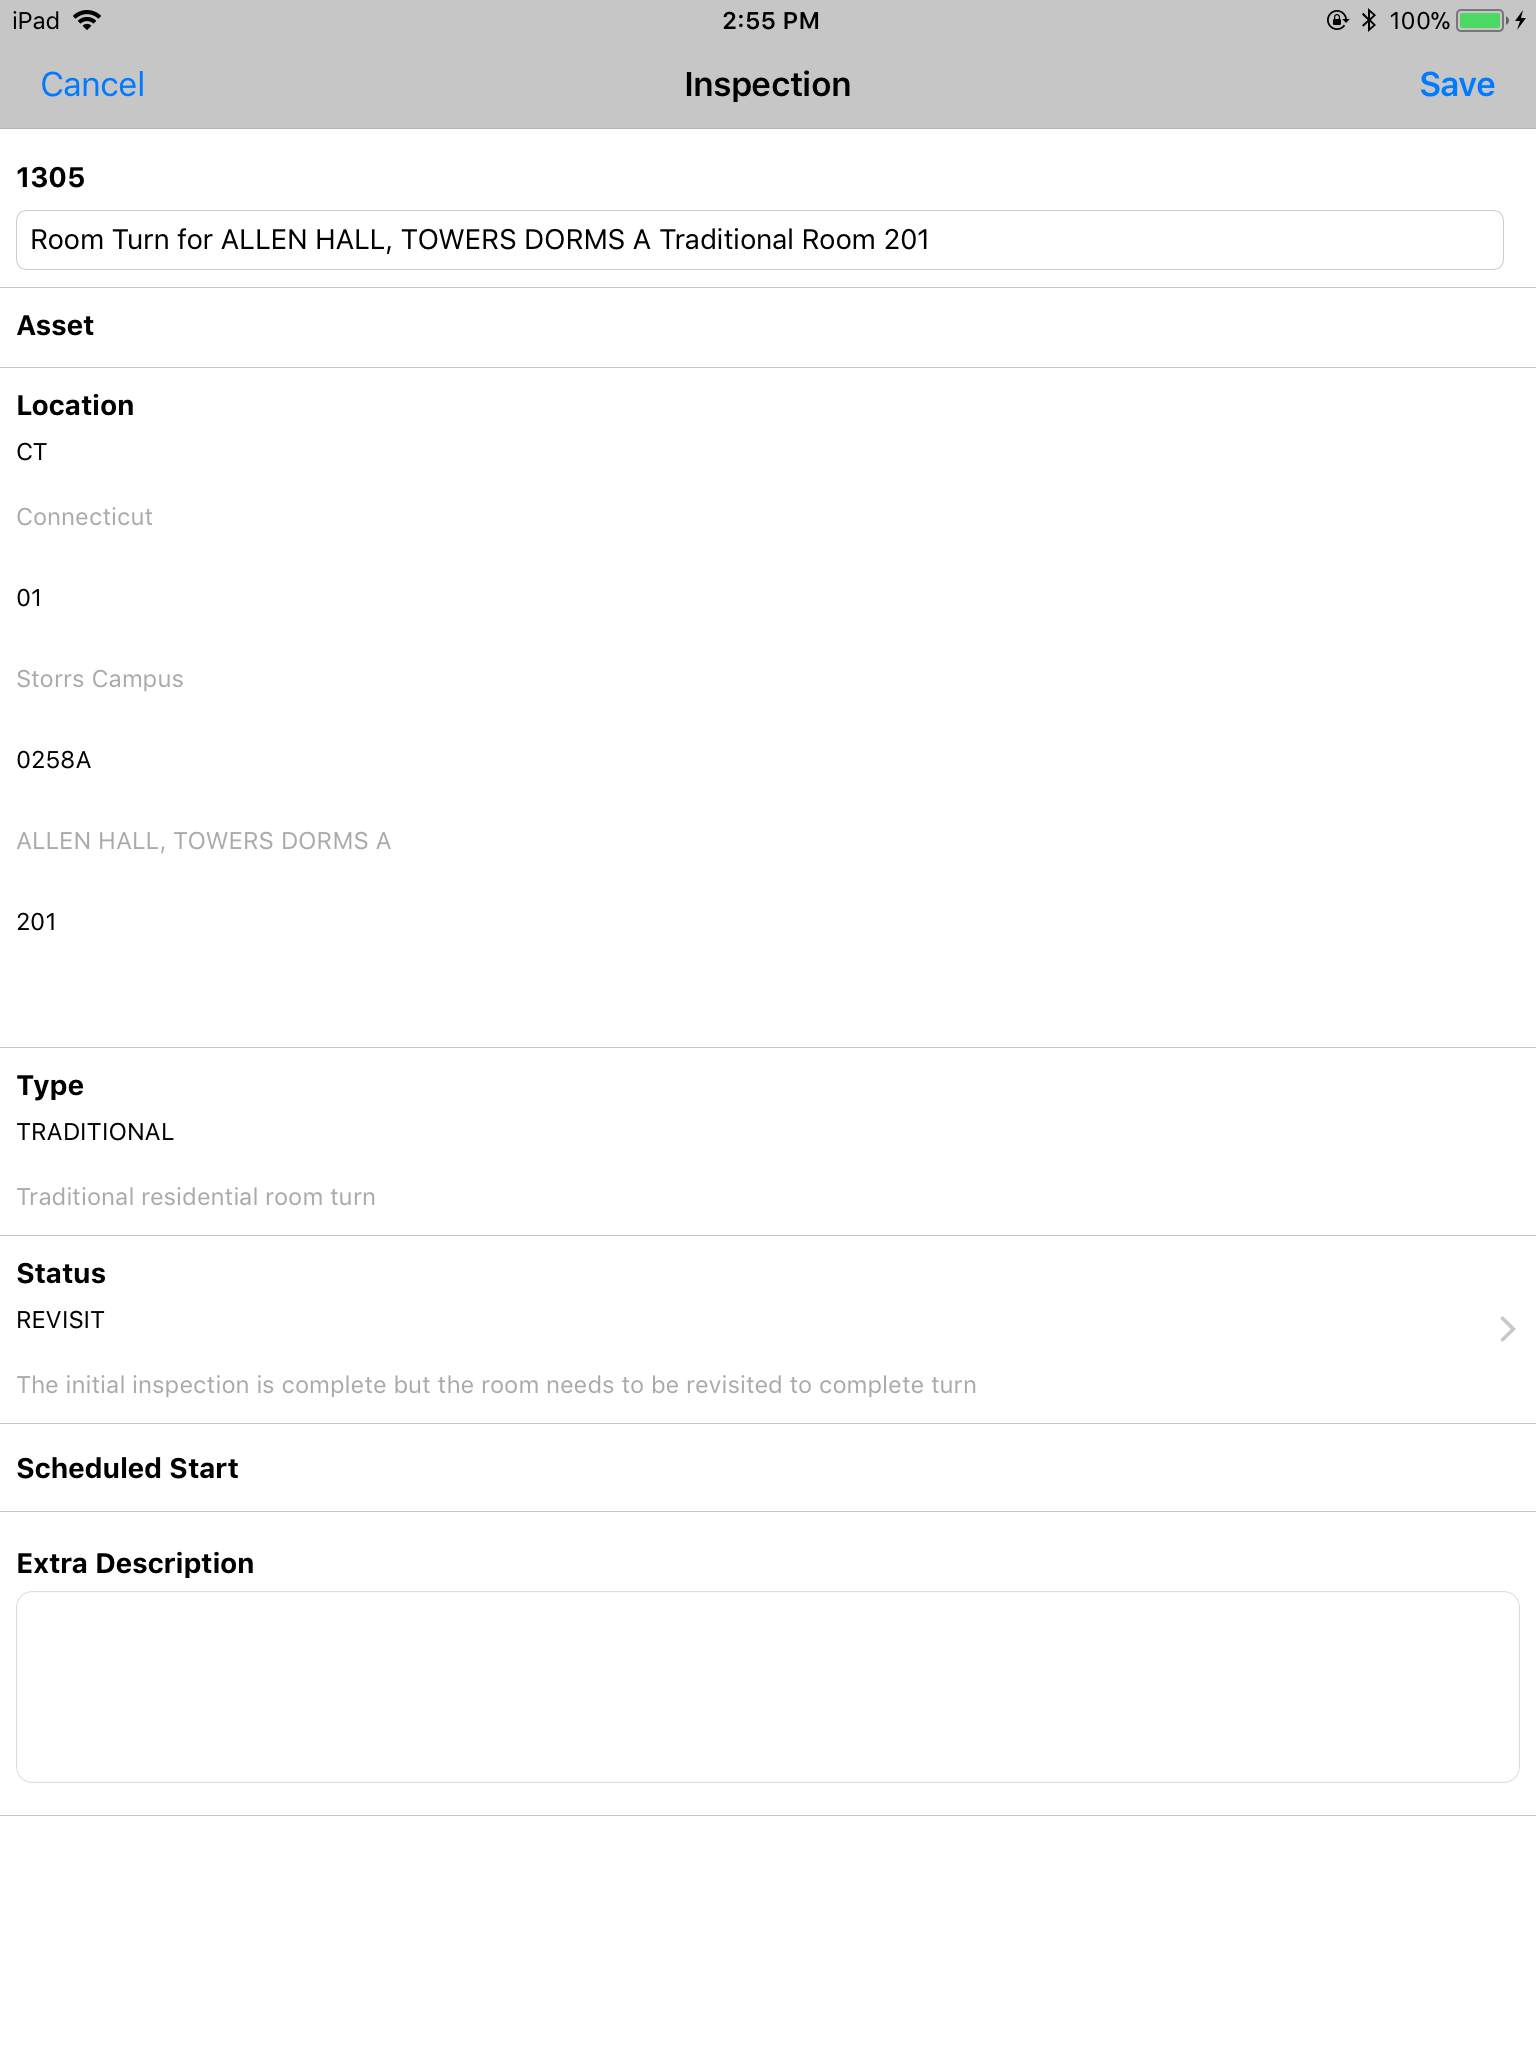 |
| In order to permanently save the updates and return to the Inspection list, click the Done link in the upper right corner. |  |
| Because the status change was to REVISIT the inspection will remain in the inspection list with the word REVISIT prefixing the description (Inspection 1305 on the iPad shown here) | 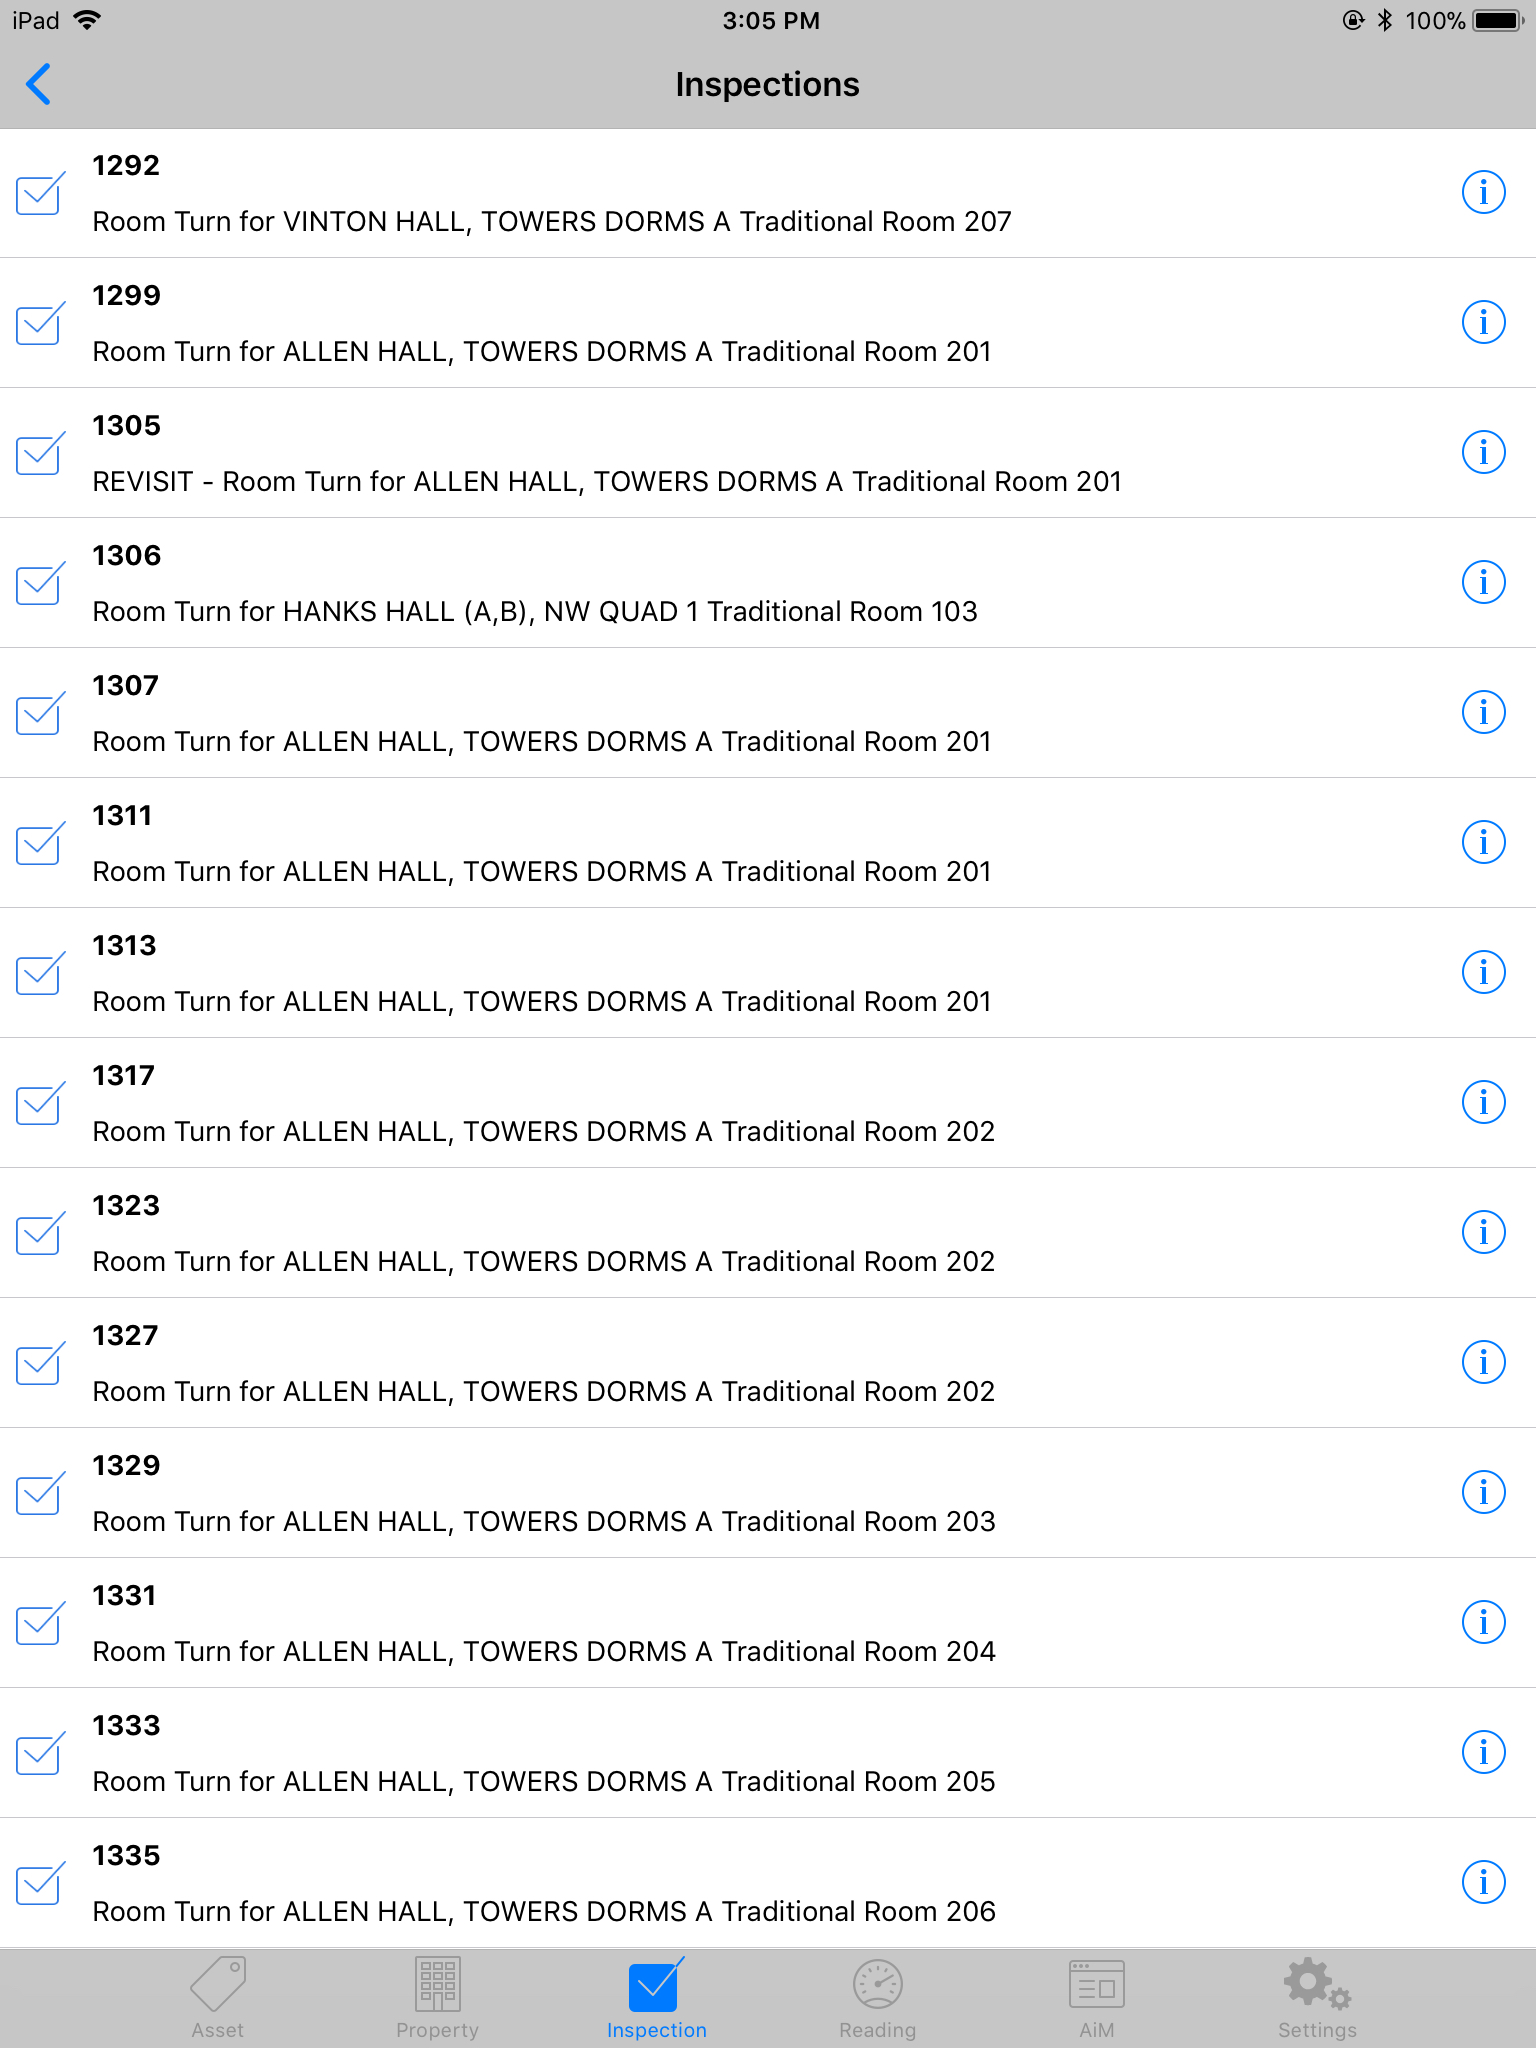 |
How to find the work that needs to be done in a room after the initial inspection
There are two ways to find the work that needs to be done in a room after the initial inspection
| Search for the word REVIST on the Inspection List | |
| In the Search Box just below the Inspections By Type title, type the word REVISIT, then click the blue Search button on the keyboard. | 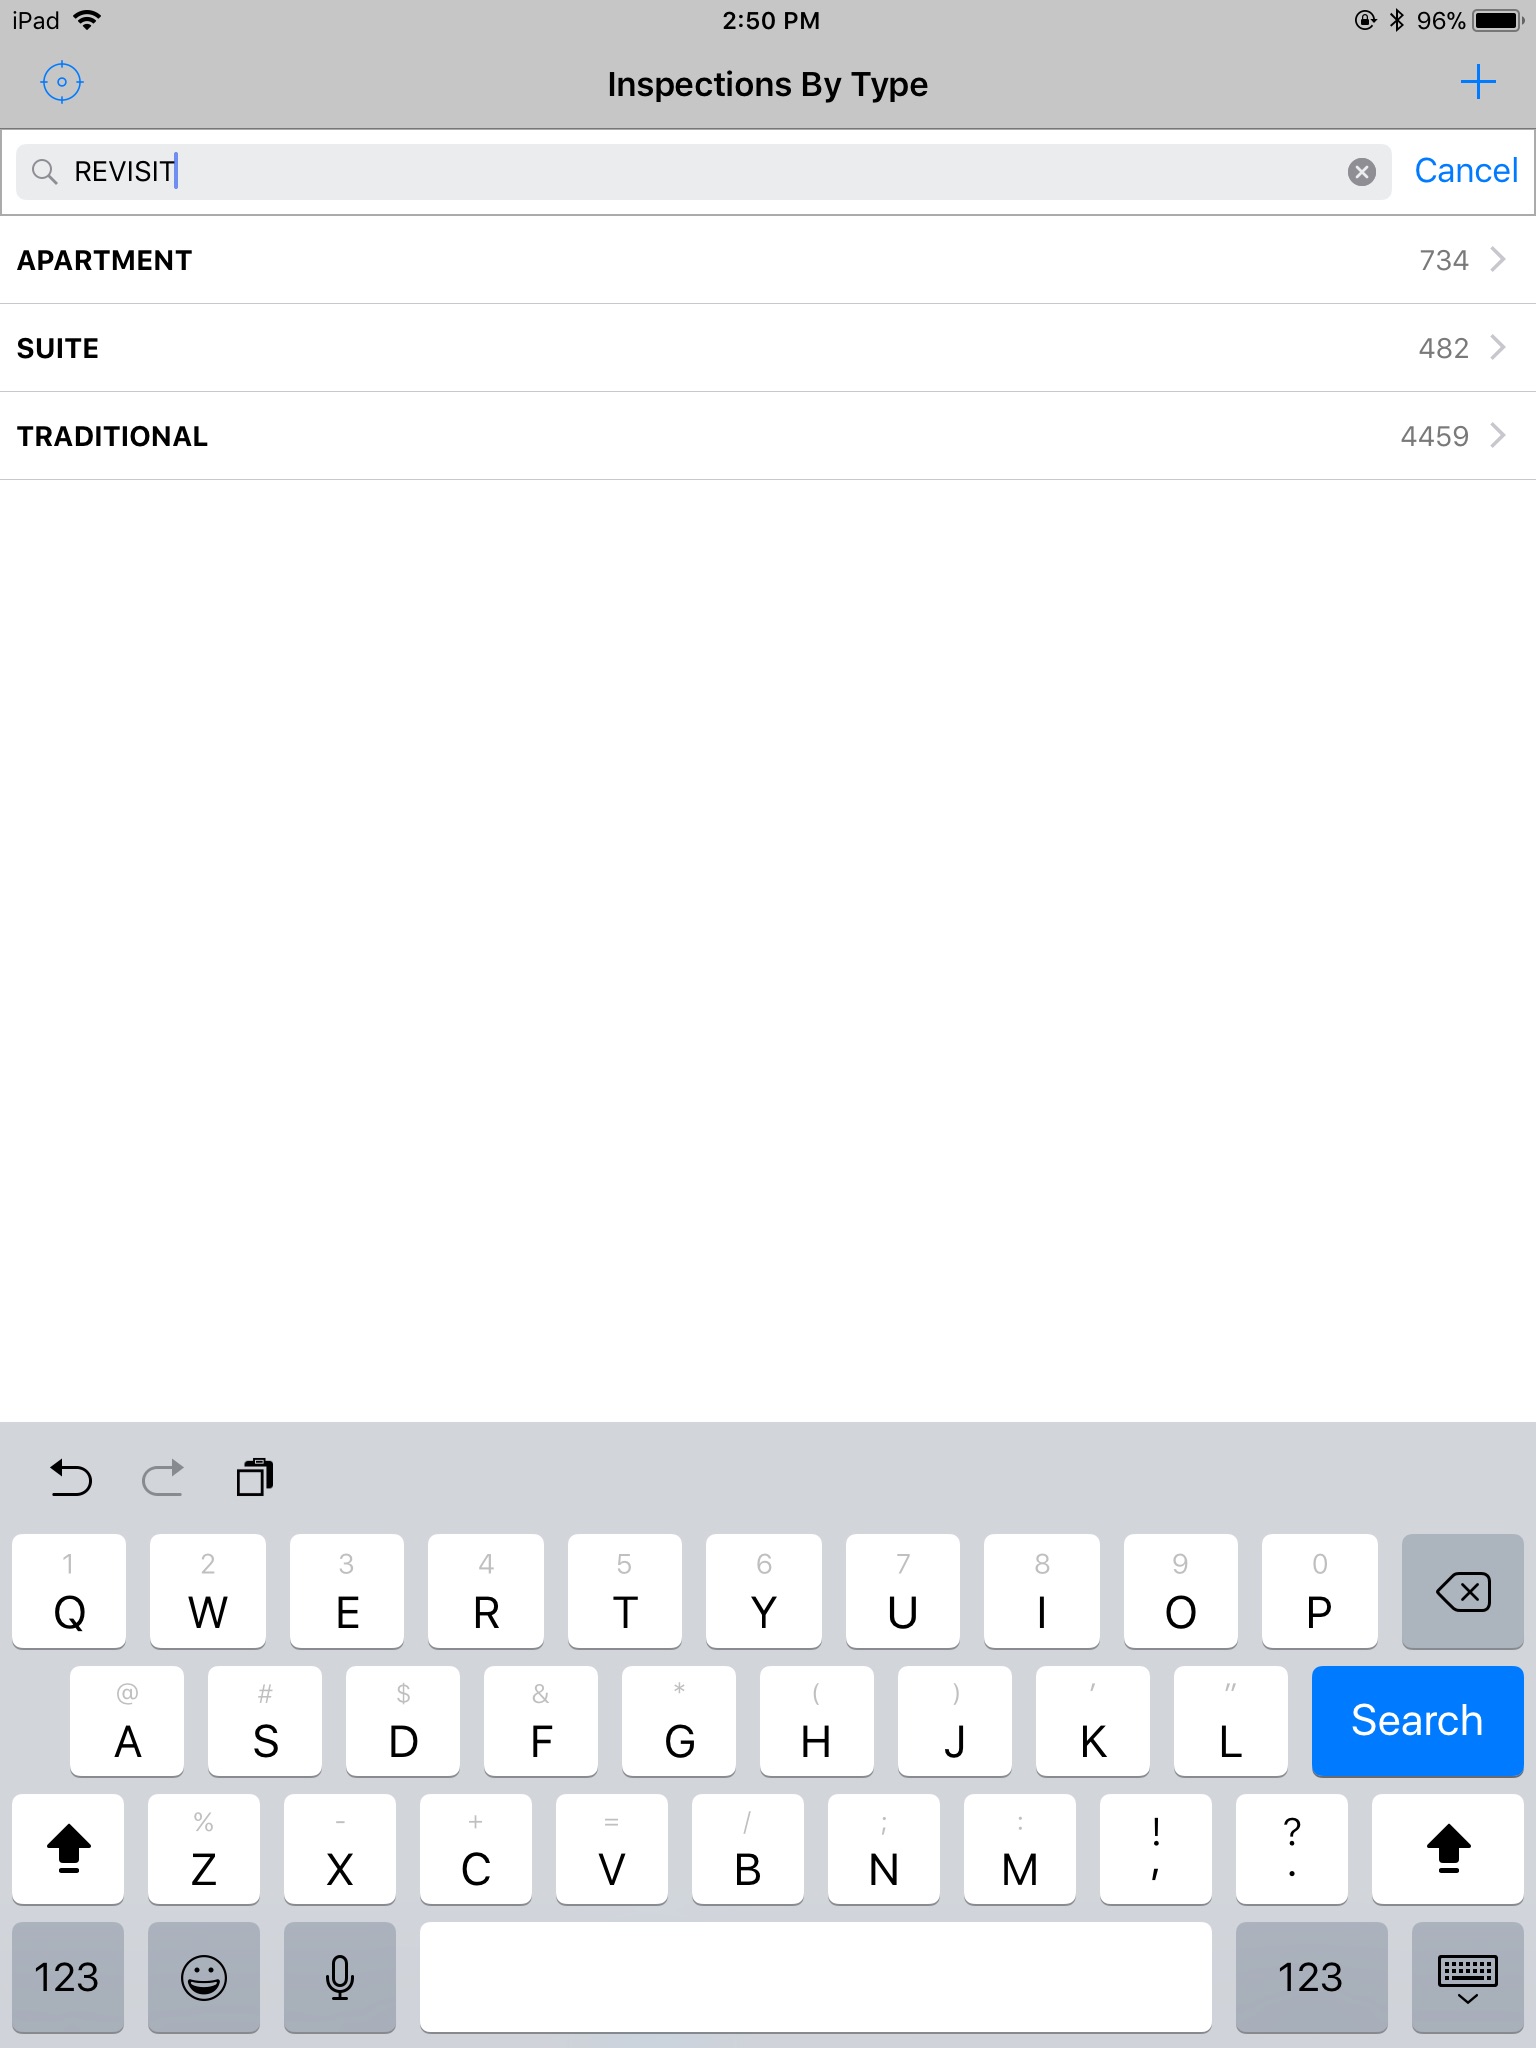 |
| The count of matching Inspections of each type marked for REVIST shows on the right end of the type line. Touch the arrow next to the number to access the list of inspections. | 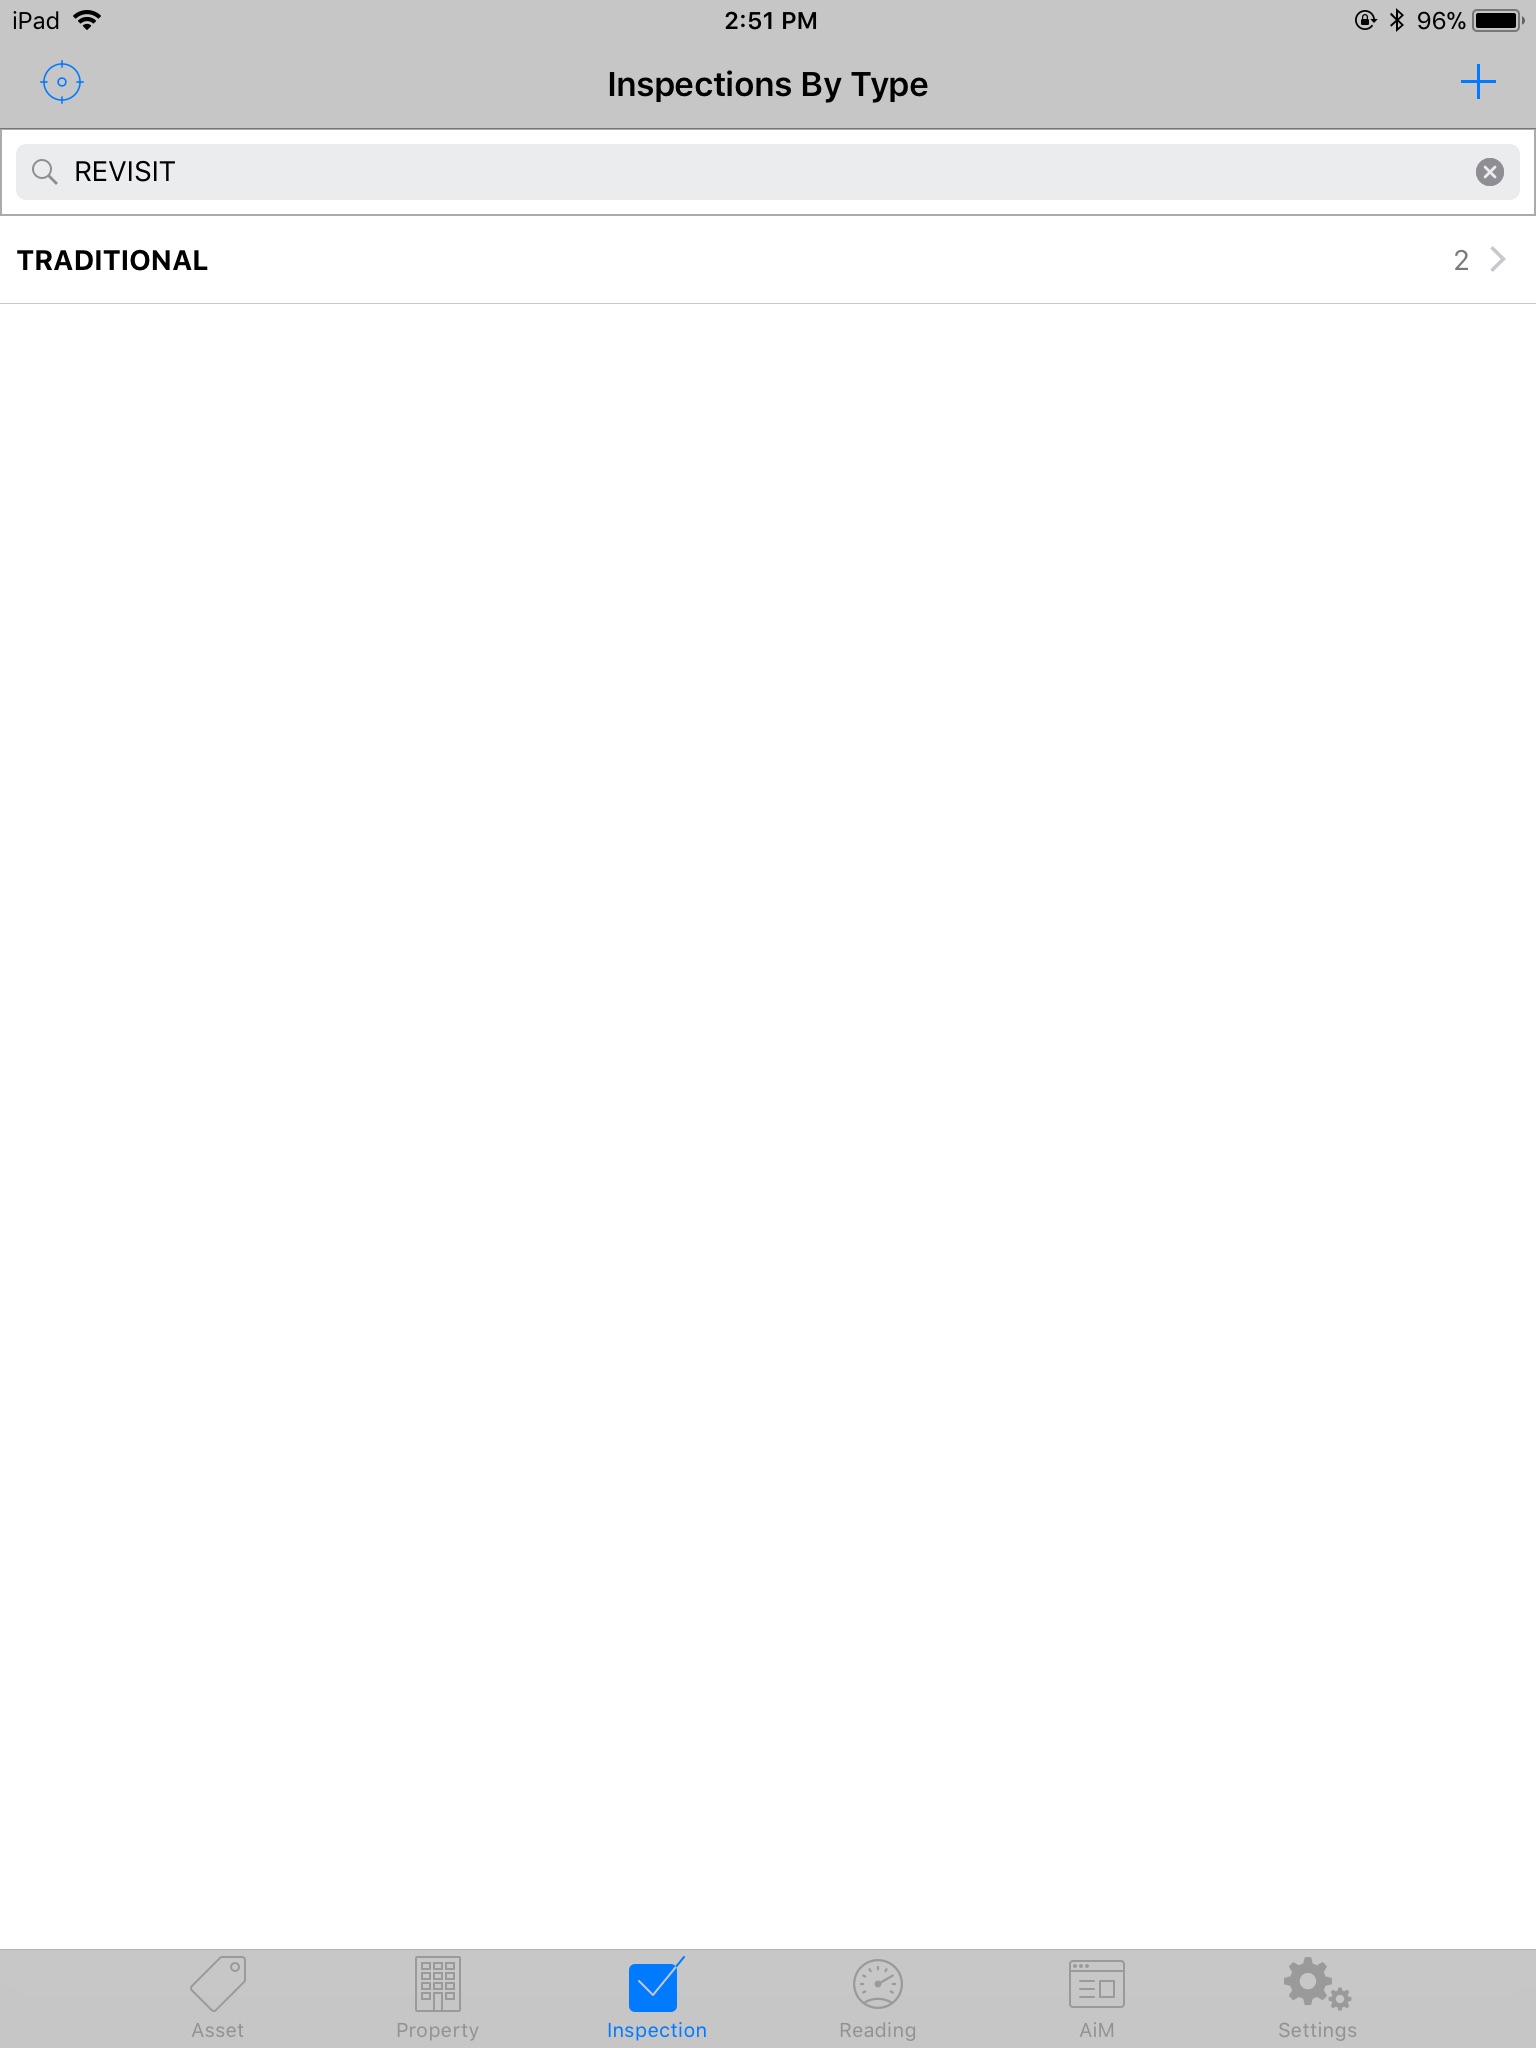 |
| Click on the execute inspection icon |
 |
| Use a reporting tool | |
How to create an inspection on-the-fly
To create an inspection on-the-fly, click the plus icon in the upper right corner of the header |
 |
| The system auto-assigns an inspection number (1447 in the example to the right) .Inspections need to be attached to either an Asset or a Location. Click the right arrow at the end of the Location line. |  |
| Click CT on the Region page | 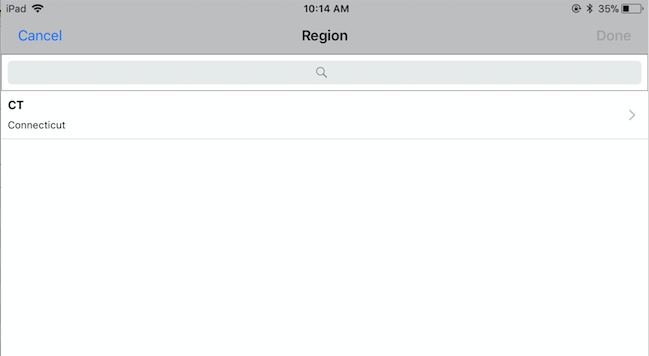 |
| After selecting CT on the Region page, select the proper campus on the Facility page | 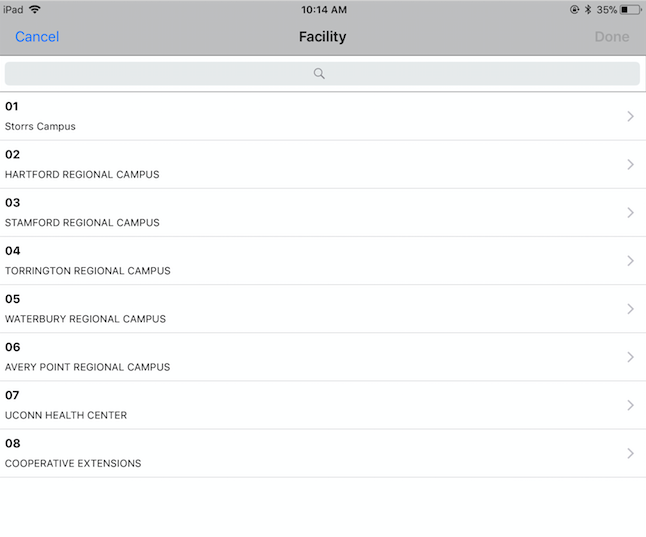 |
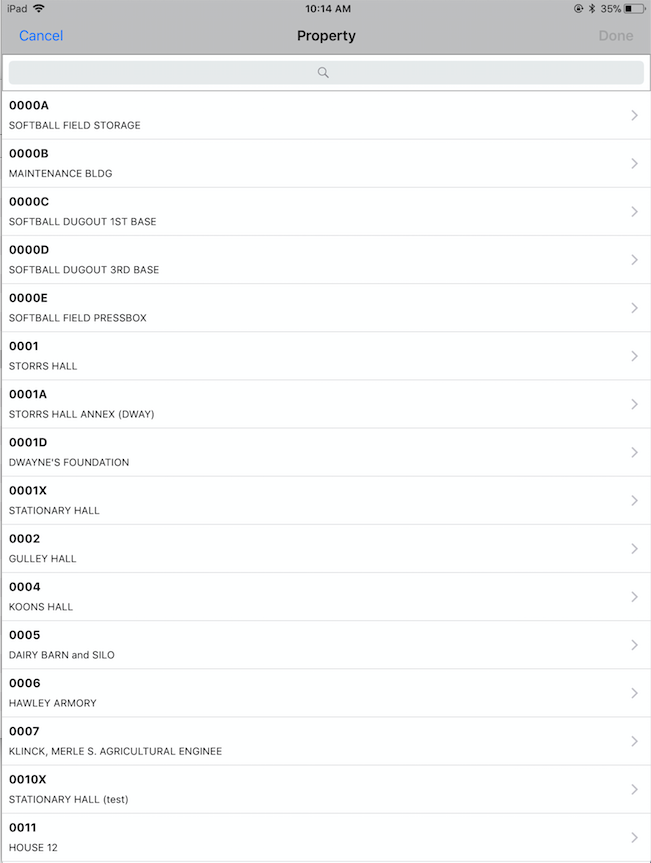
| The Property screen is next with the list of all UConn properties on the selected campus loading 20* rows at a time. To quickly select the building, type the building ID or description in the search box at the top of the screen and click the Search button.
(*The number of rows is a configurable setting for the Fire AM app) |
 |
| Select the Location/Room from the list | 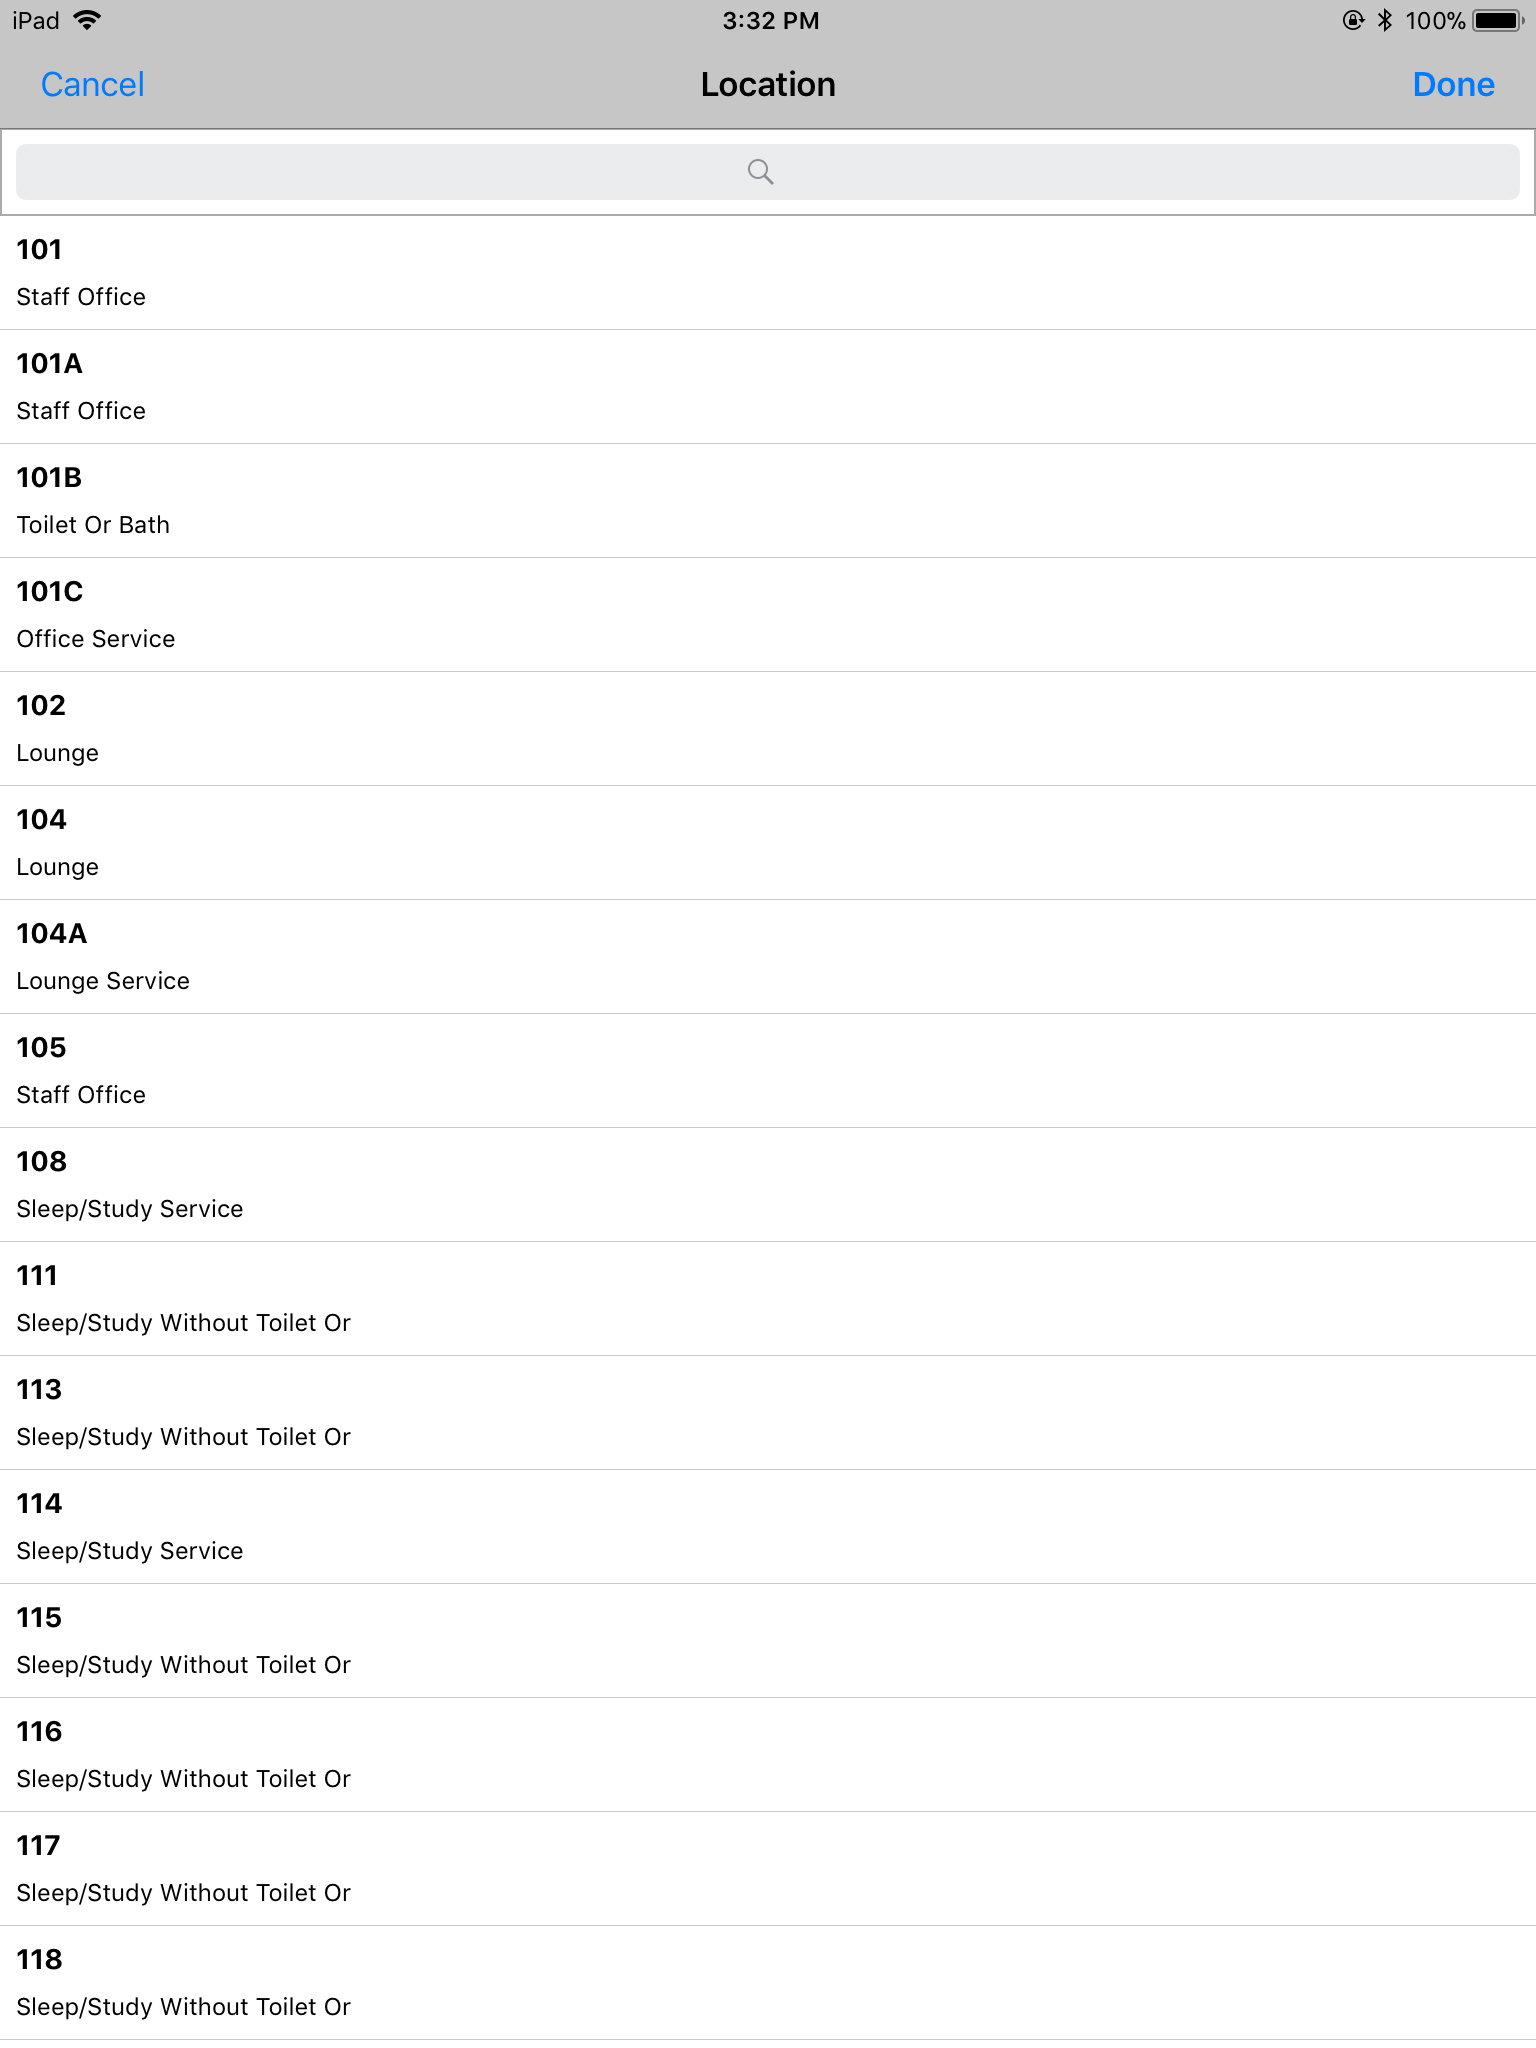 |
| Once the location of the inspection is specified down to the room level Fire Asset Manager returns to the Inspection definition page | 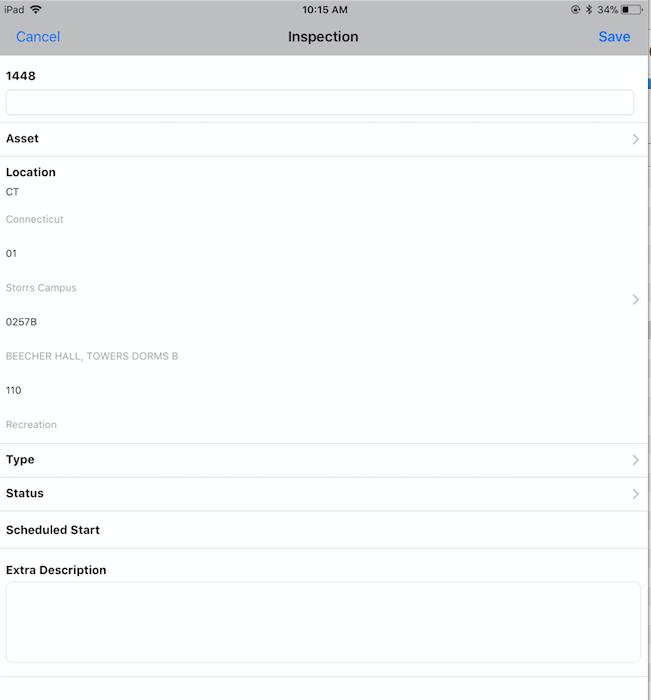 |
| Select the Inspection type that corresponds to the type of inspection about to be performed | 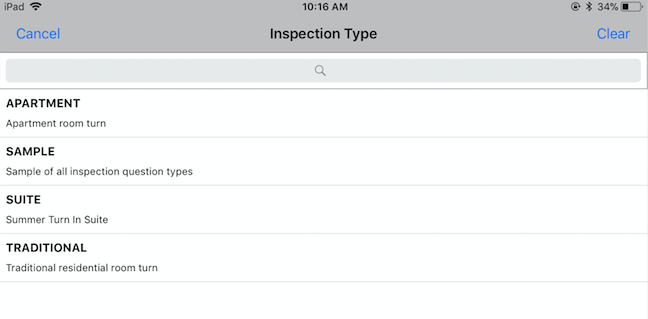 |
| When creating an inspection in Fire Asset Manager select CURRENT as the status | 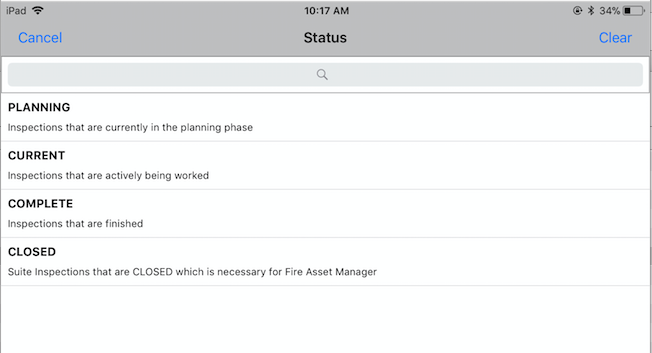 |
| When the location, type and status are filled in click the Save link in the upper right corner to save the inspection | 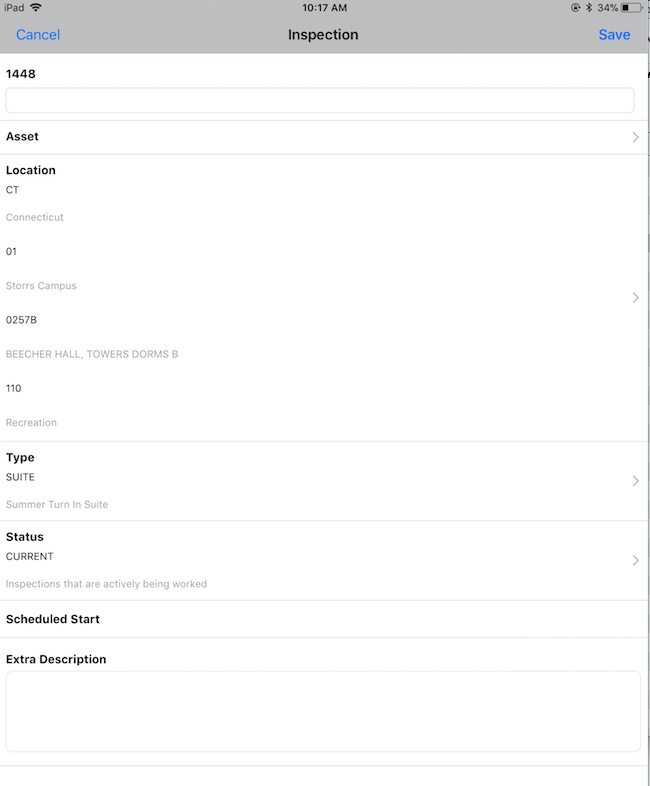 |
| Note that most UConn inspections have automatic naming that helps standardize the locating and reporting on inspections. (Room Turn for BEECHER HALL, TOWERS DORMS B Suite 110 in the example shown to the right) | 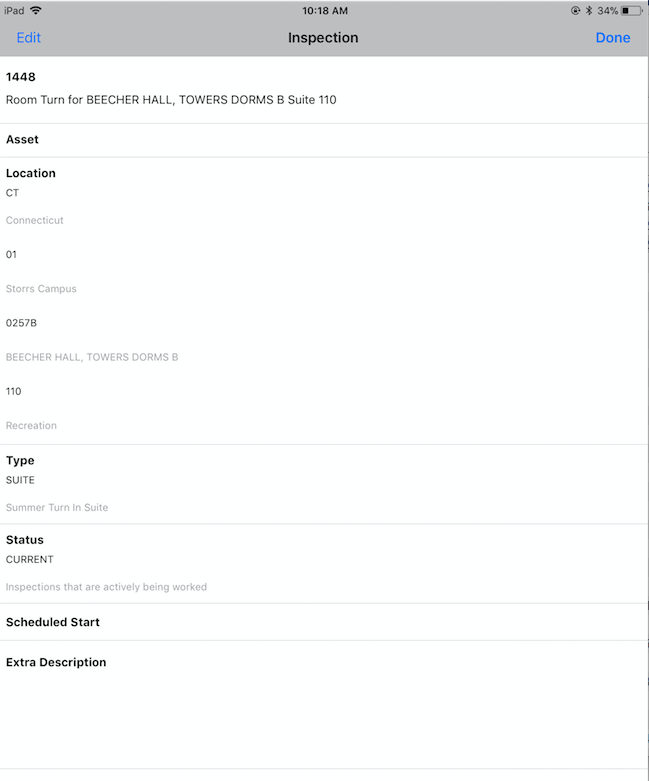 |
| After clicking Done, Fire AM returns to whichever section of the application the plus icon was clicked at the beginning of this process | 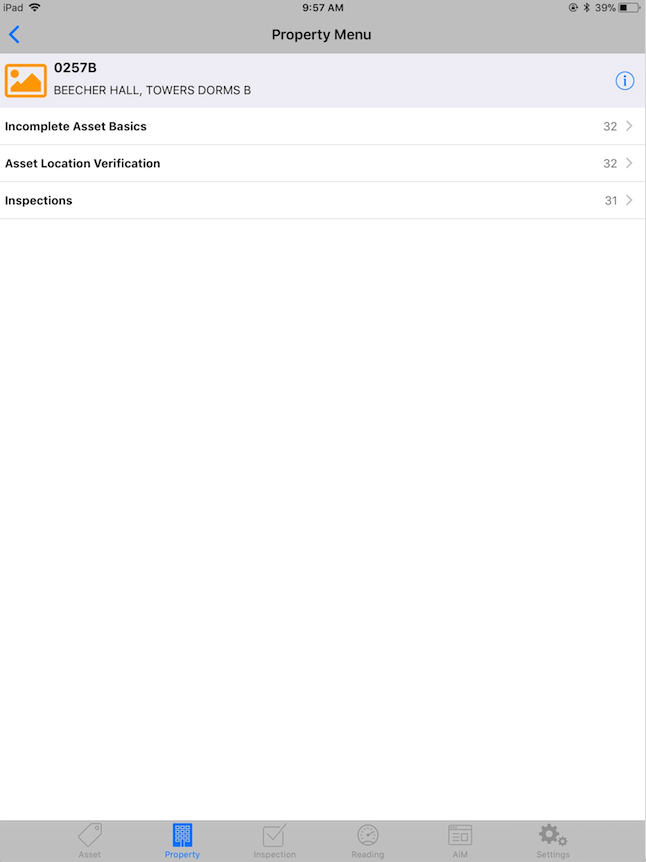 |
How to cancel an inspection that is of the wrong type or in the wrong place
| Inspection Statuses can be changed by locating the Inspection in the Inspection list and clicking the information link on the right end of the inspection line.
|
|
| The inspection information is shown on the right. Click the Edit link in the upper right corner to update. | |
| In this mode the description becomes editable and the Status field displays a right arrow a the end of the line. Click the right arrow to access the list of available statuses. | |
| Touch the line with the word CANCELED in bold text. | |
| Once the update has been made and confirmed back on the Inspection Information Screen select the Save link in the upper right corner. | 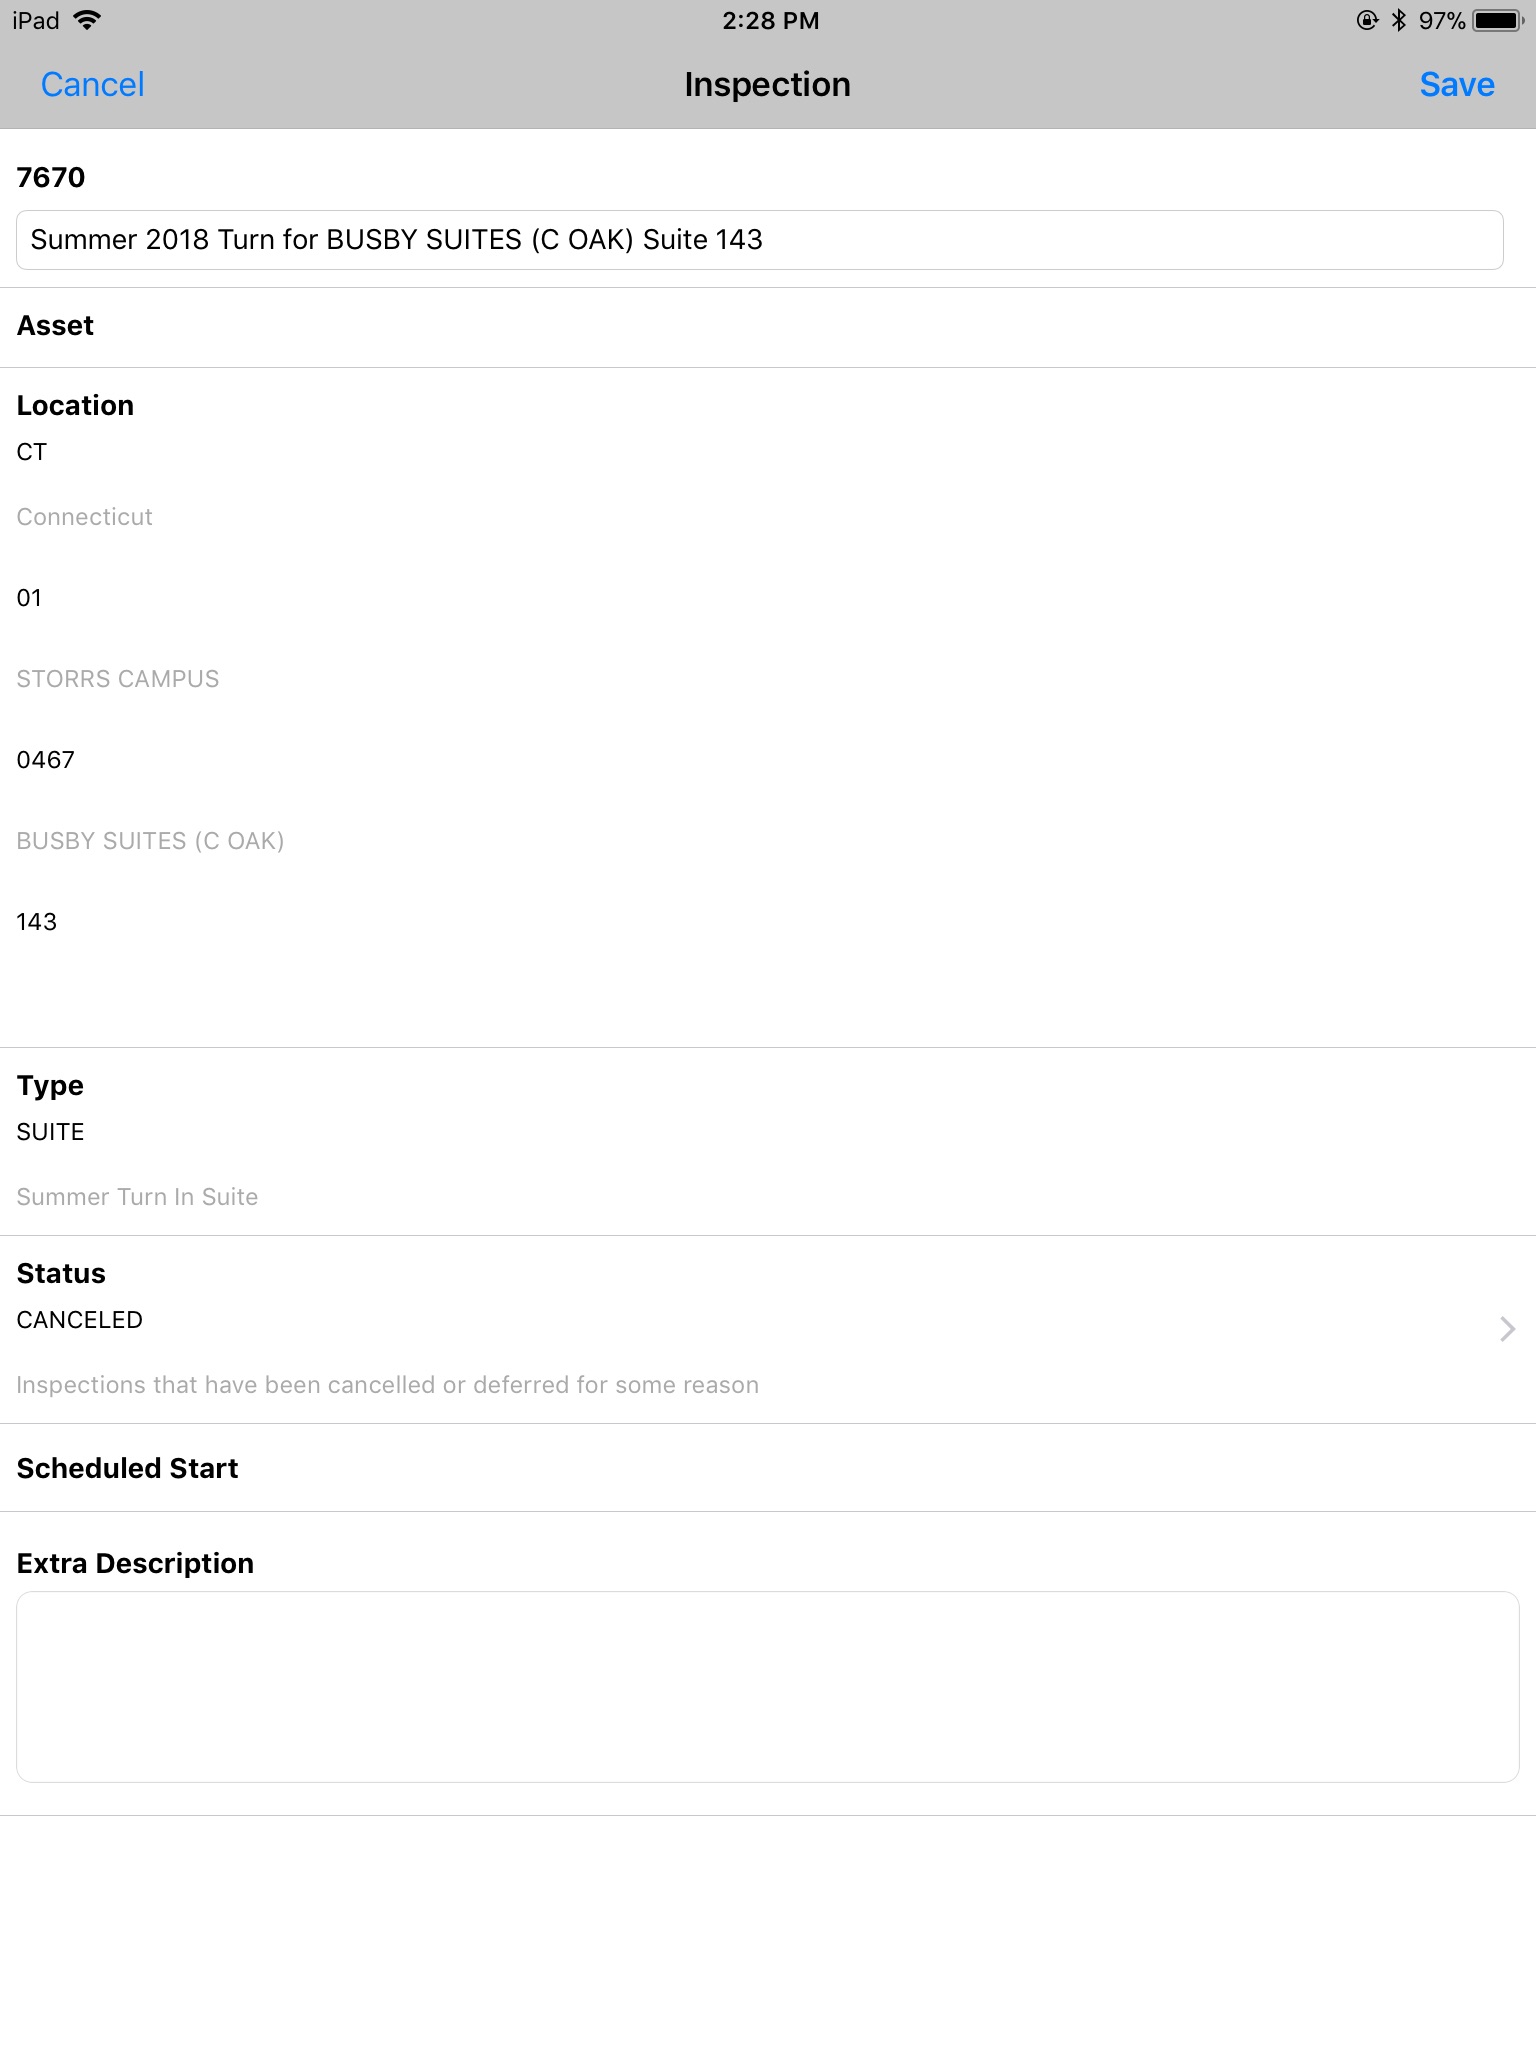 |
| In order to permanently save the updates and return to the Inspection list, click the Done link in the upper right corner. |  |
| Because the status change was to CANCELED the inspection is removed from the remaining list of inspections | |
How to refer work to a TRADES Shop
| The second to last Inspection step for every room turn in Refer to Trades (Line 16 in the inspection shown to the right) | 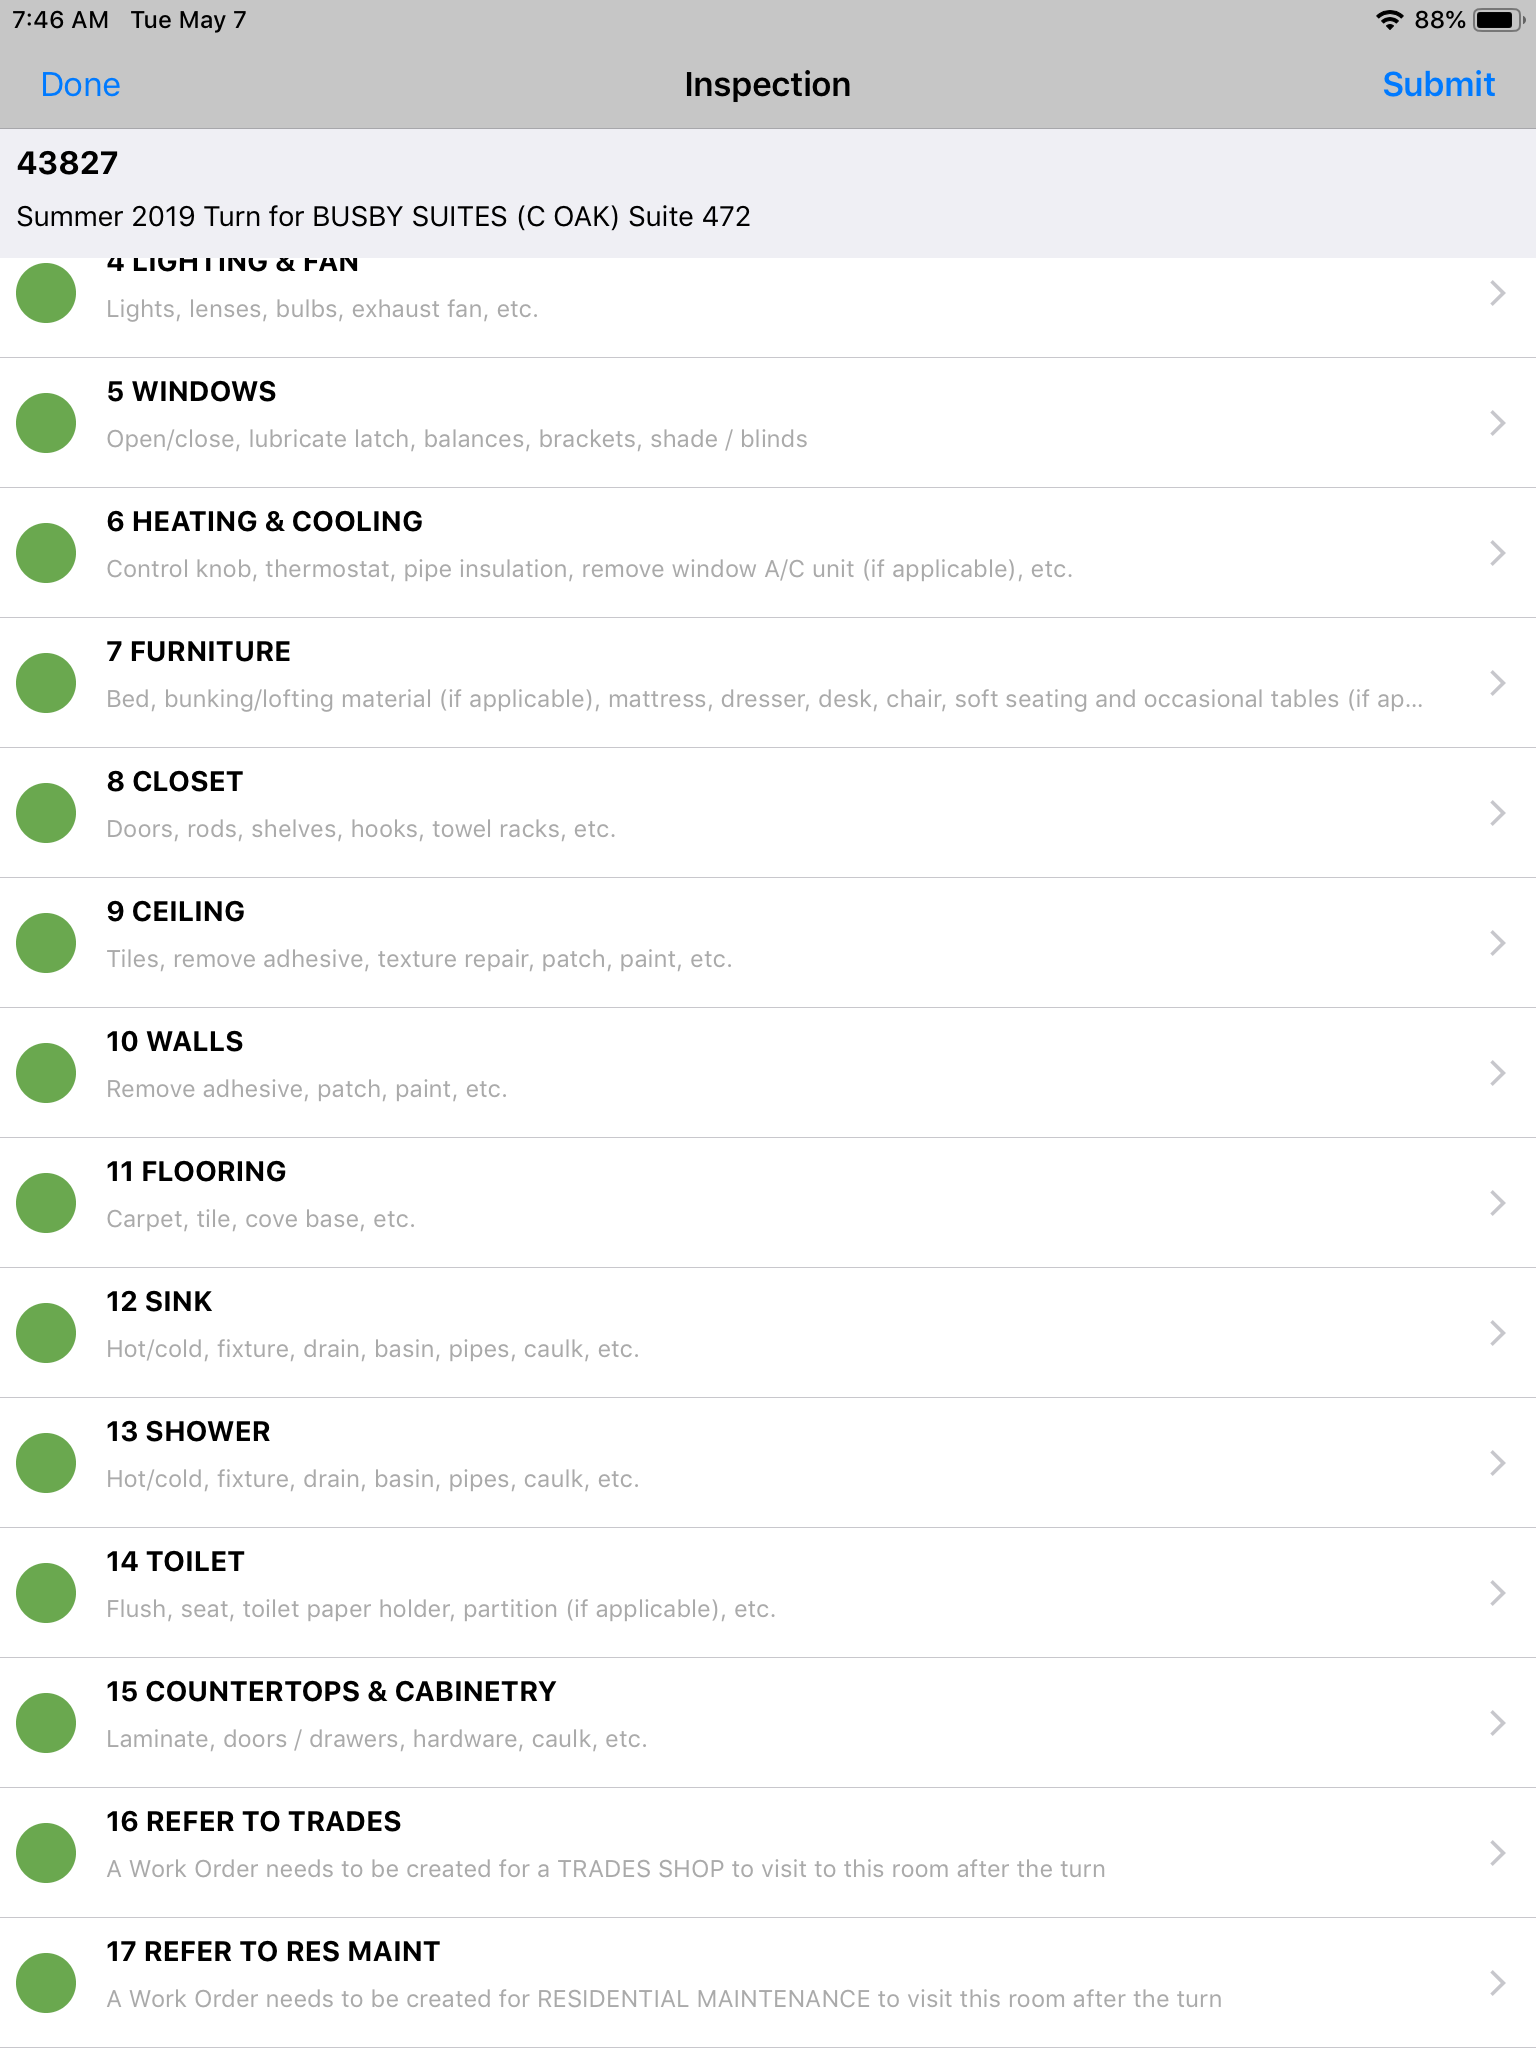 |
| Fail the Inspection Line following the instructions found in How to Fail and note the problem on an inspection item |  |
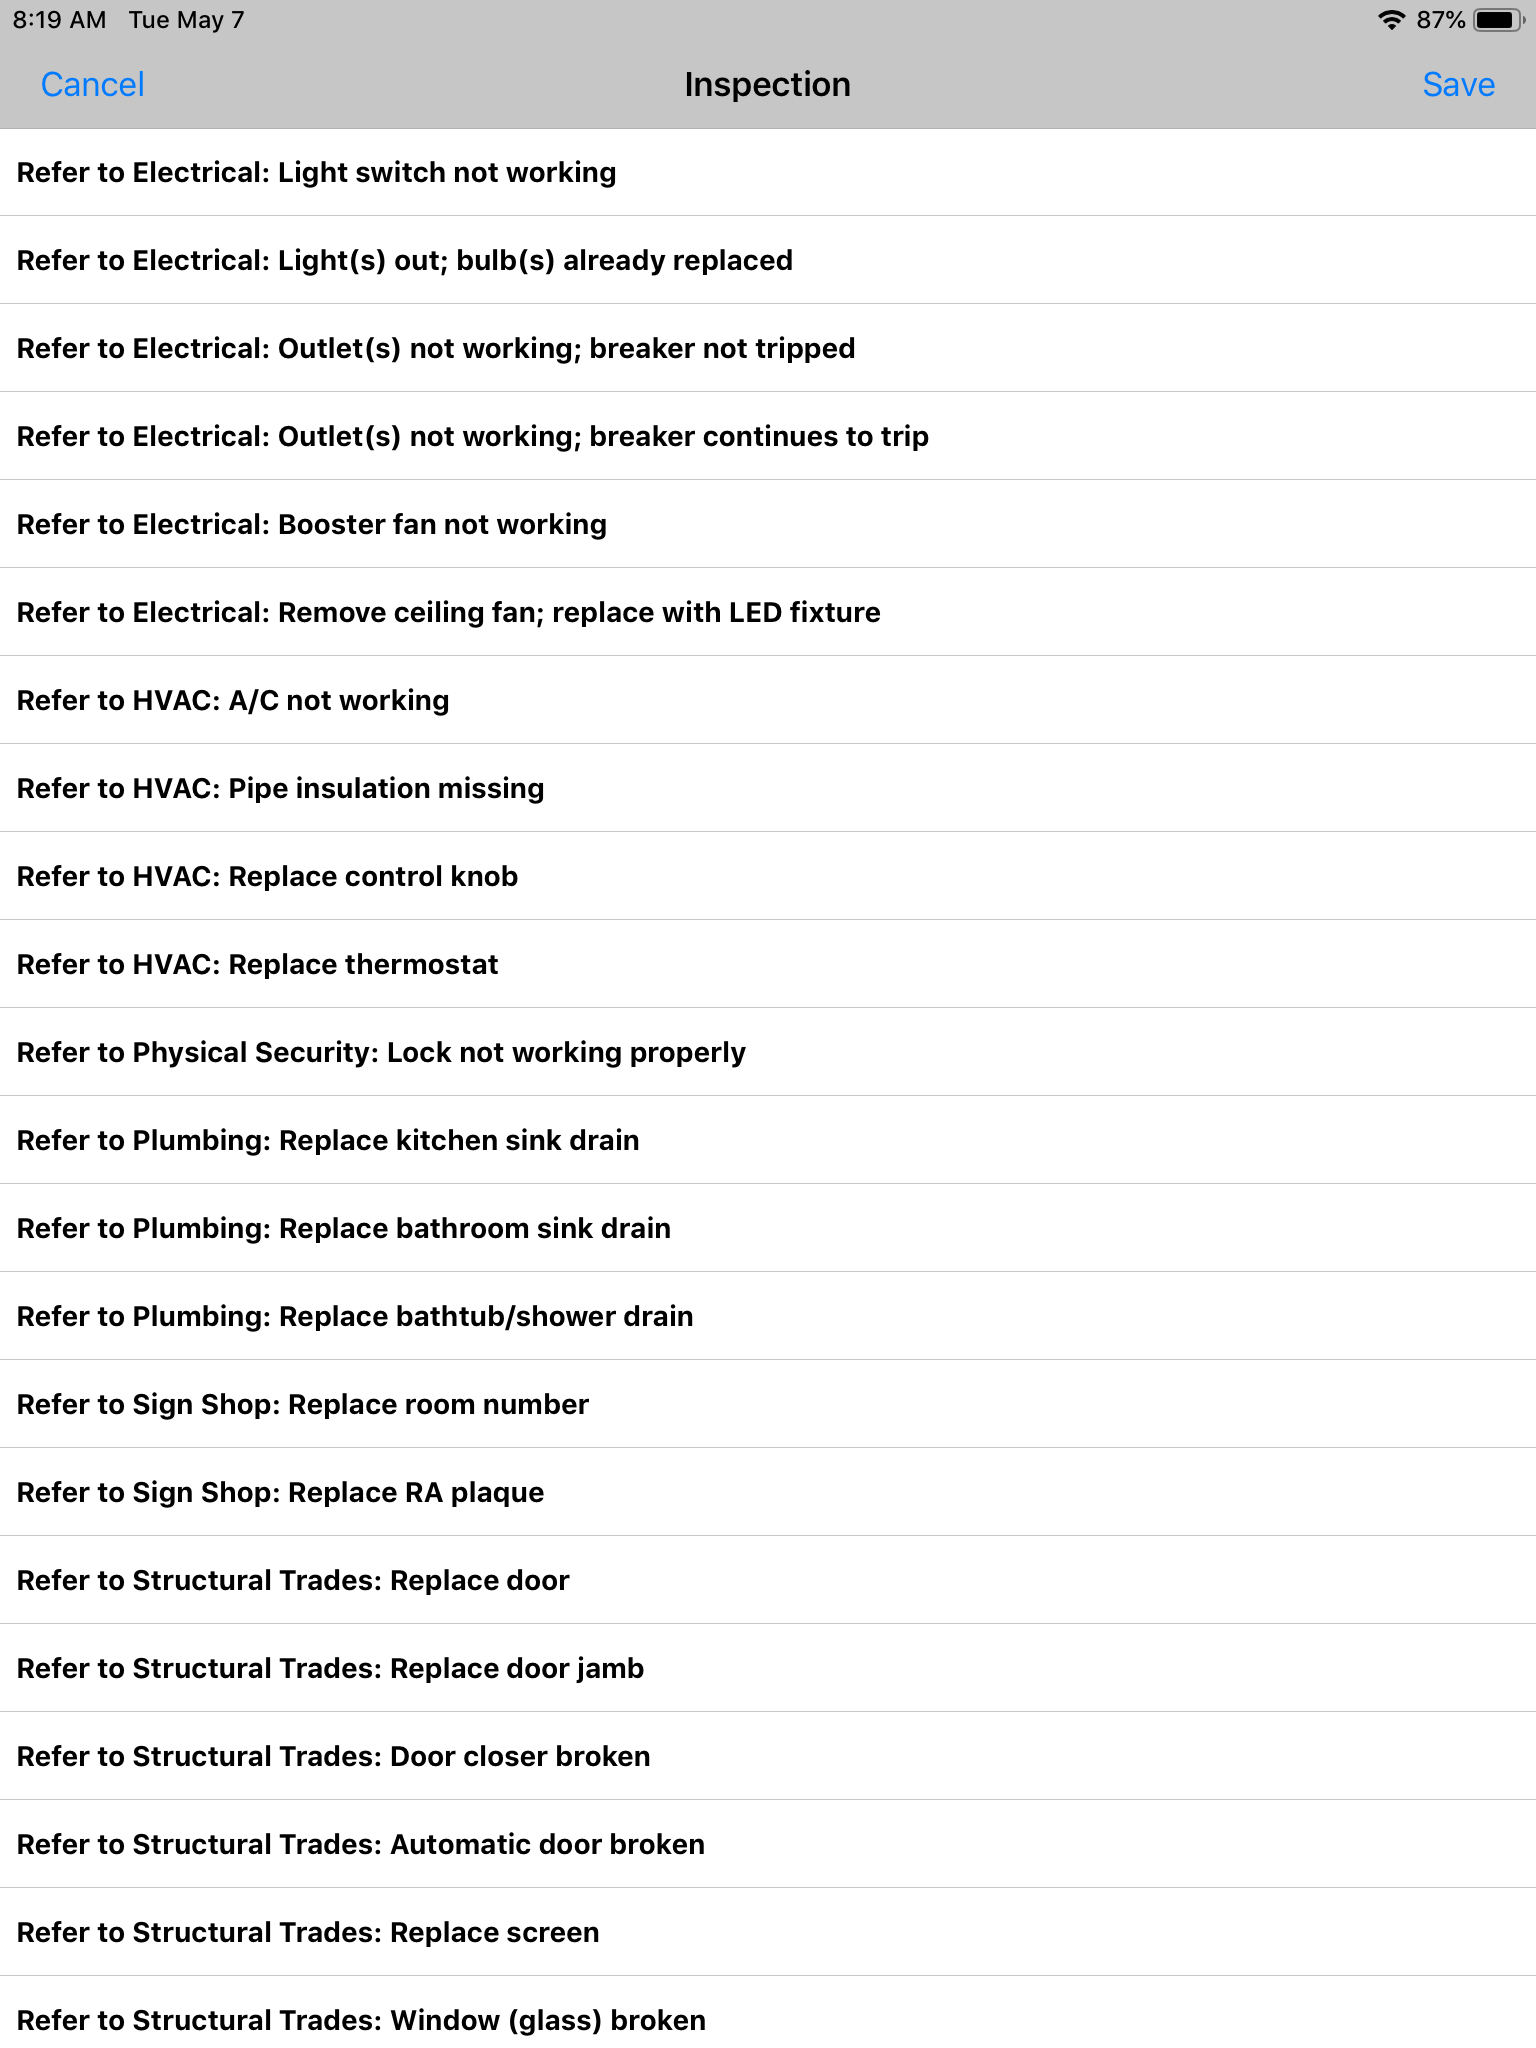
| The remedial actions available on this inspection step are intended to help the Operation’s center create a work order for a TRADES shop. Please be sure to put a check next to the line that corresponds to the shop and problem that is best suited to resolve the outstanding problems in the room.
A customer service request will be created for each line that has a check next to it. Any notes in the Value field of the Inspection line will be added to the customer service request |
 |
| The customer service request will be created as soon as the inspection is submitted. Please refer to How to Submit an Inspection when it is completed for details on this process |
How to refer work to Residential Maintenance
| The last Inspection step for every room turn in Refer to RESIDENTIAL MAINTENANCE (Line 17 in the inspection shown to the right) | |
| Fail the Inspection Line following the instructions found in How to Fail and note the problem on an inspection item | 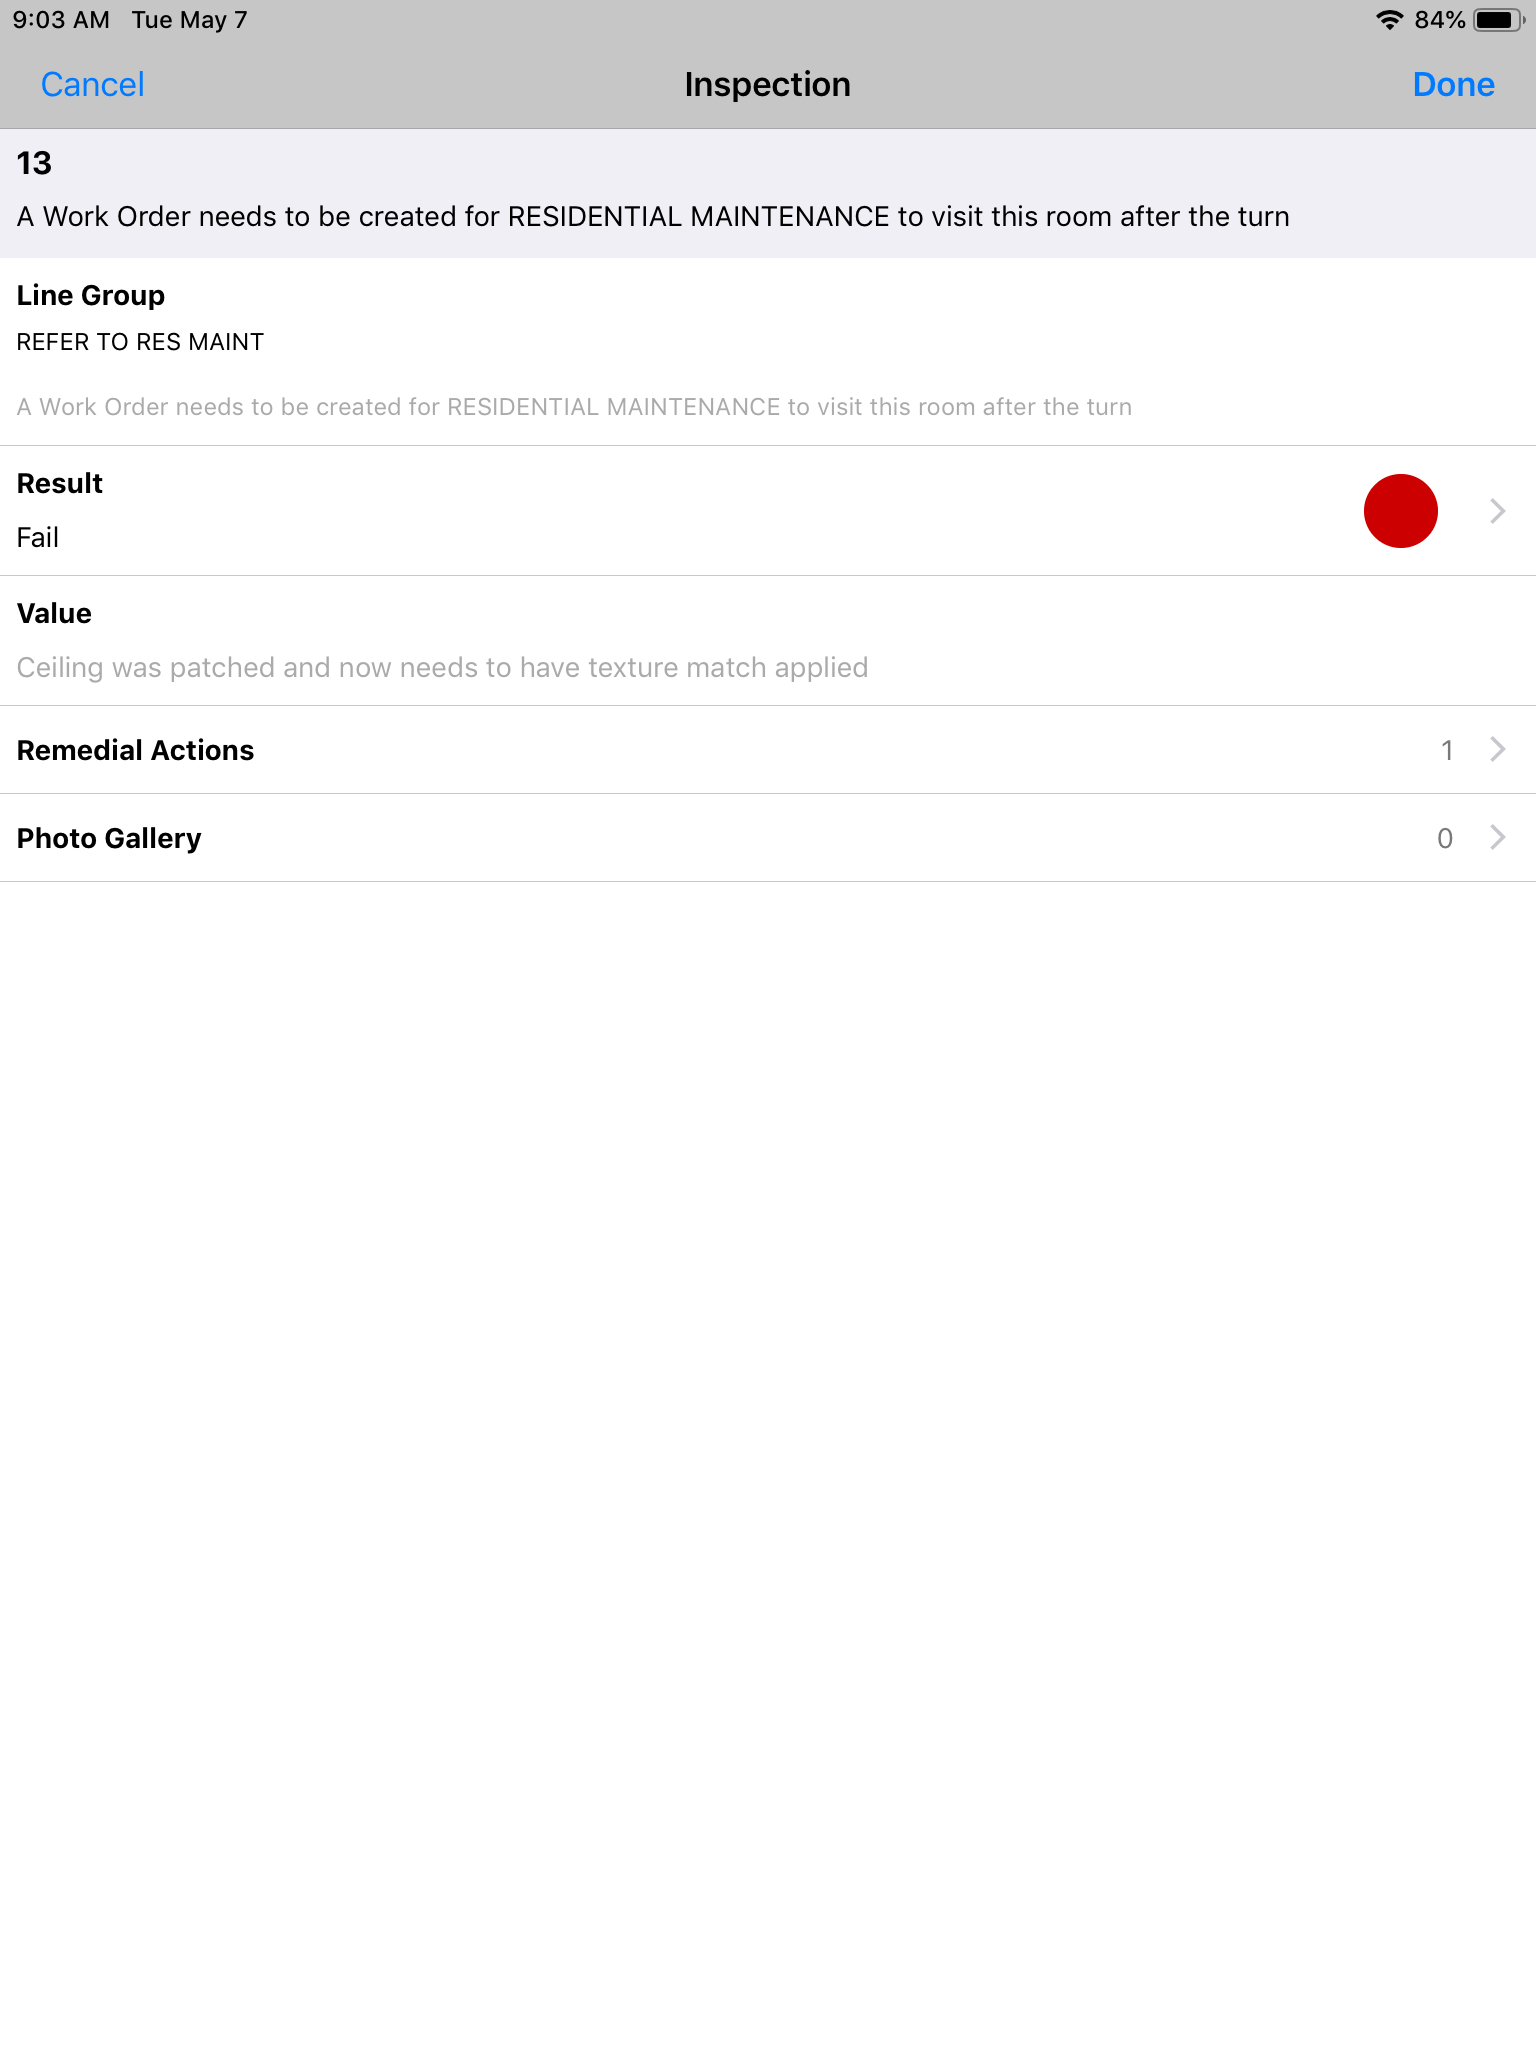 |
| The remedial actions available on this inspection step are intended to help the Operation’s center create a work order for the RESIDENTIAL MAINTENANCE shop. Please be sure to put a check next to the line that corresponds to the problem that is best suited to resolve the outstanding problems in the room.
A customer service request will be created for each line that has a check next to it. Any notes in the Value field of the Inspection line will be added to the customer service request |
 |
| The customer service request will be created as soon as the inspection is submitted. Please refer to How to Submit an Inspection when it is completed for details on this process |
Inspection Steps and Remedial Actions to Identify
| Question Group | Description of Inspection Step | Remedial Actions |
| SIGNS | Room number, RA plaque, etc. |
|
| DOORS | Lock, hinges, stop, striker plate, tighten screws, handle, closer, weather stripping, rubber silencer, peep hole, etc. |
|
| SWITCHES & PLATES | Light switches, plates, test outlets, jacks: cable, data, etc. |
|
| LIGHTING | Lights, lenses, bulbs, etc. |
|
| WINDOWS | Open/close, lubricate, latch, balances, brackets, shade / blinds |
|
| HEATING & COOLING | Control knob, thermostat, pipe insulation, remove window A/C unit (if applicable), etc. |
|
| FURNITURE | Bed, bunking/lofting material (if applicable), mattress, dresser, desk, chair, soft seating, occasional tables, dining room table and chairs, etc. |
|
| CLOSET | Doors, rods, shelves, hooks, towel racks, etc. |
|
| CEILING | Tiles, remove adhesive, texture repair, patch, paint, etc. |
|
| WALLS | Remove adhesive, patch, paint, etc. |
|
| FLOORING | Carpet, tile, cove base, etc. |
|
| SINK (Suites & Apartments Only) | Hot/cold, fixture, drain, basin, pipes, caulk, etc. |
|
| SHOWER (Suites & Apartments Only) | Hot/cold, fixture, drain, basin, pipes, caulk, etc. |
|
| TOILET (Suites & Apartments Only) | Flush, seat, toilet paper holder, partition (if applicable), etc. |
|
| COUNTERTOPS & CABINETRY (Suites & Apartments Only) | Laminate, doors / drawers, hardware, caulk, etc. |
|
| APPLIANCES (Apartments Only) | Dishwasher, garbage disposal, microwave, refrigerator, stove, washer, dryer, etc. |
|
Return to Job Aids Page